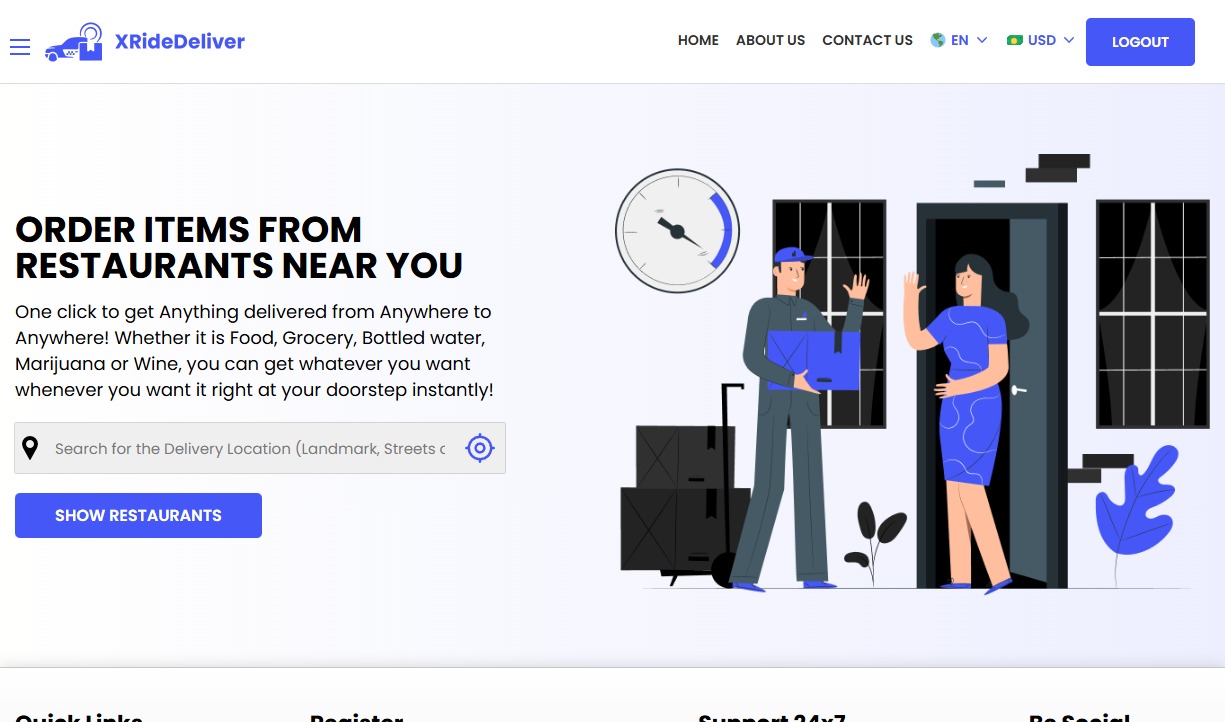
Your InDrive Clone comes with fully-fledged website which is more than a digital brochure. It acts as an active booking platform where book taxi rides, food deliveries, manage profile, view transactions, view earnings and more. It comes with customizable page setting, where you can update about us, contact us, FAQs and so on. Take a glimpse of the stellar website interface.
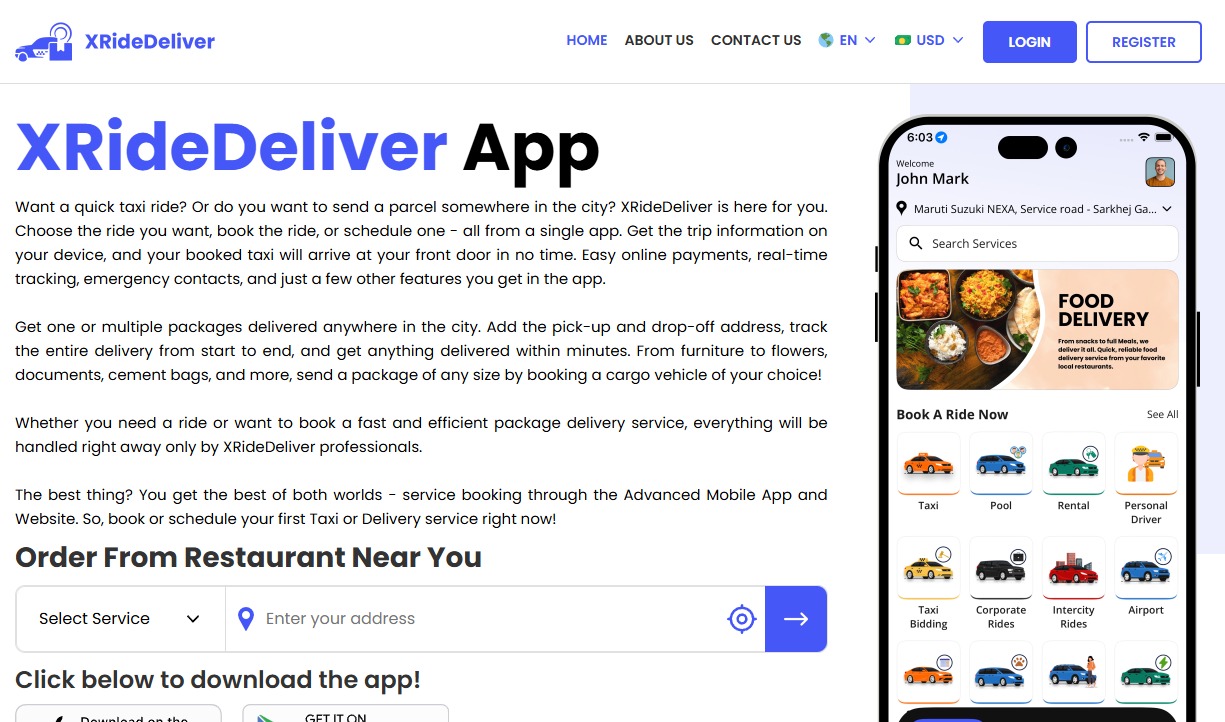
Attractive Home page where in you can browse through all the Services.
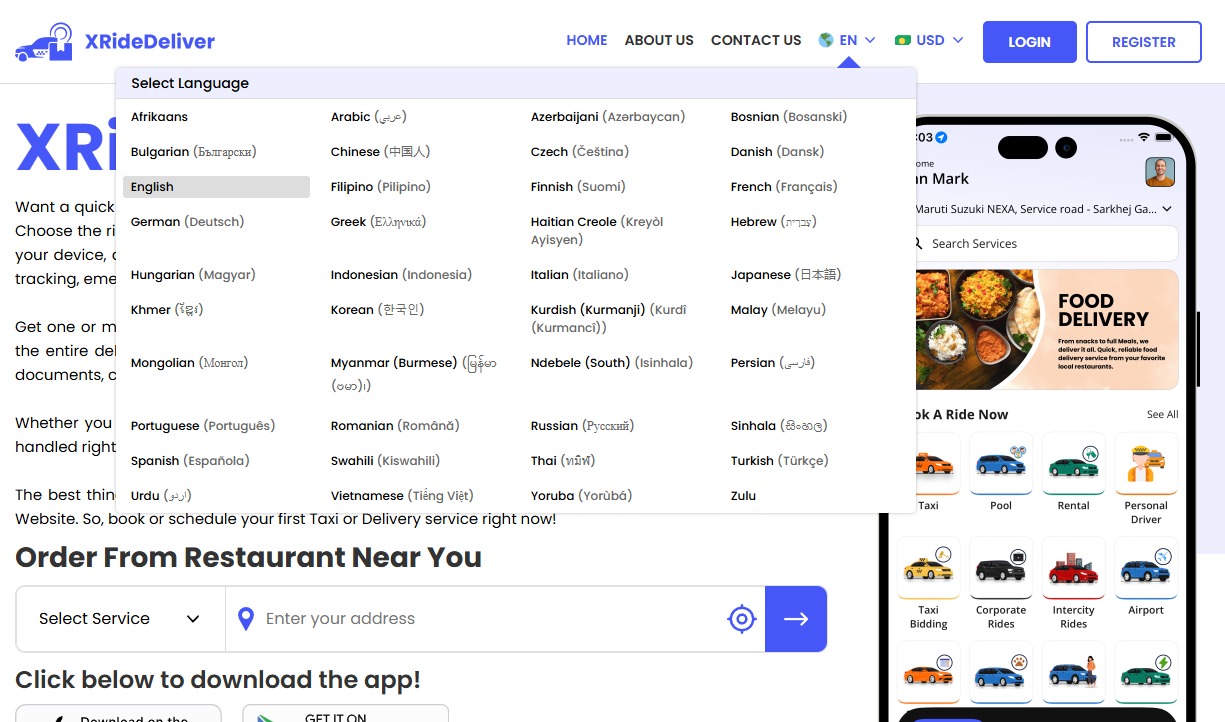
We will set the languages you choose in Apps and Website.
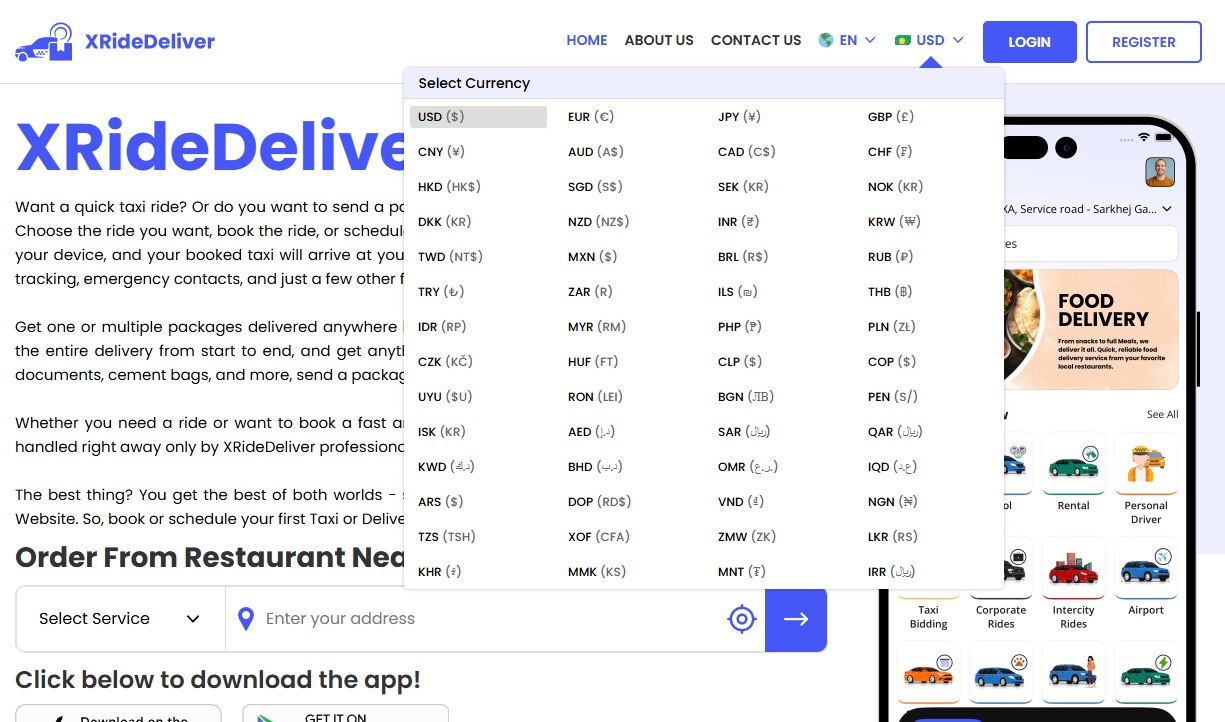
We will set the Currencies you choose in Apps and Website.
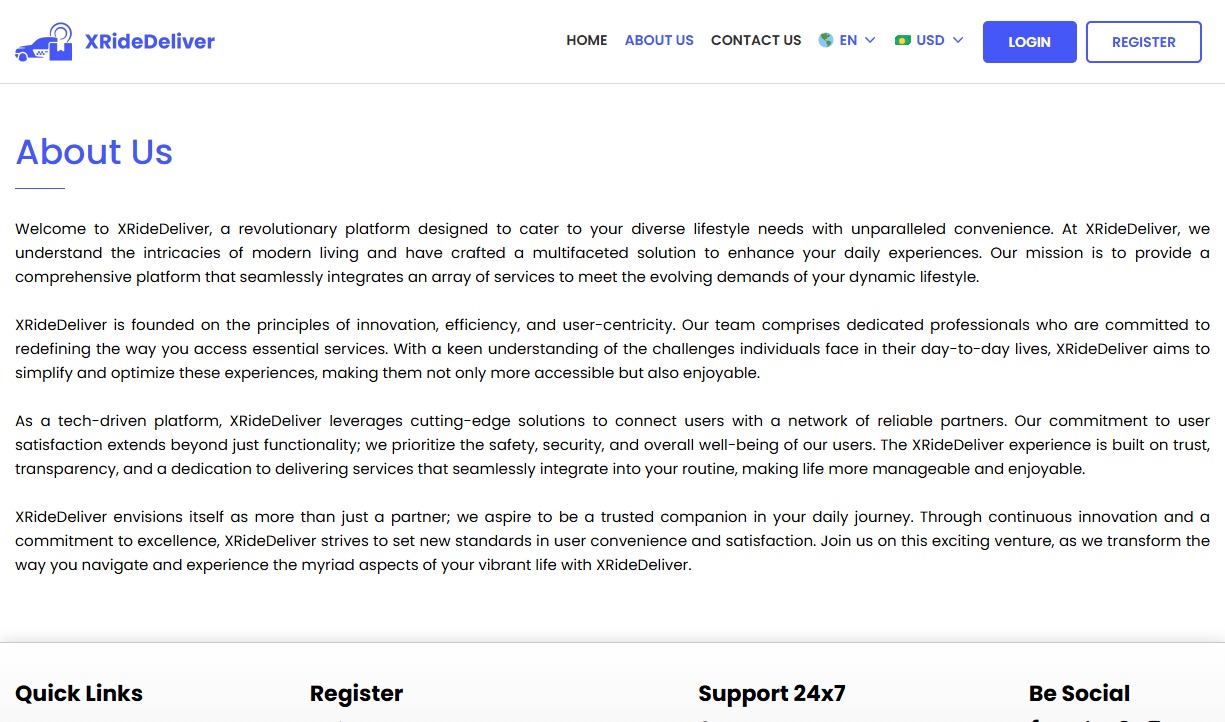
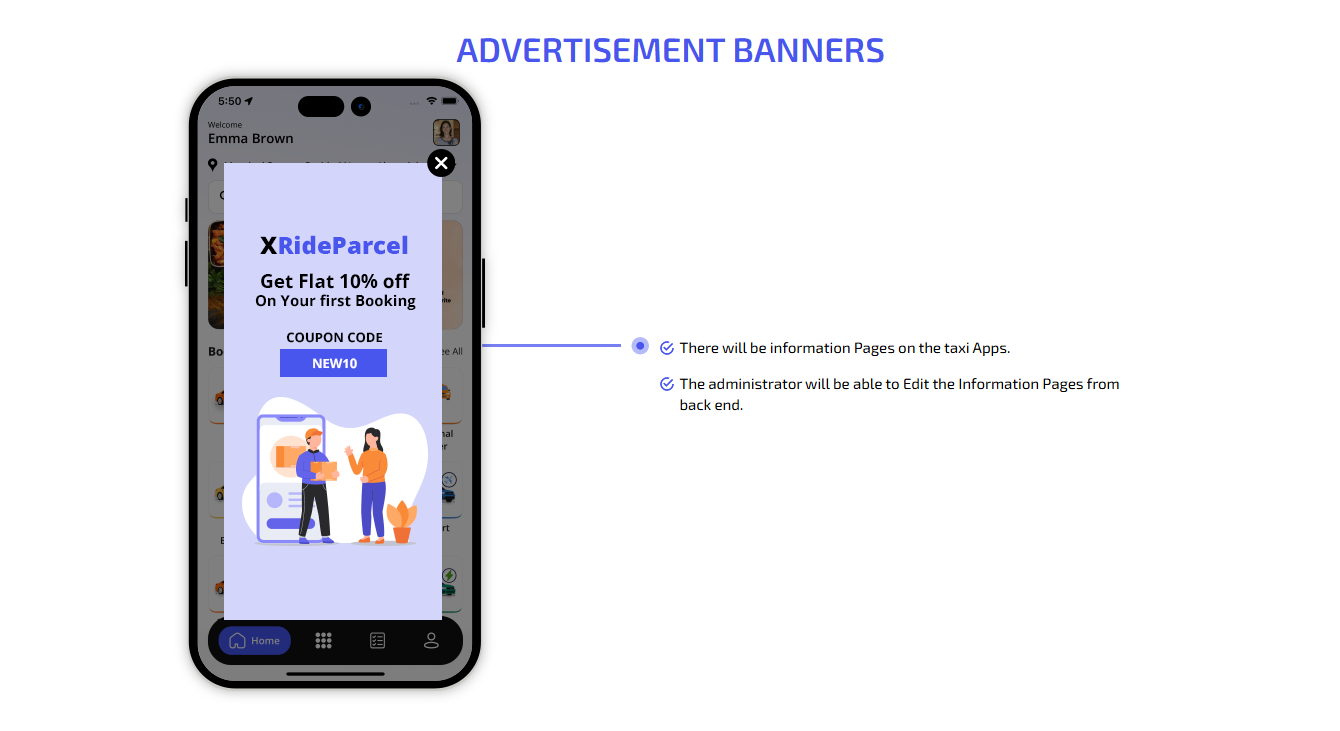
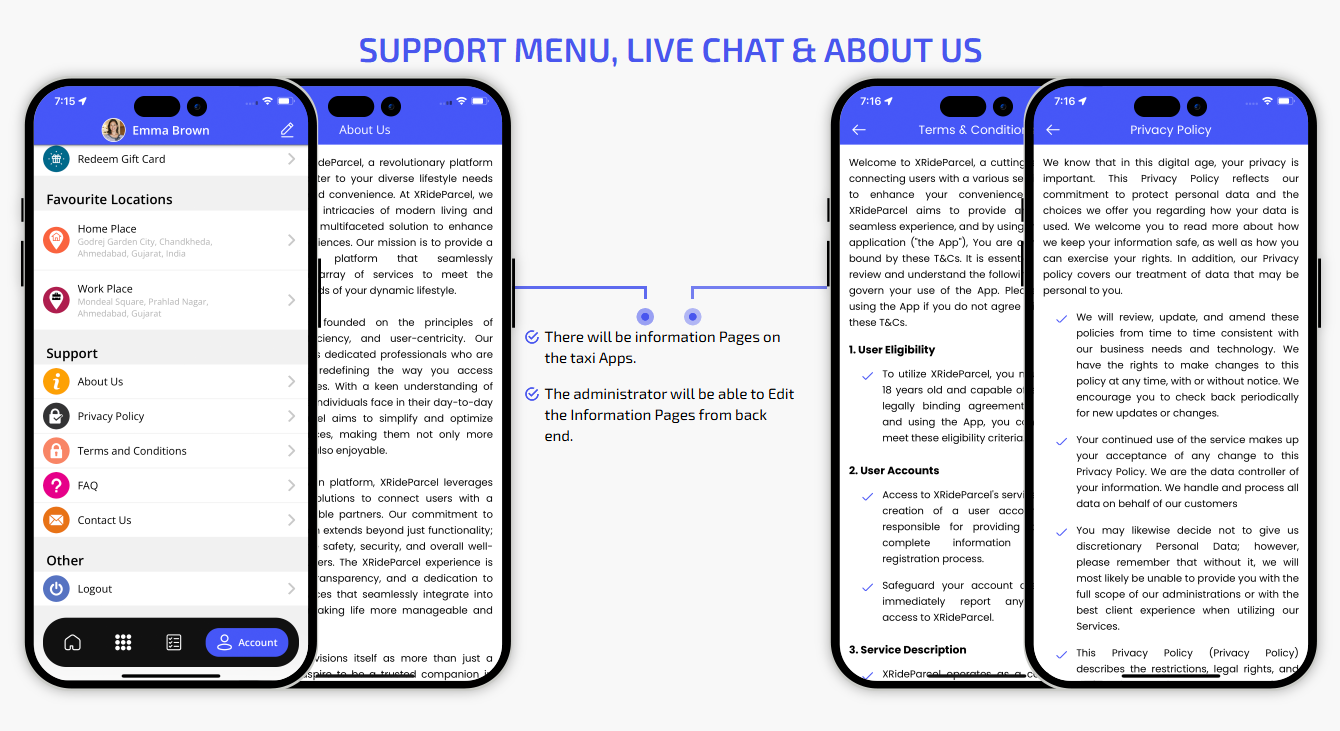
The information about the entire Website will be displayed here. The content is manageable by Admin Panel.
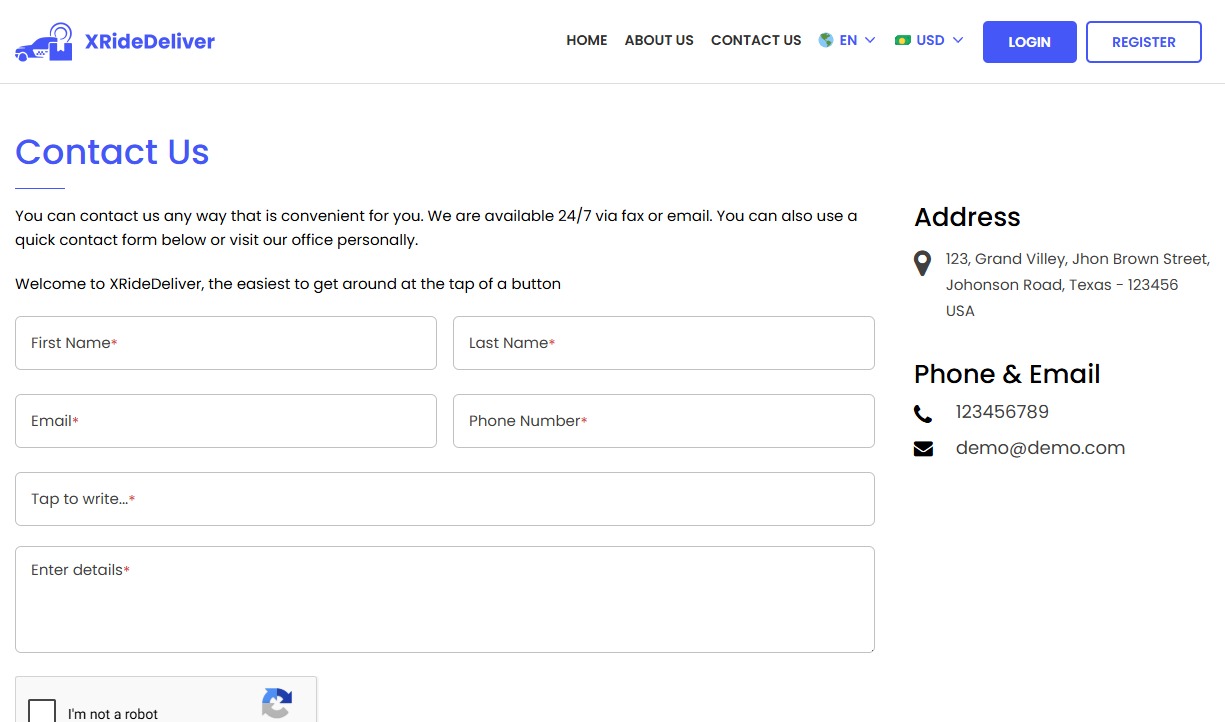
Your Customers can contact you from here. The content is manageable by Admin Panel.
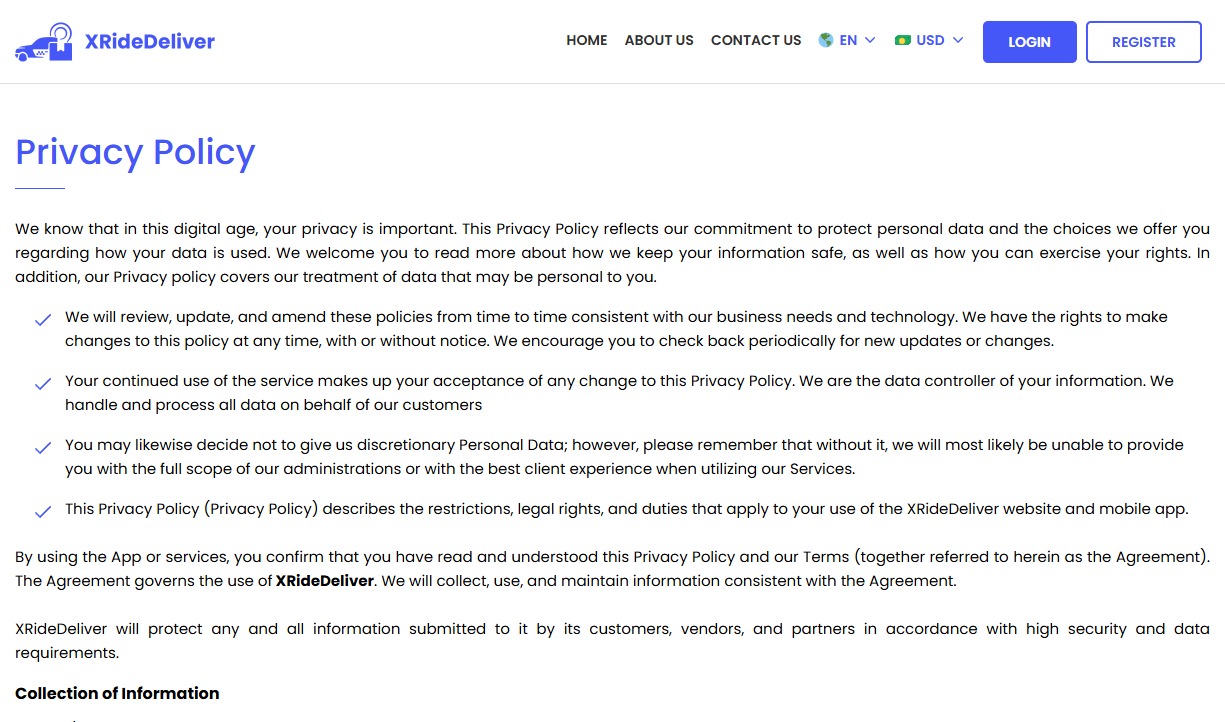
This page will Show website Privacy Policy. The content is manageable by Admin Panel.
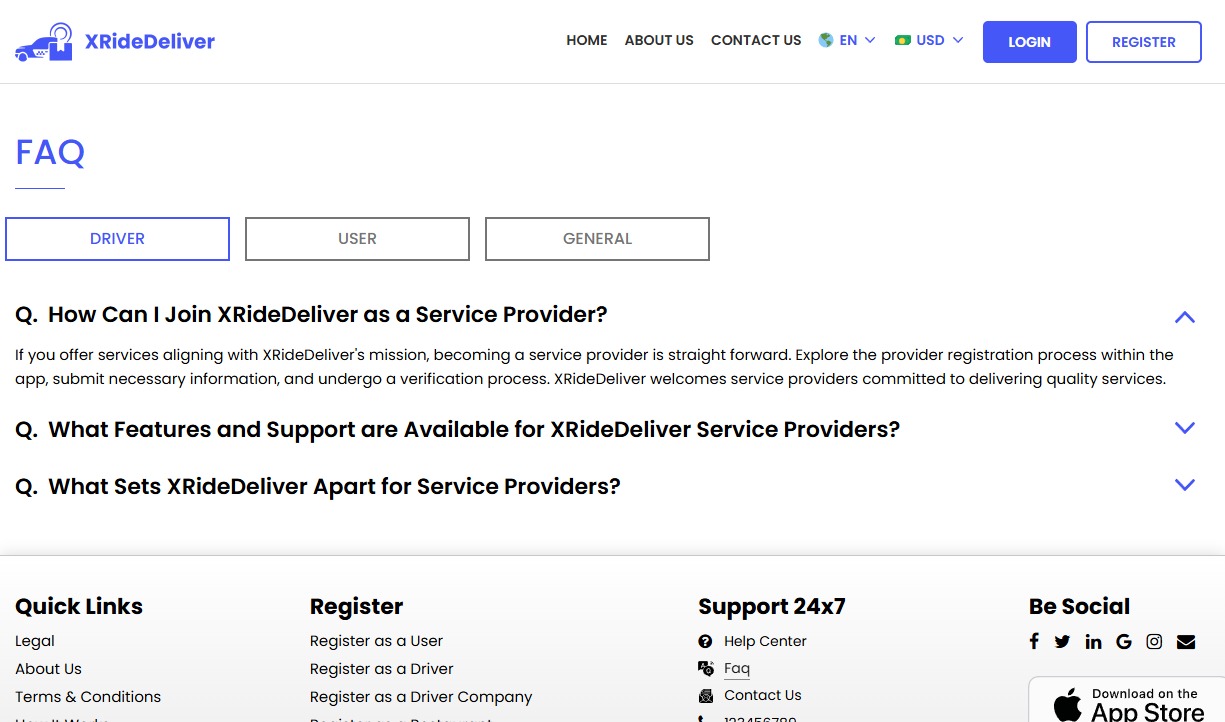
This page will show Frequently asked Questions. The content is manageable by Admin Panel.
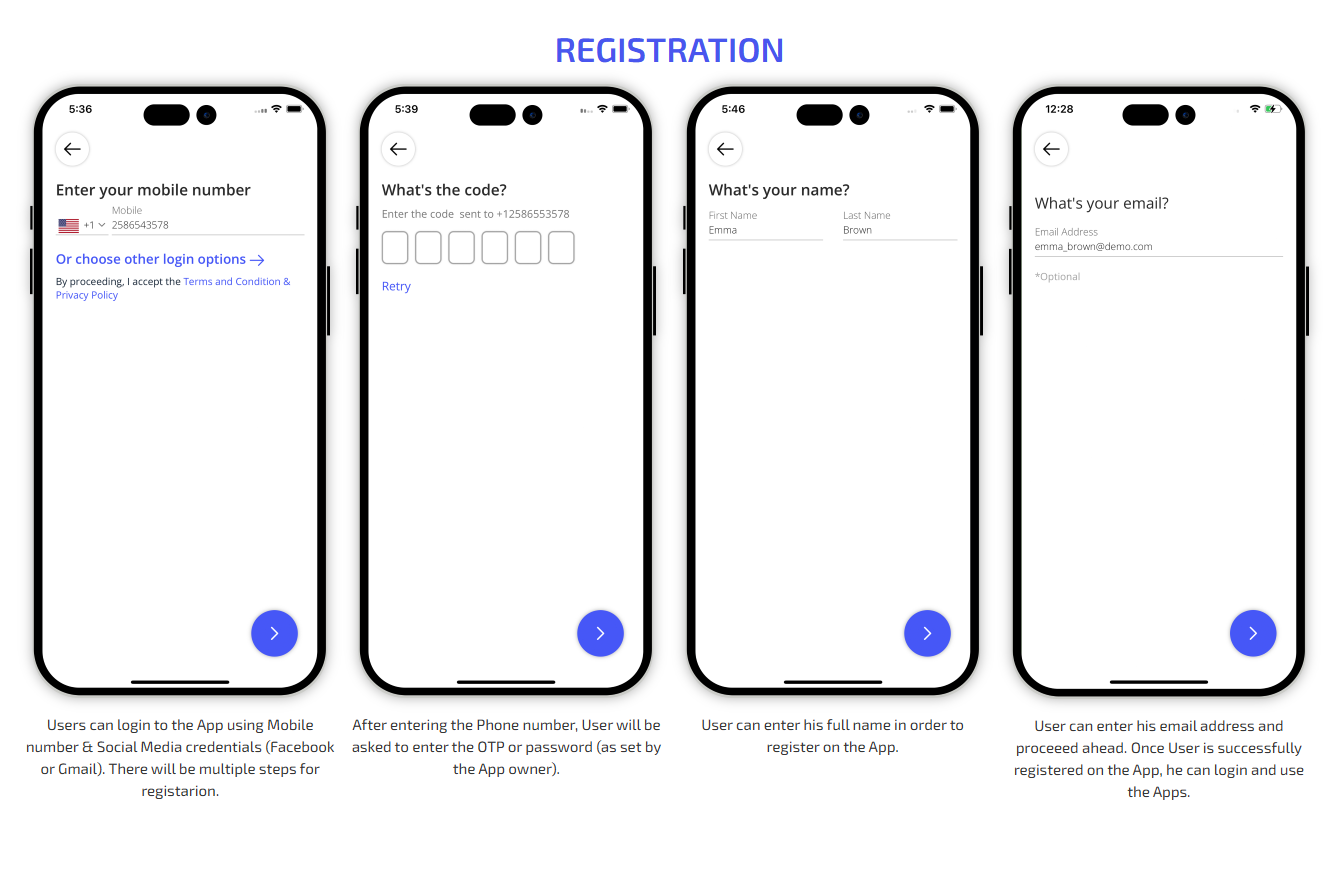
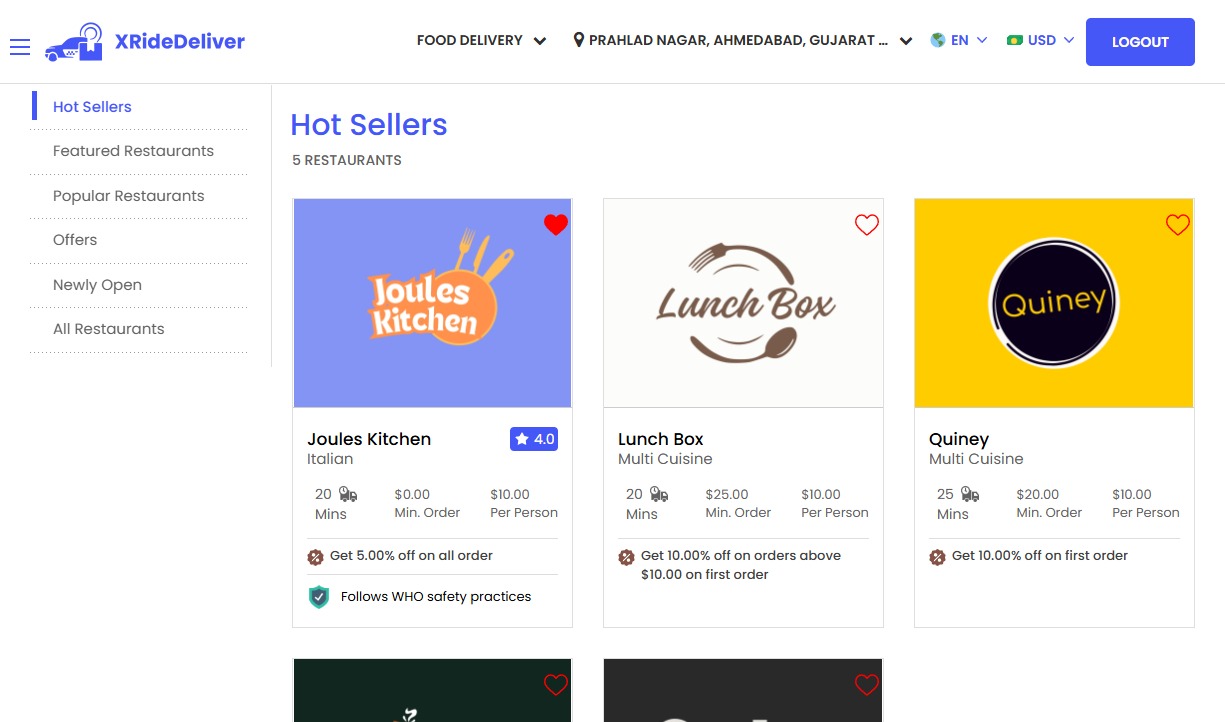
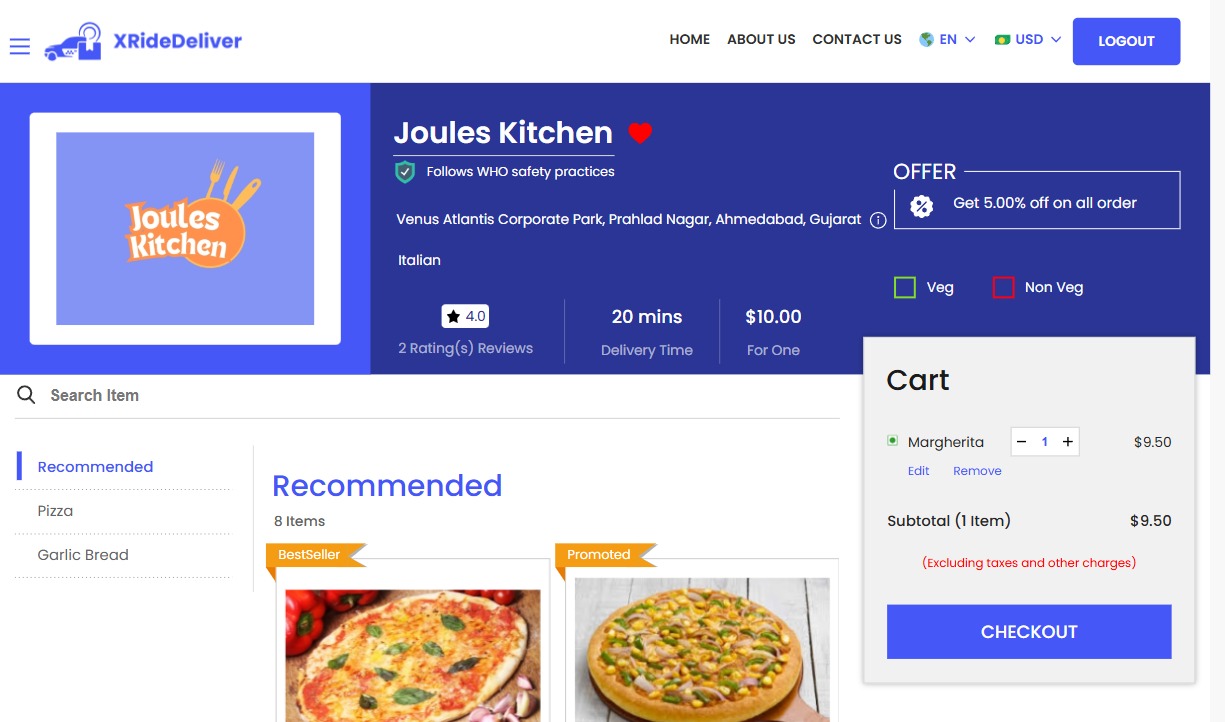
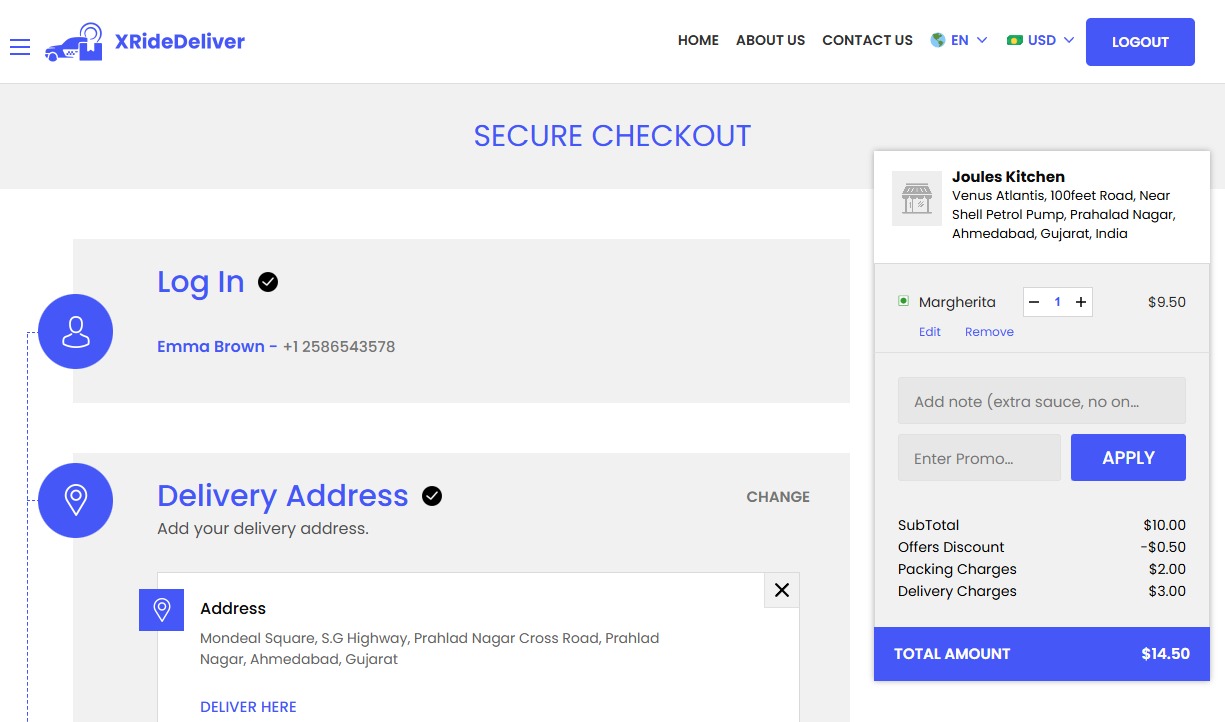
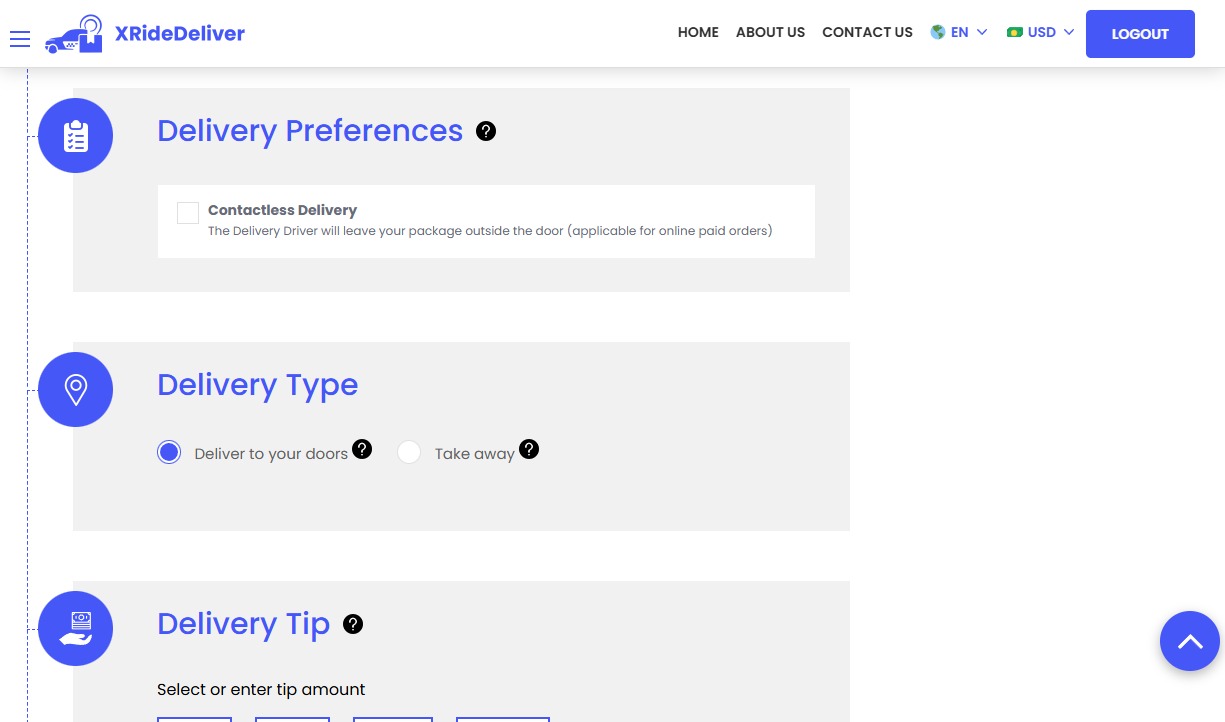
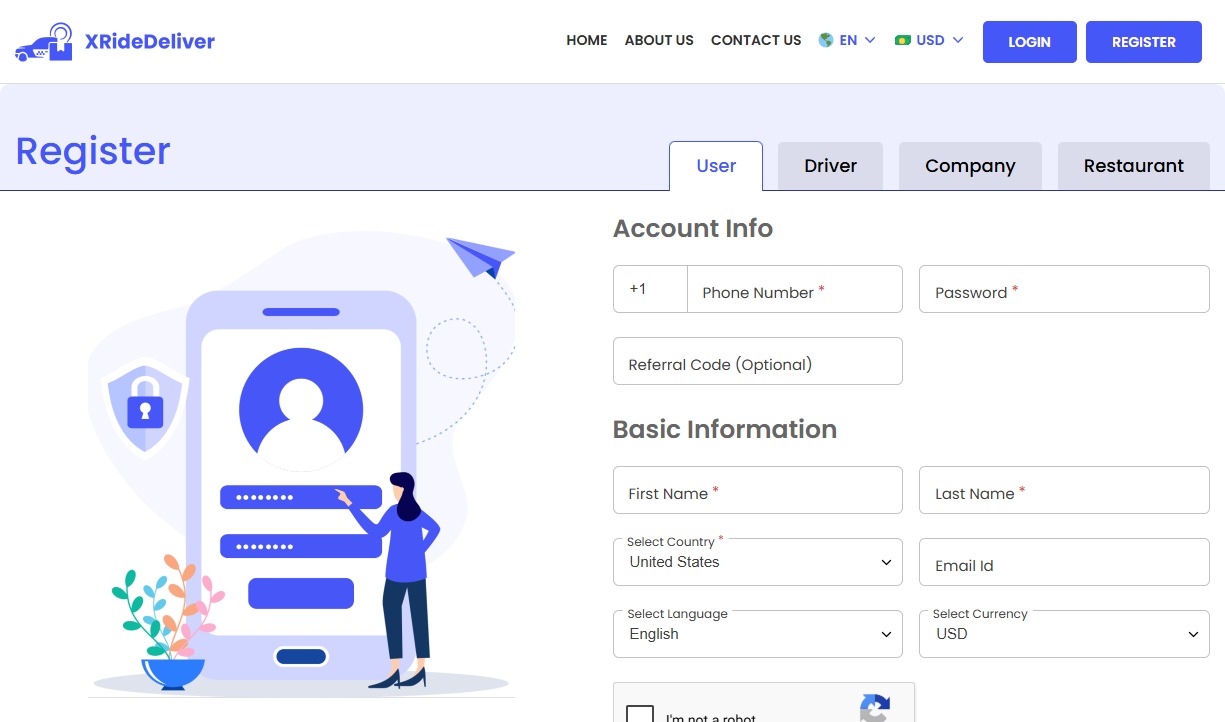
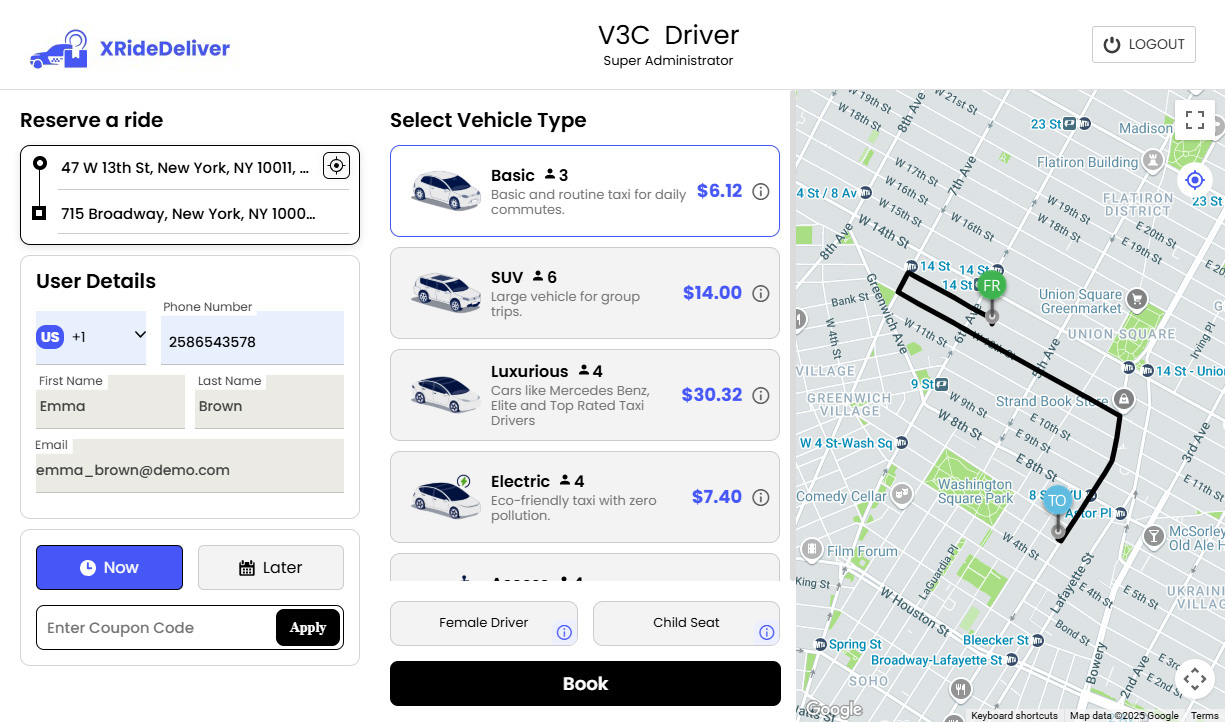
We offer users web taxi booking, food delivery, where they can register and request a ride. This is perfect for users who prefer booking from their desktops or browsers.
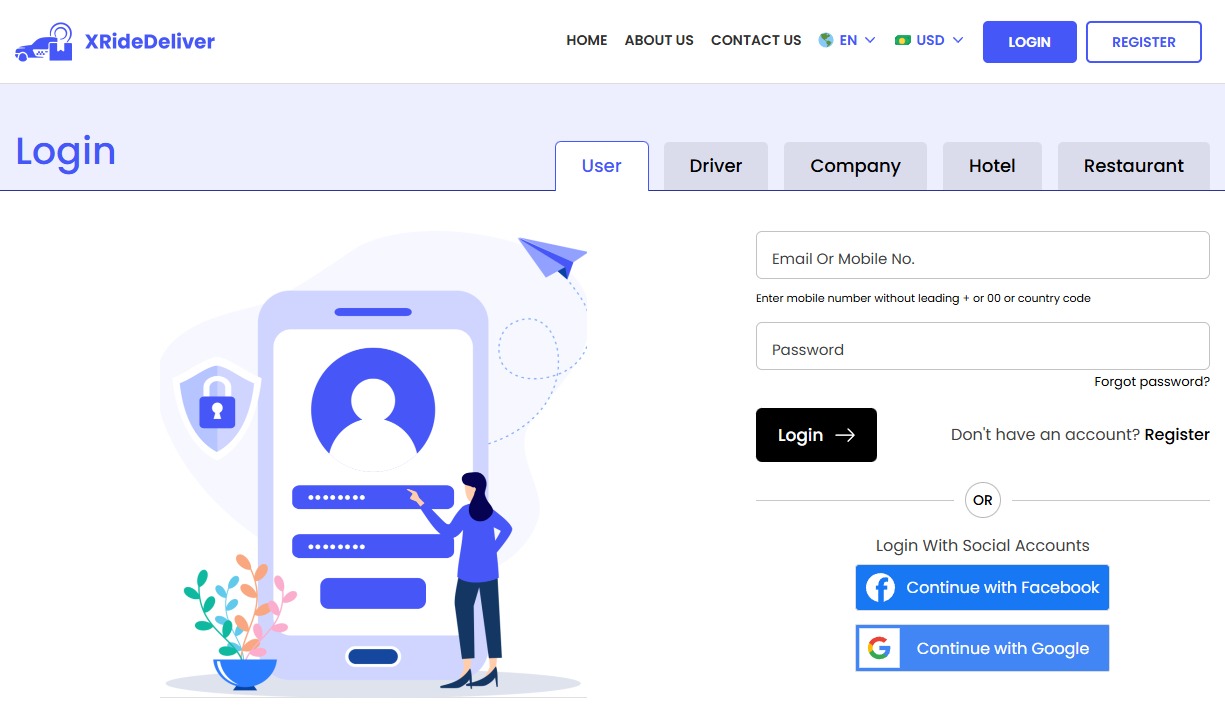

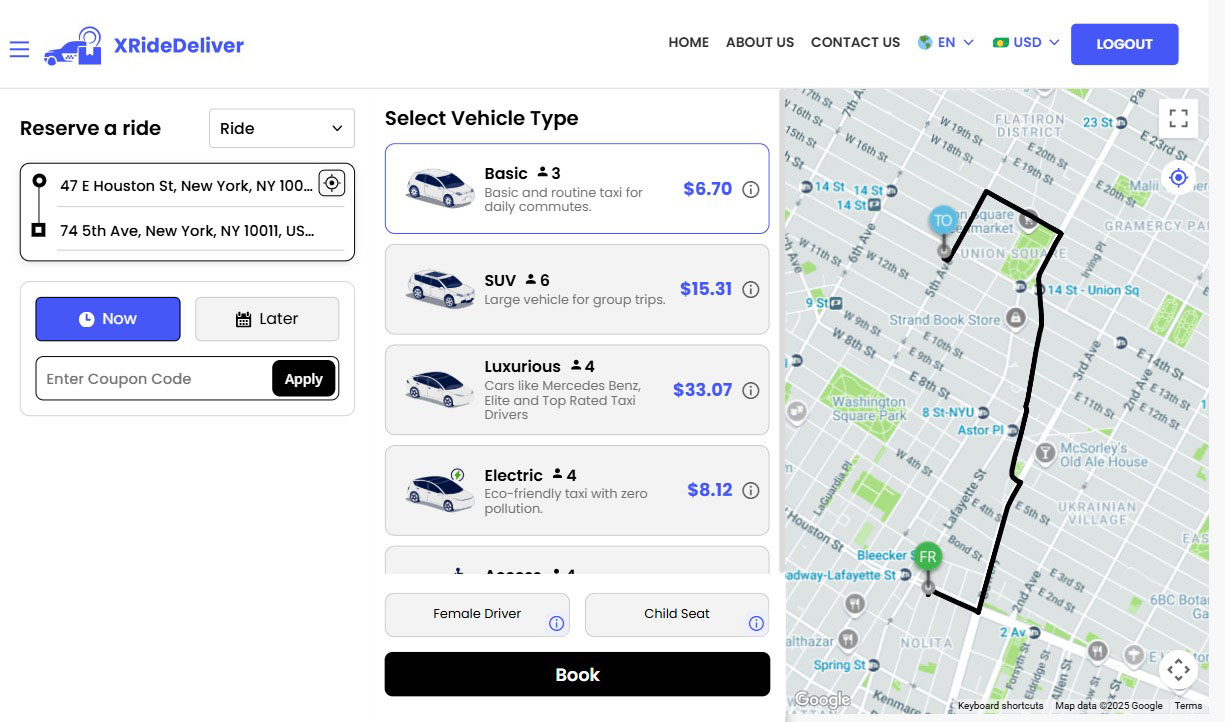
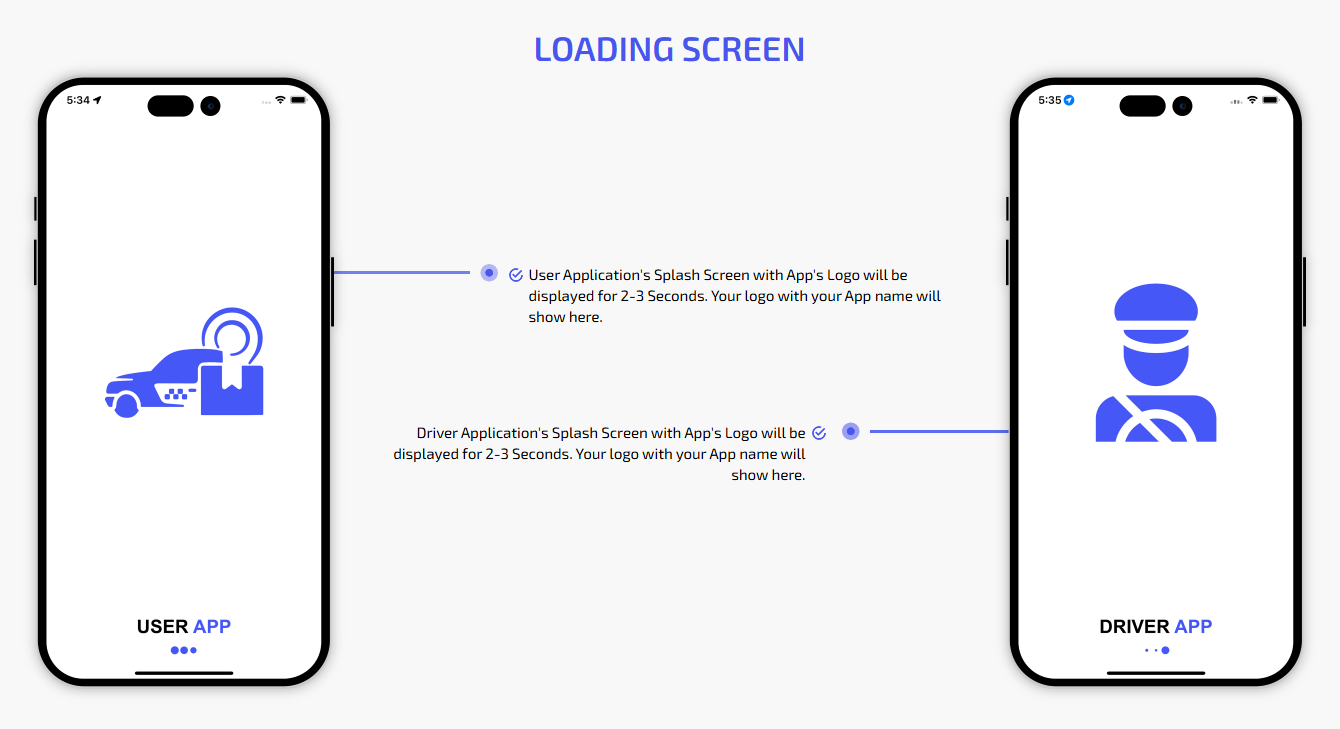
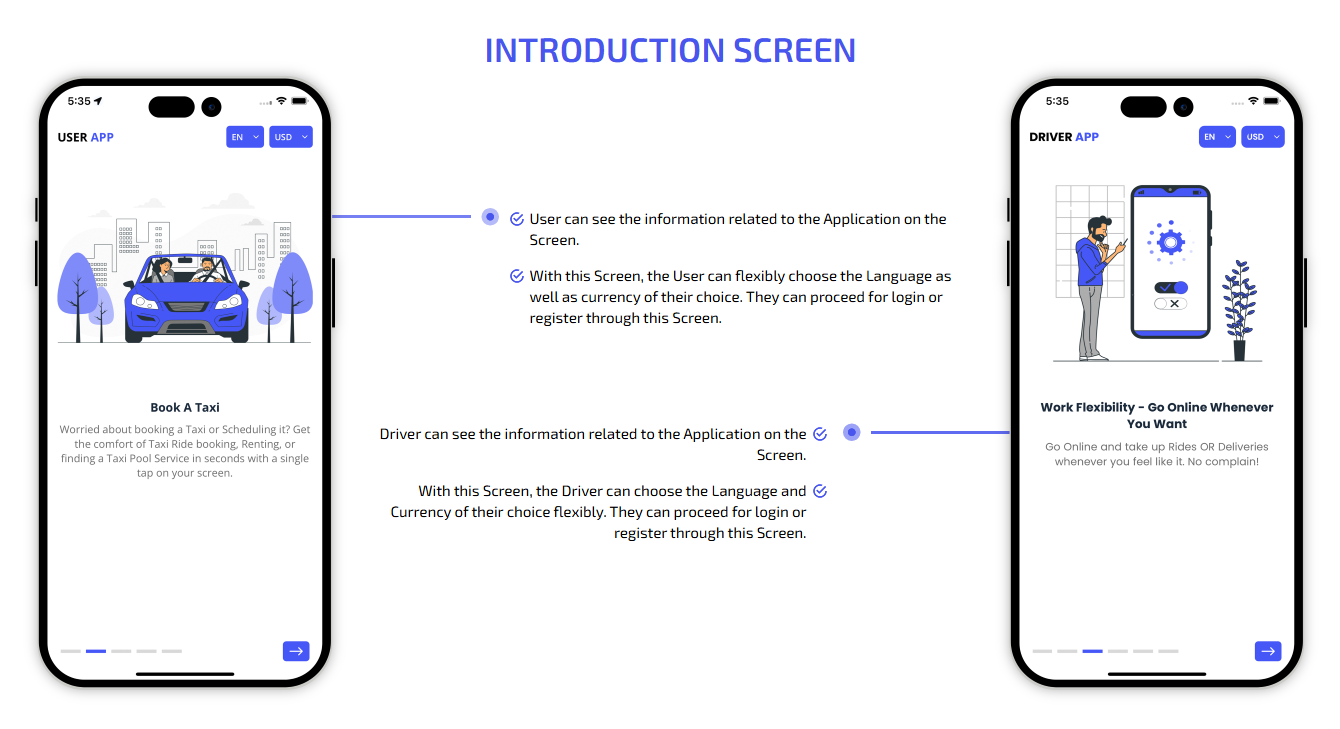
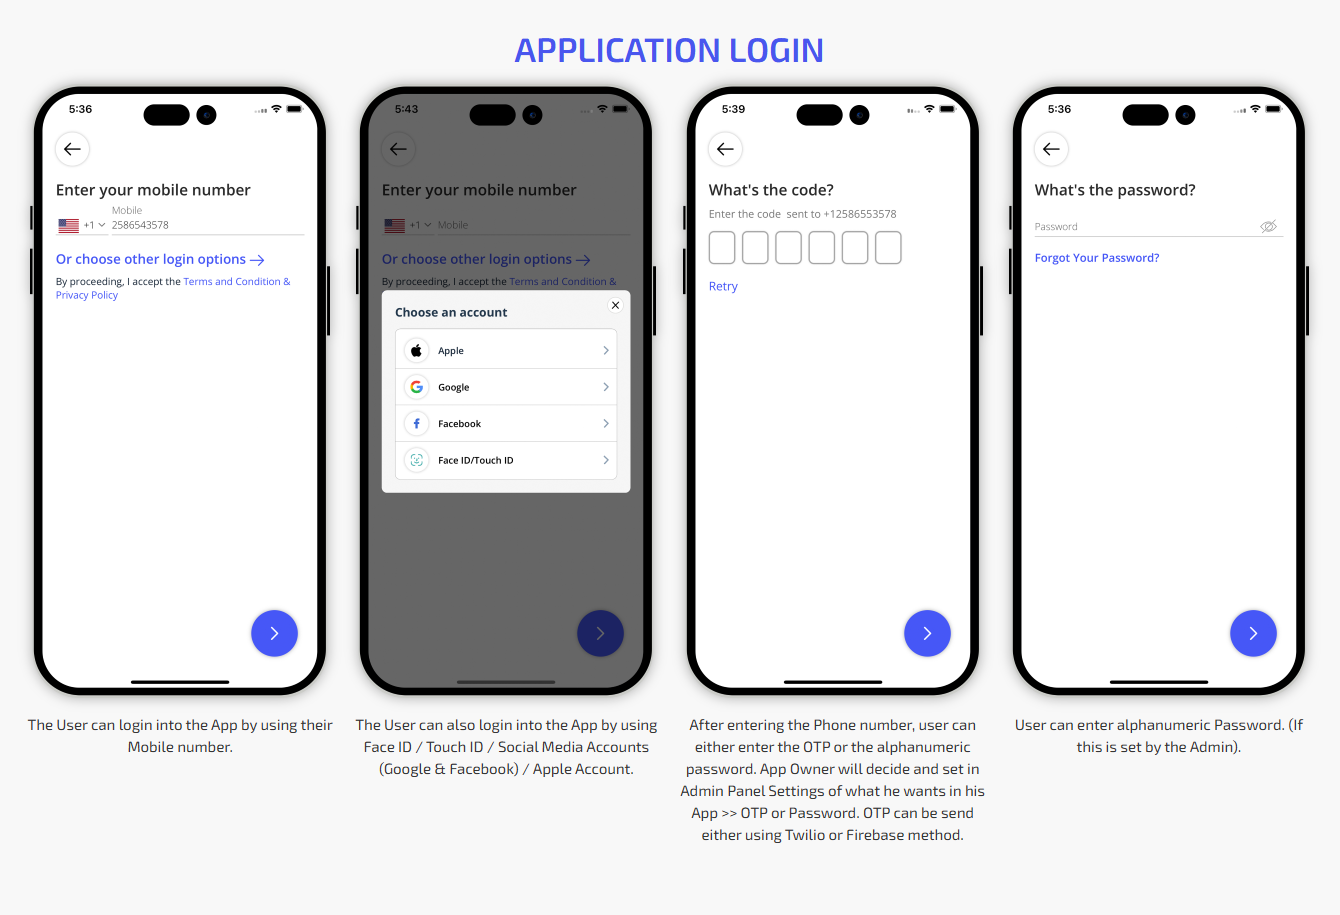
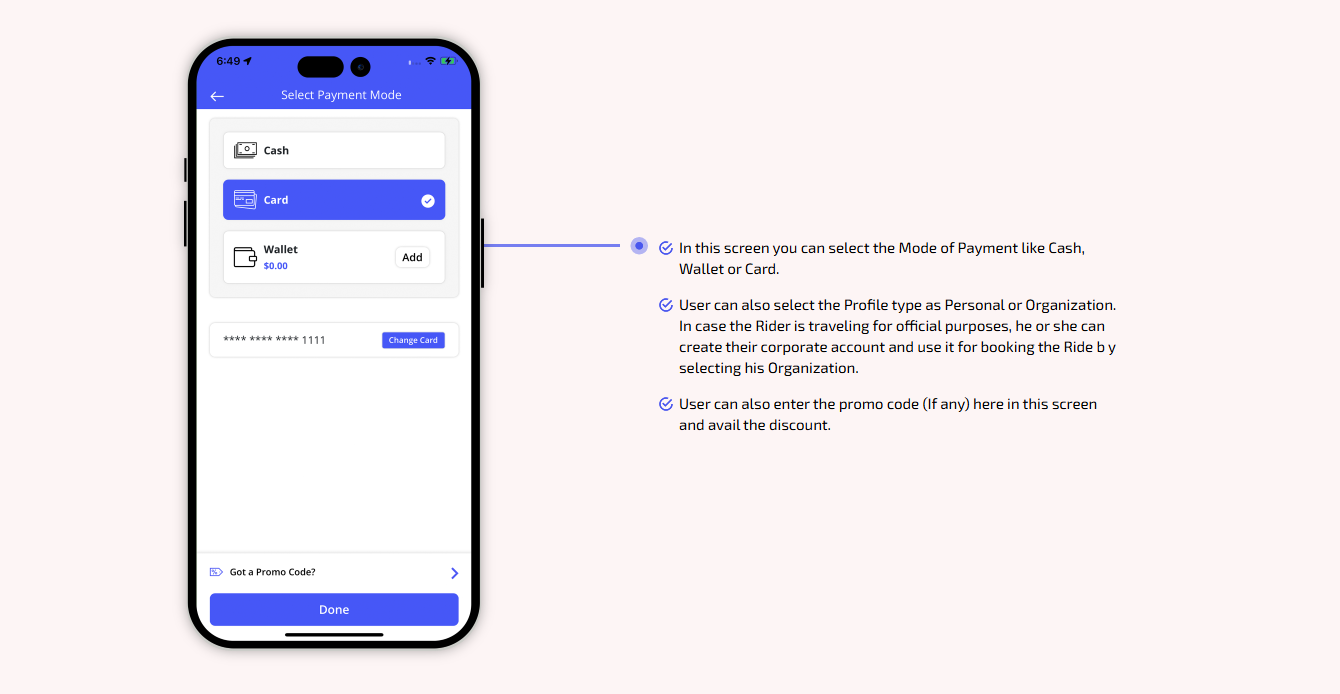
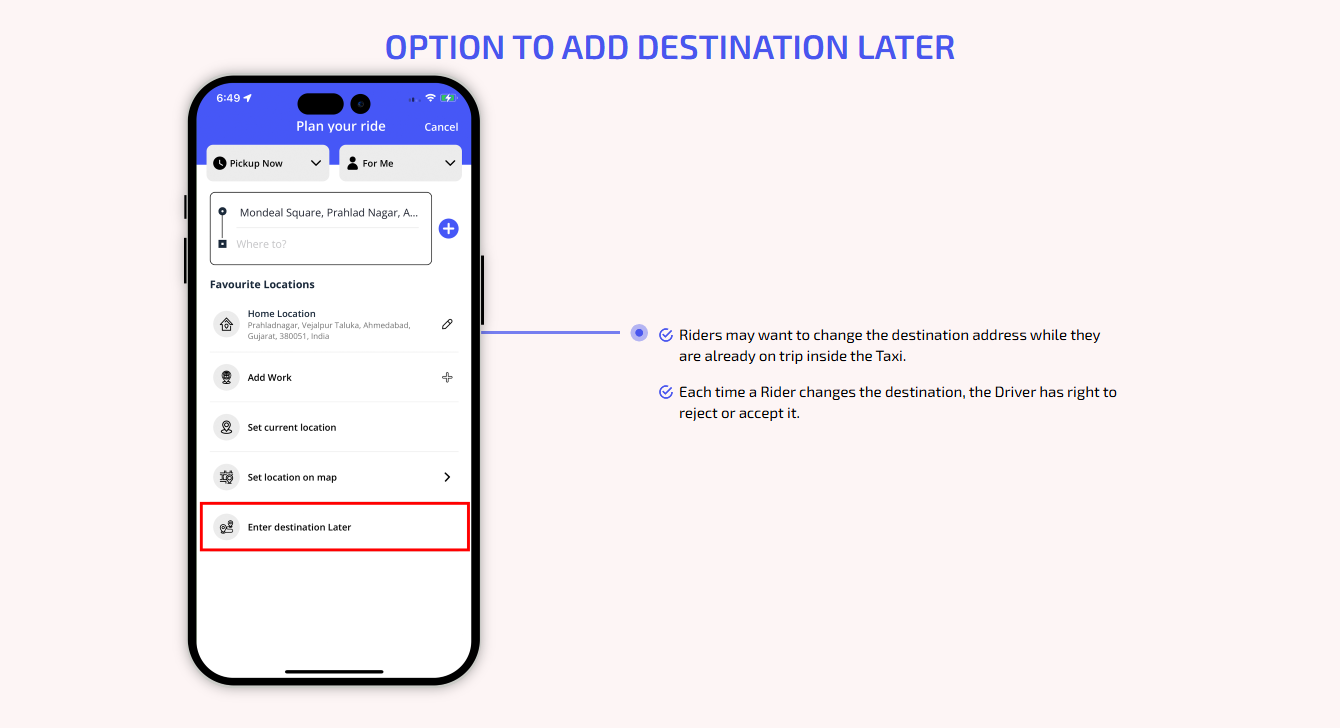
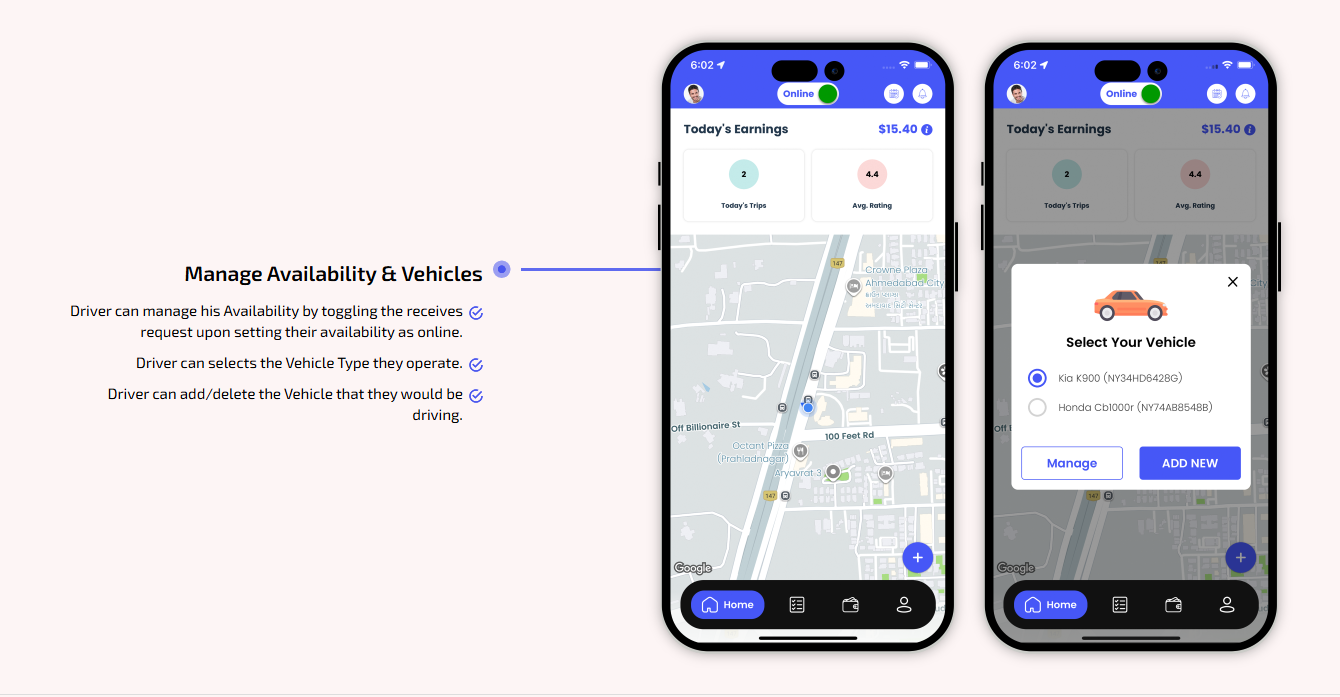
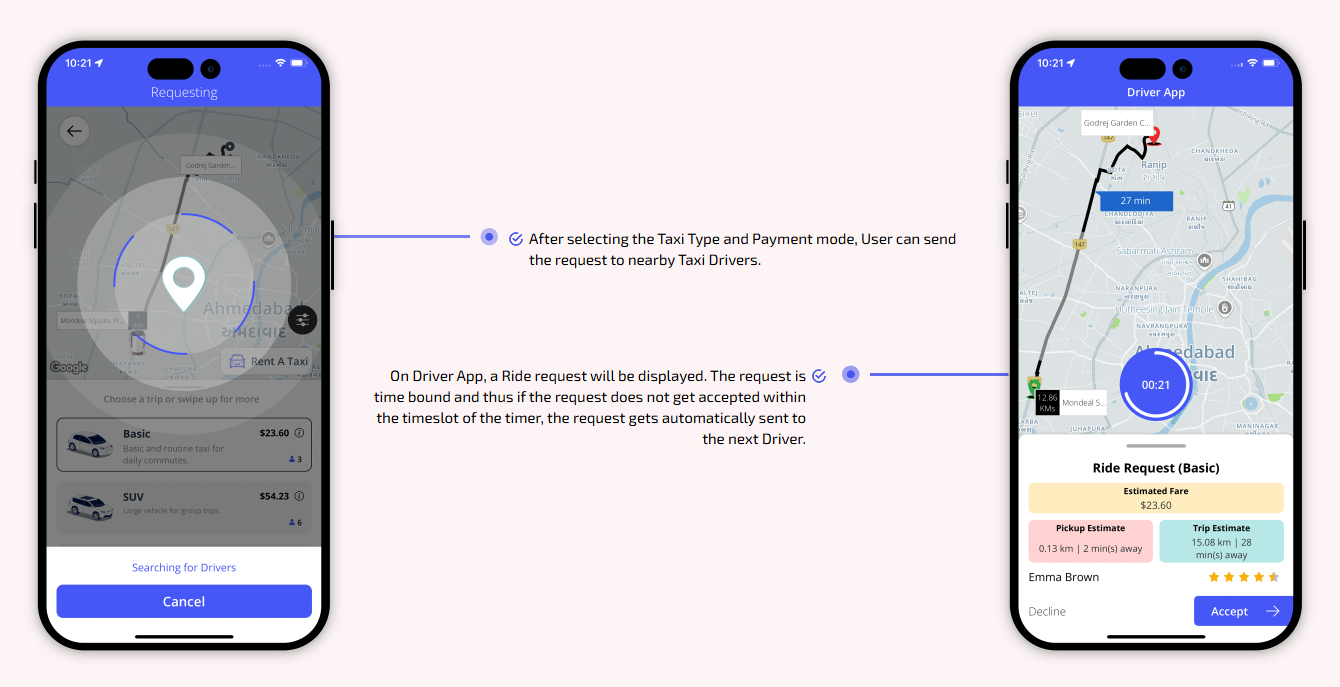
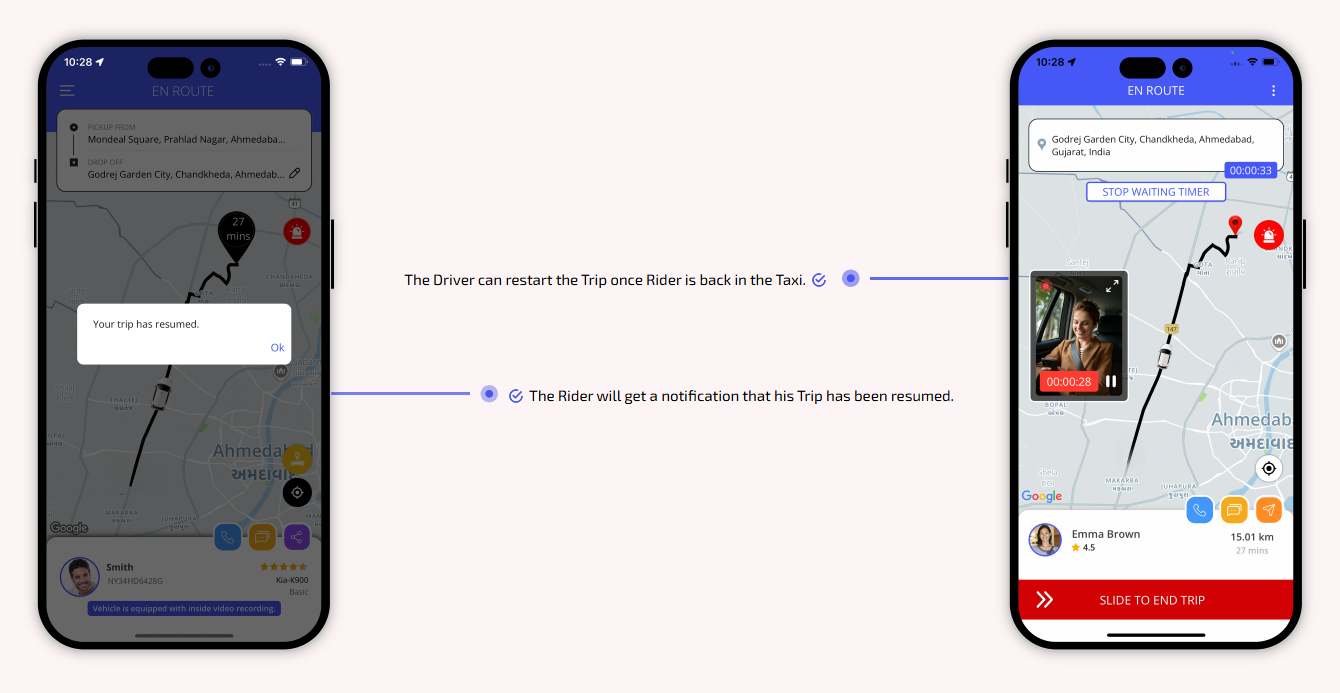
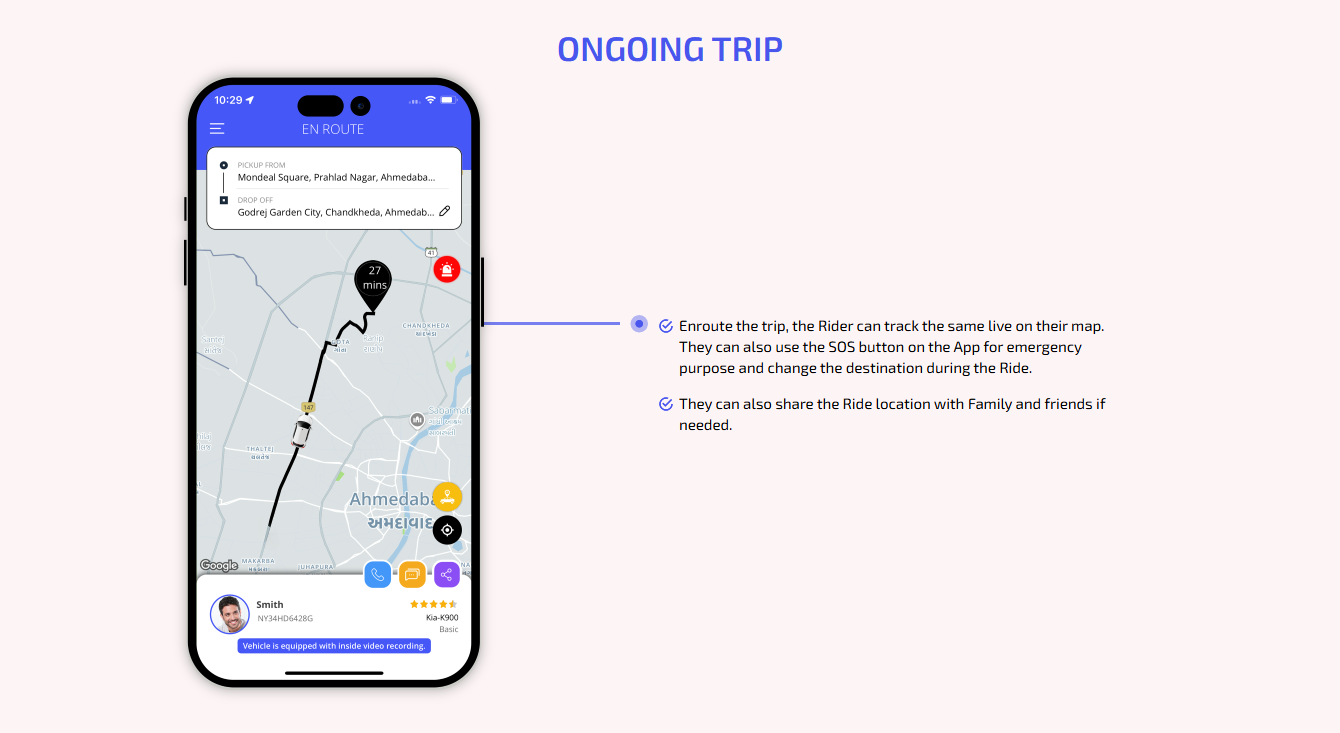
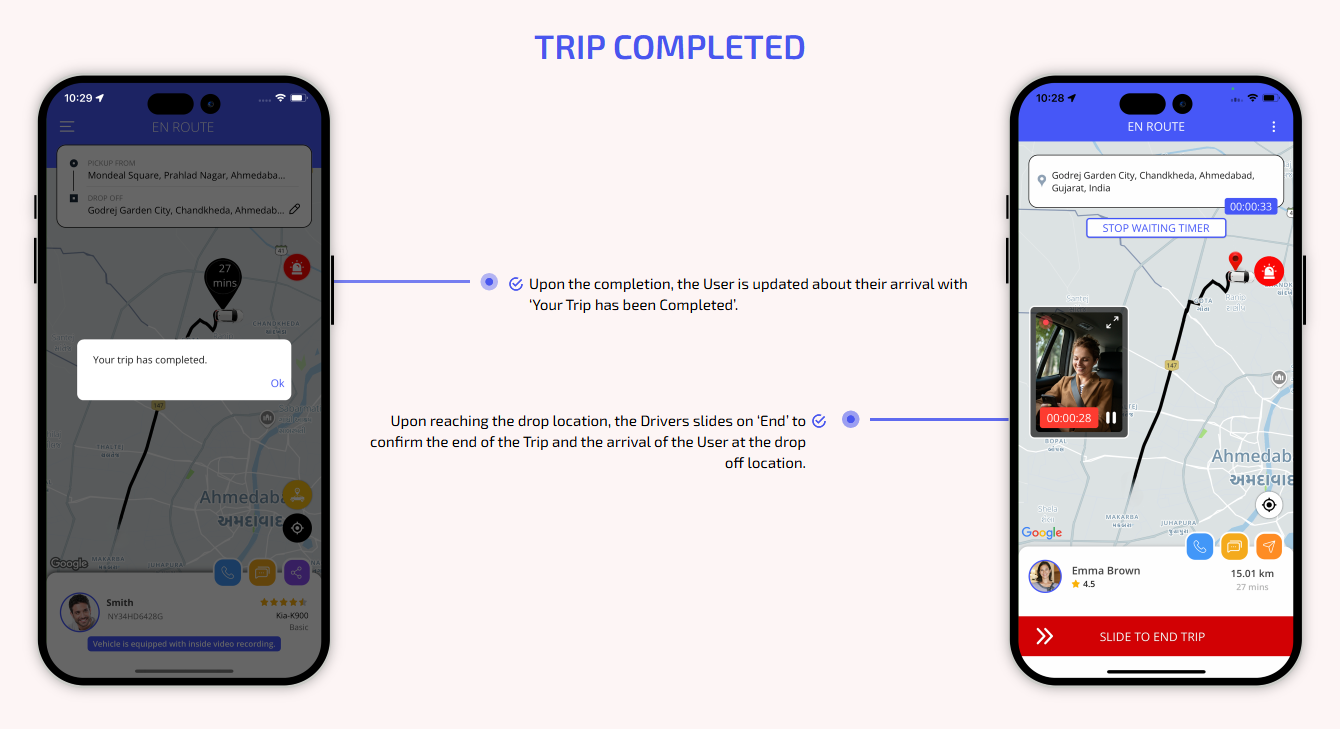
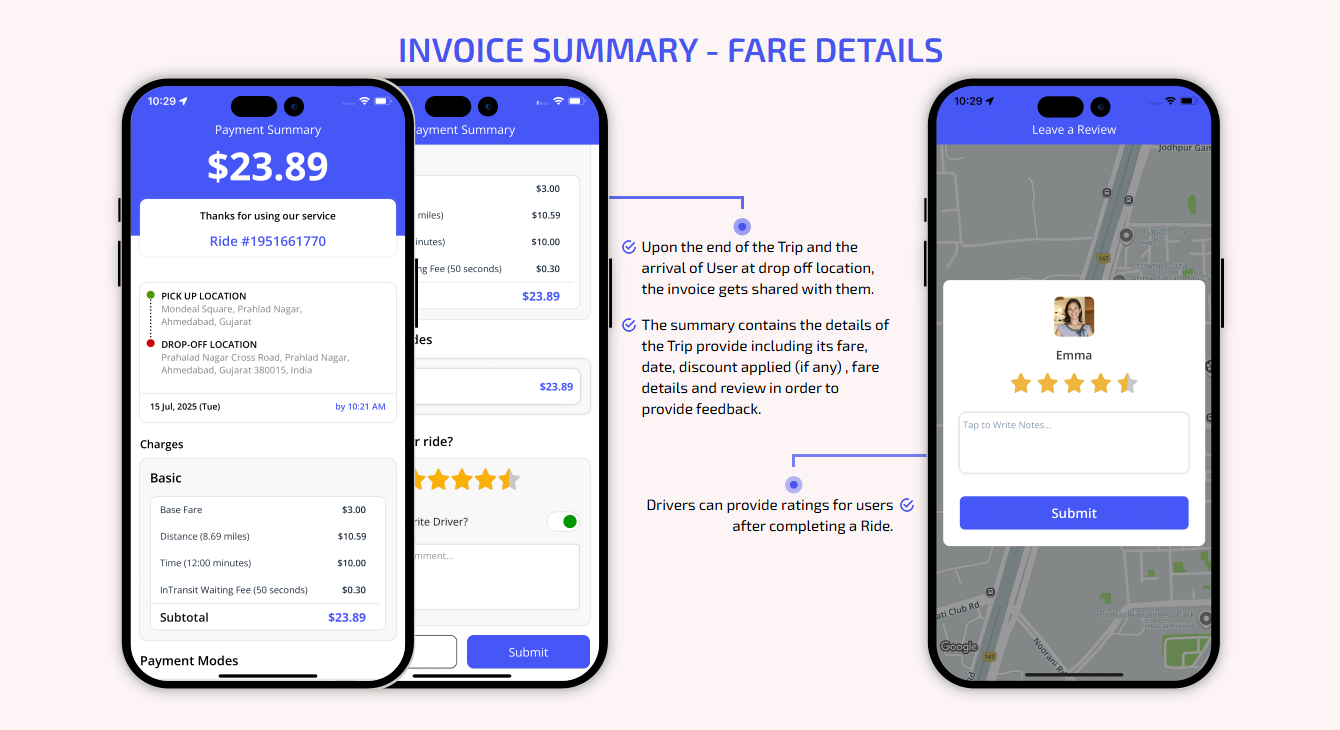
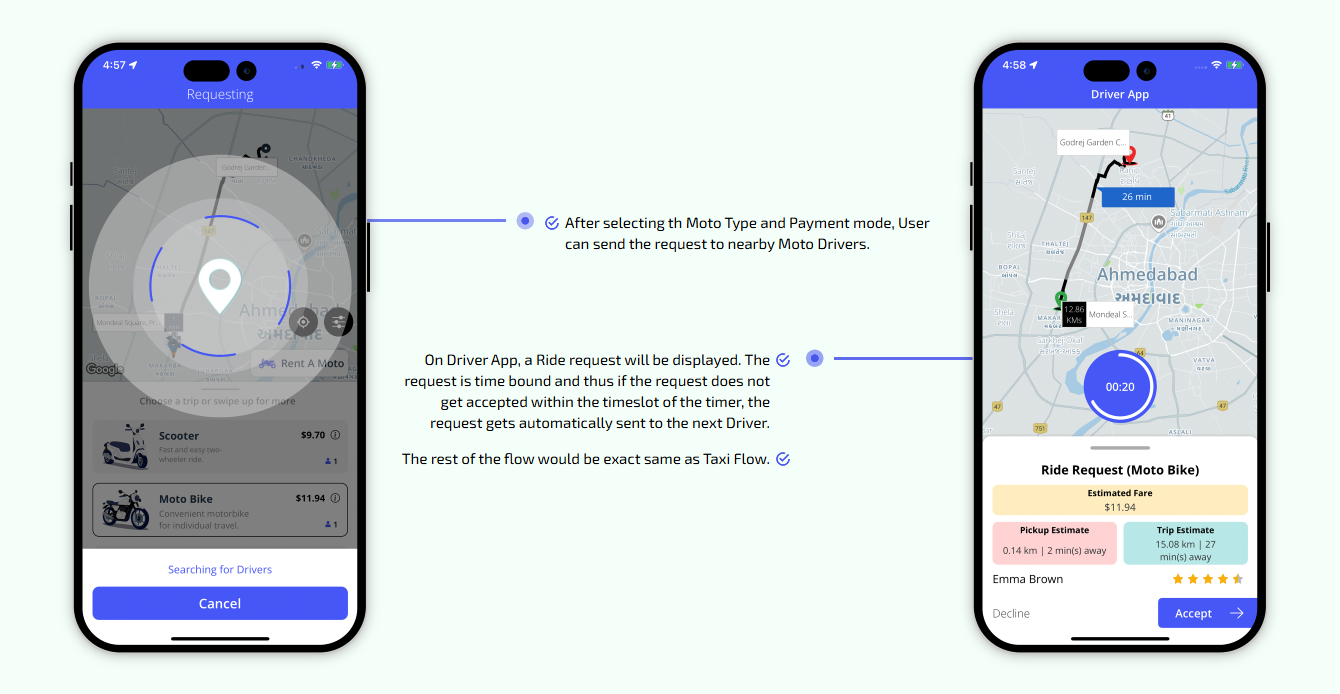
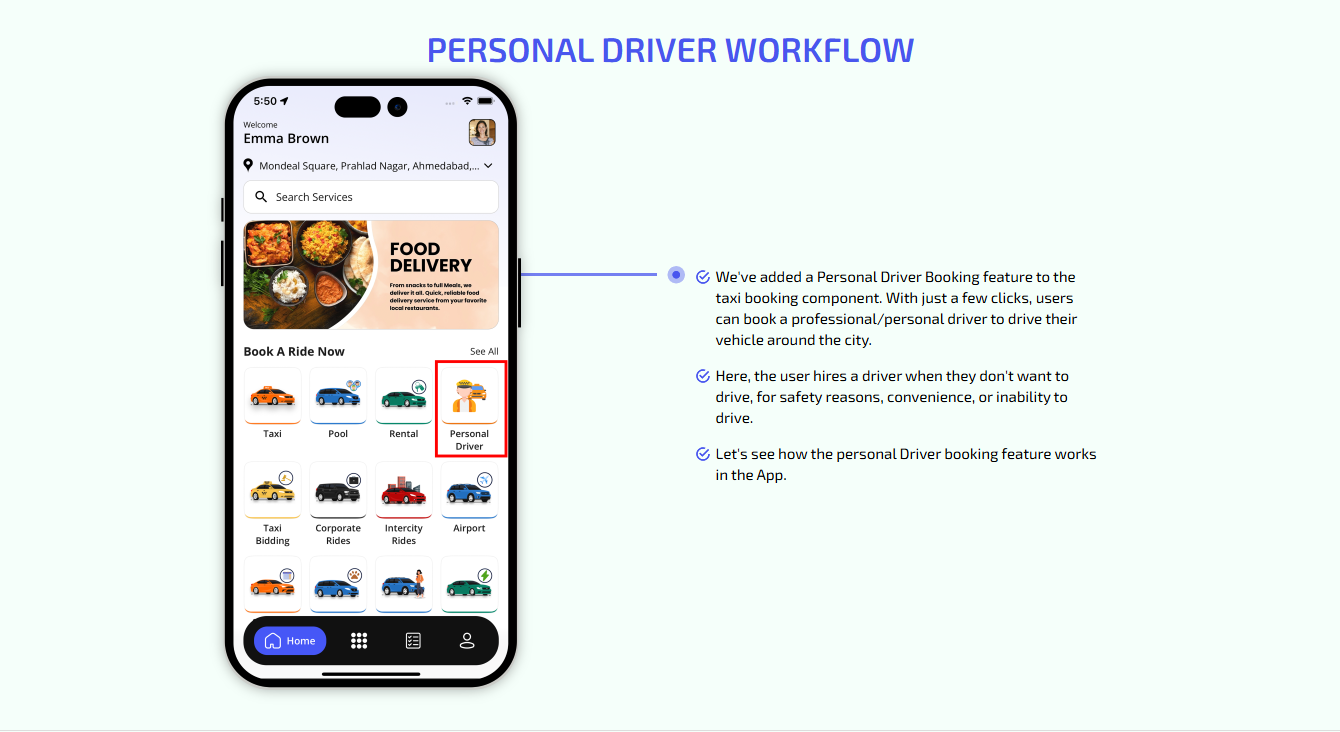
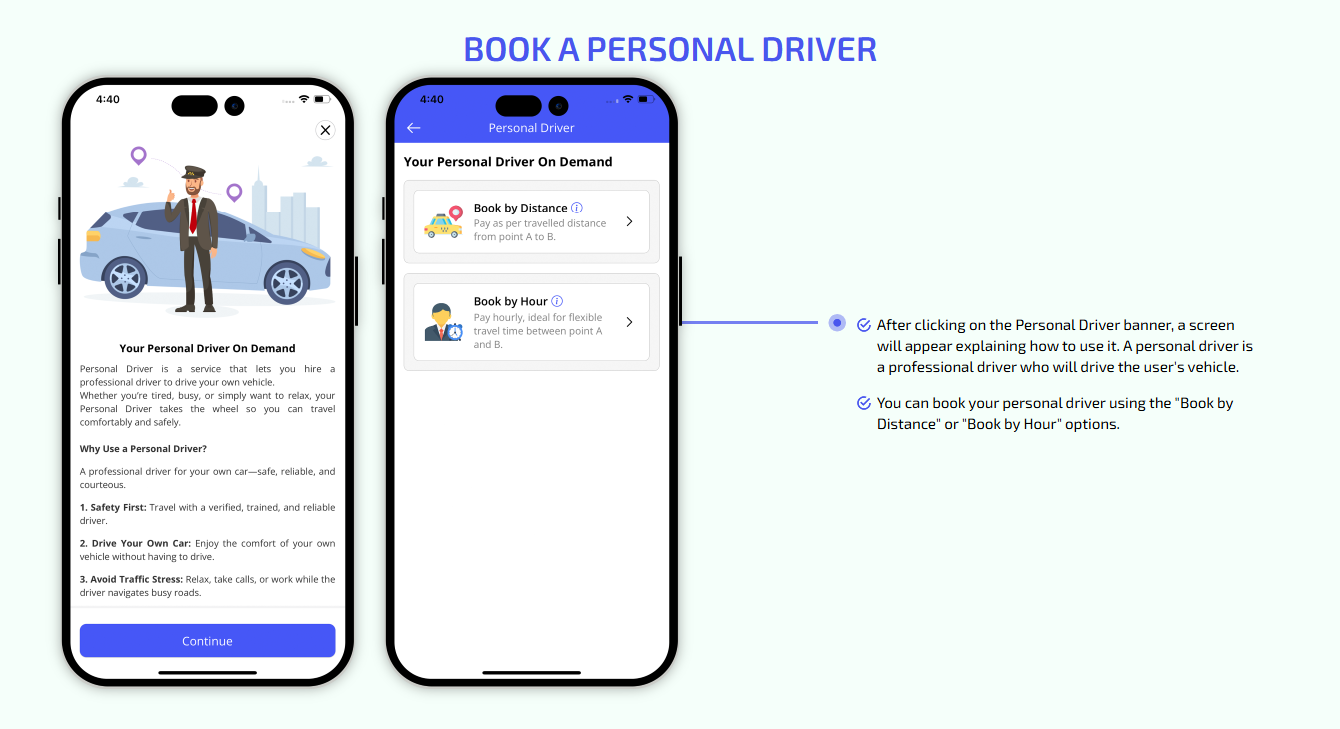
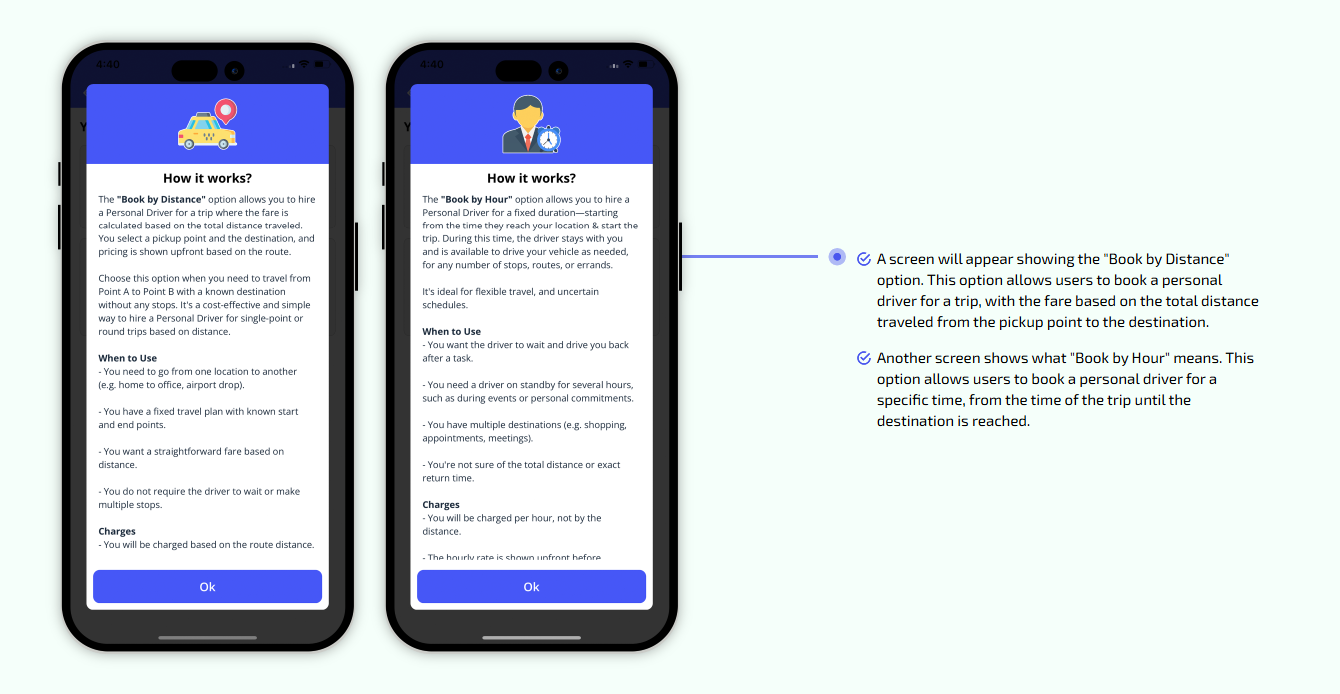
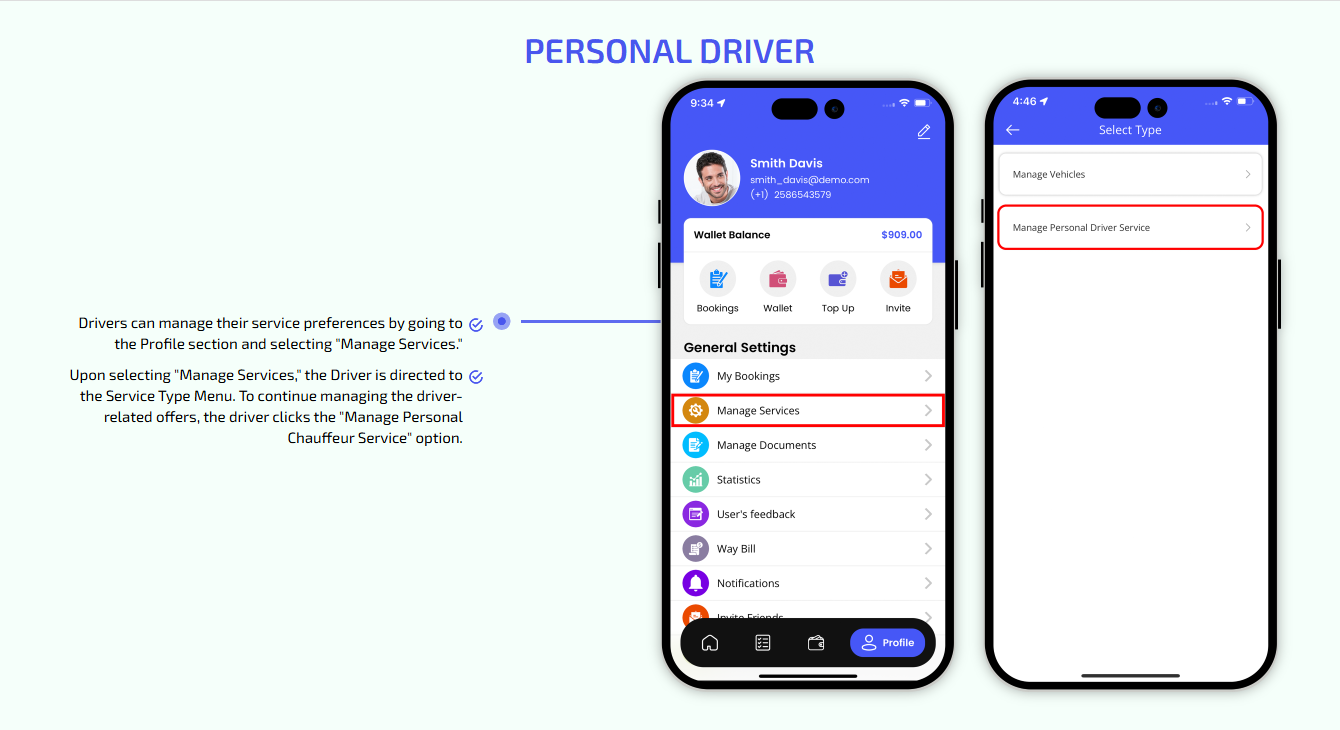
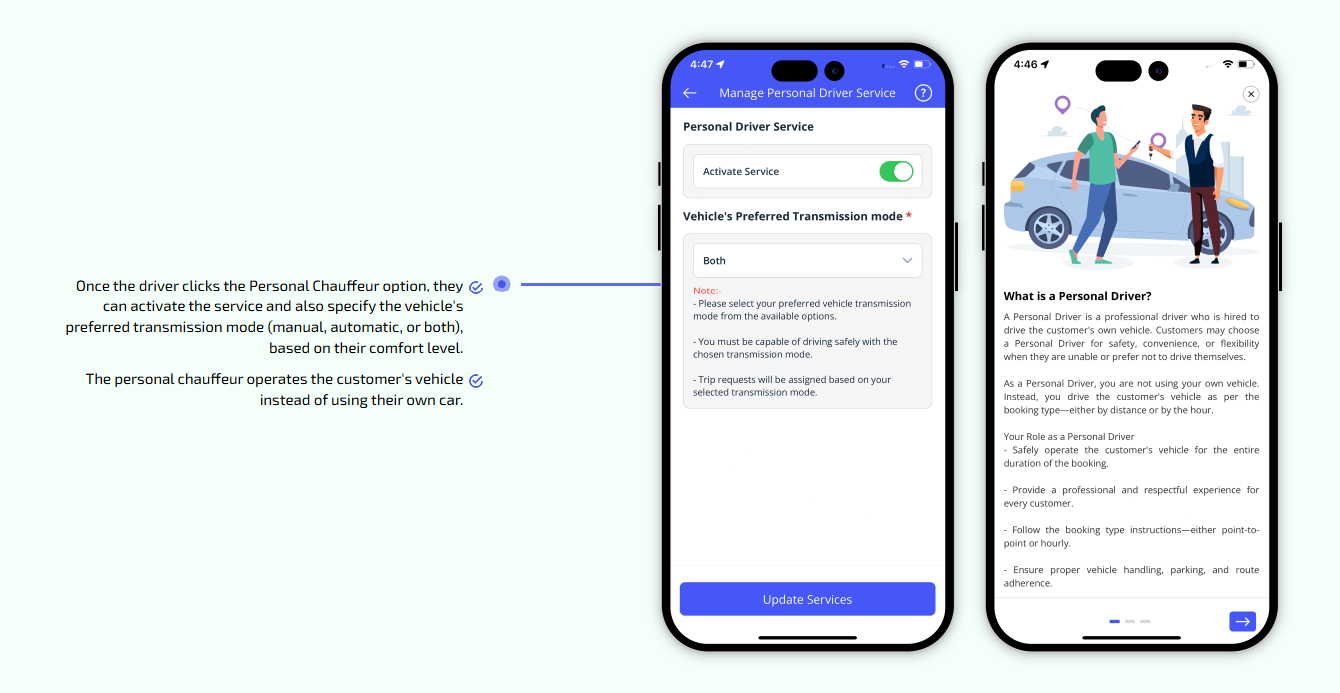
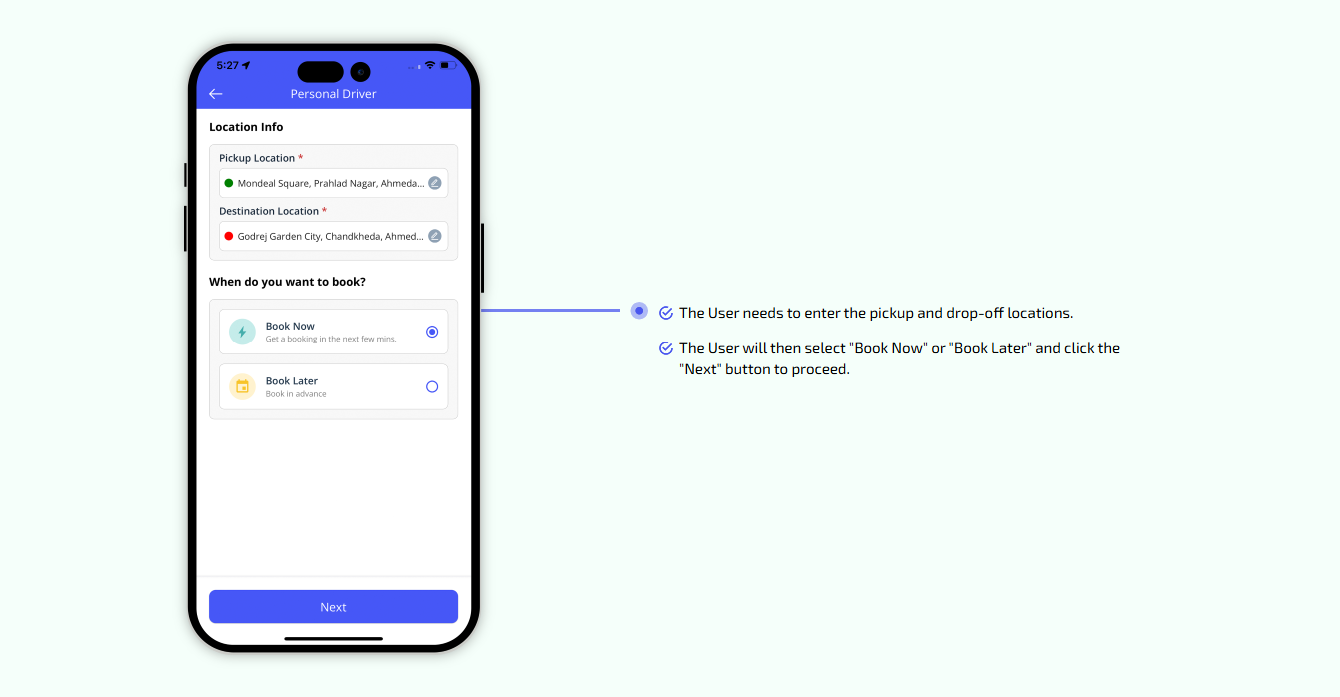
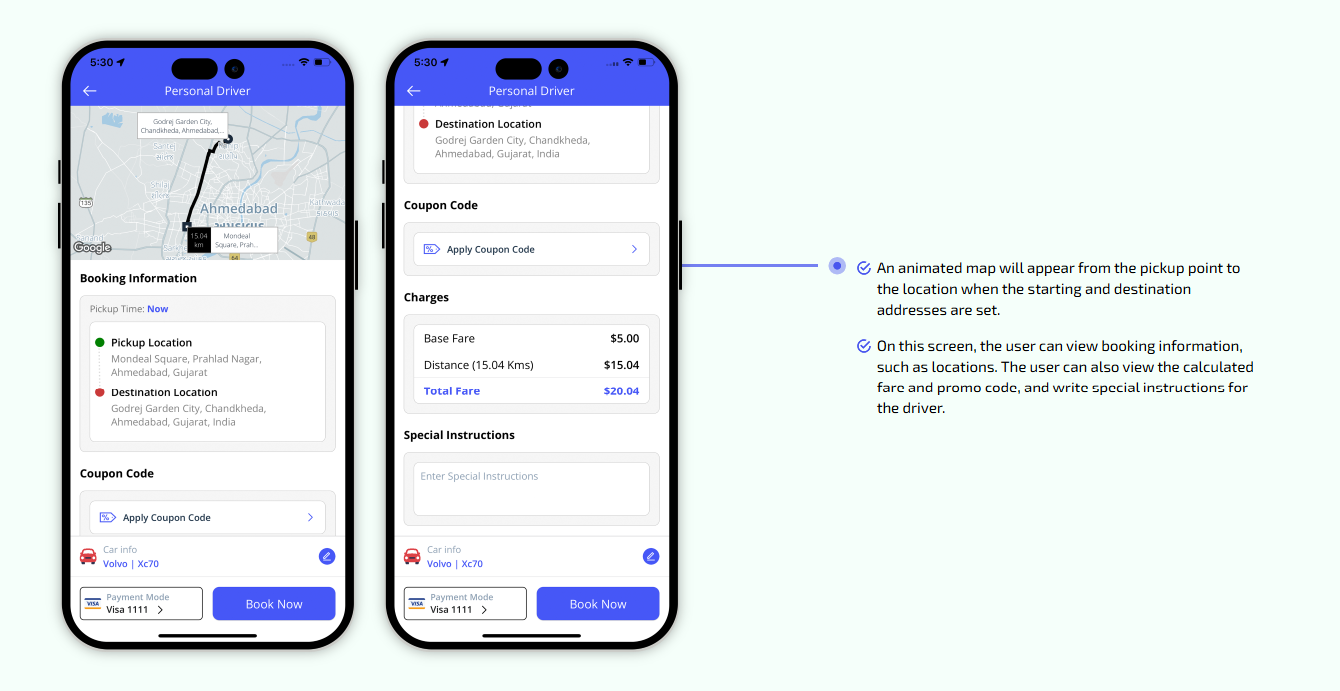
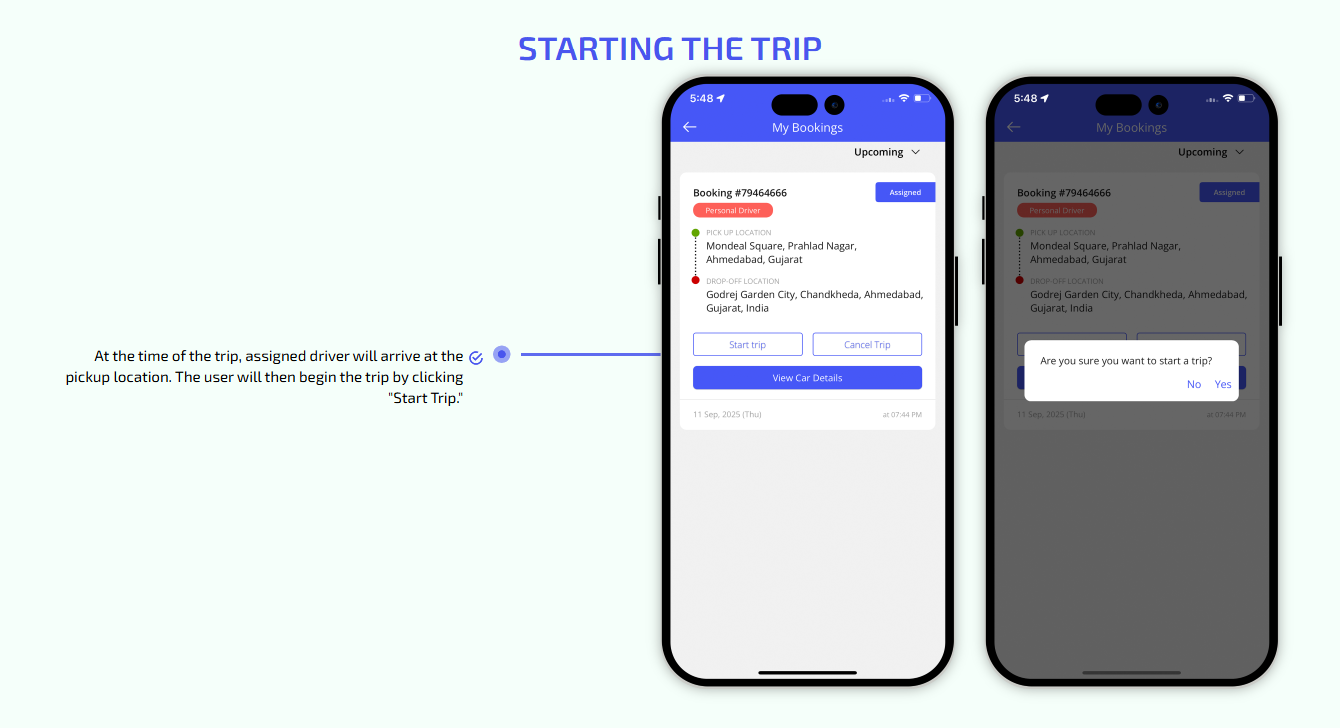
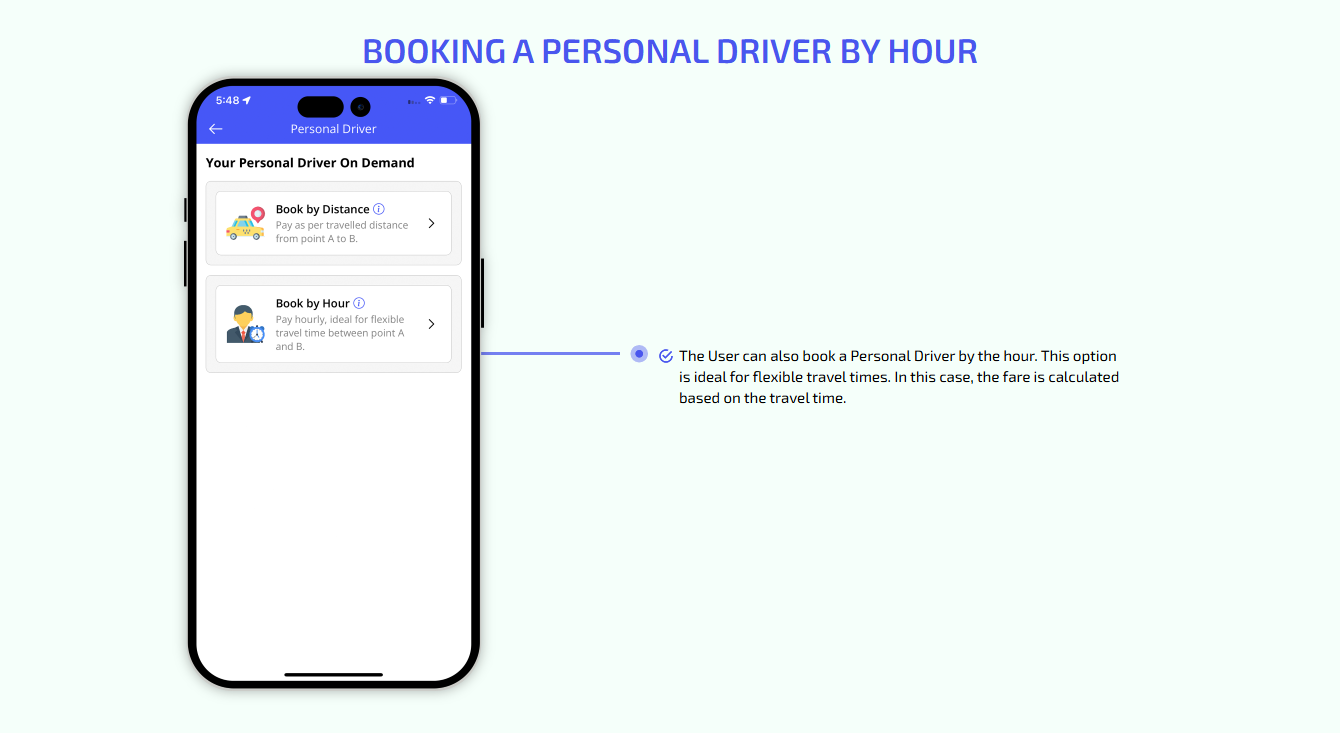
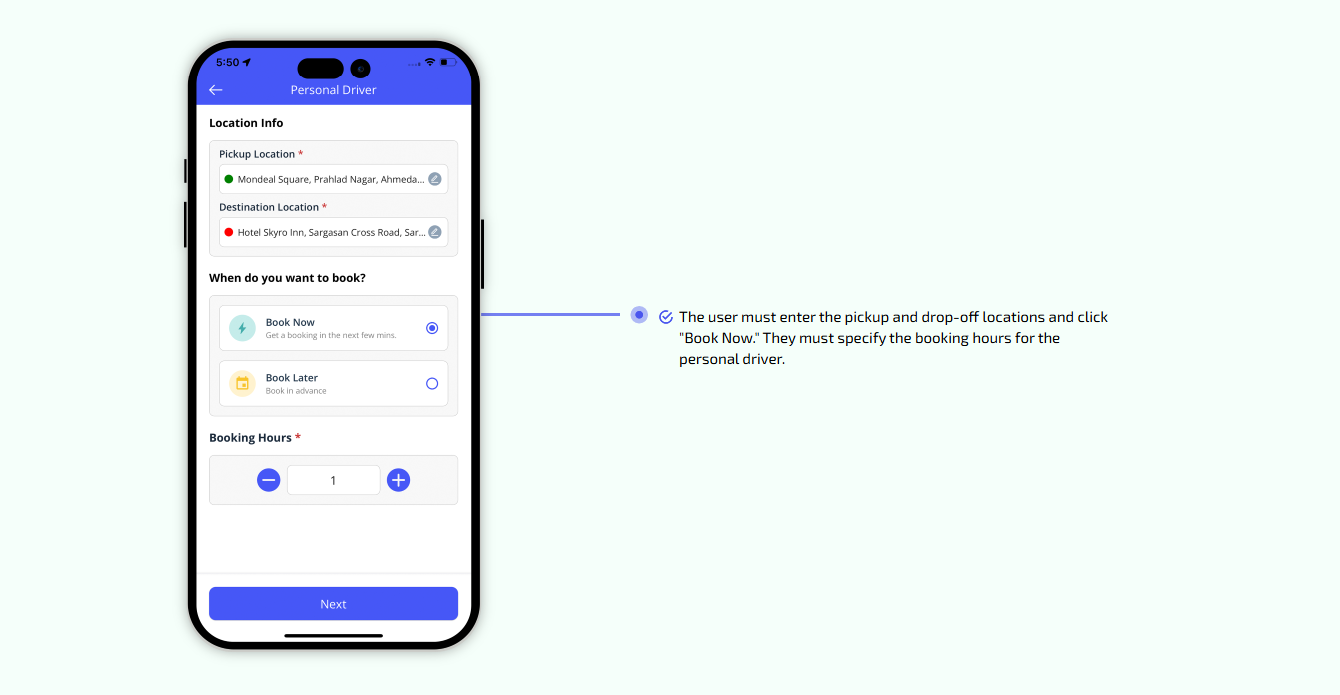
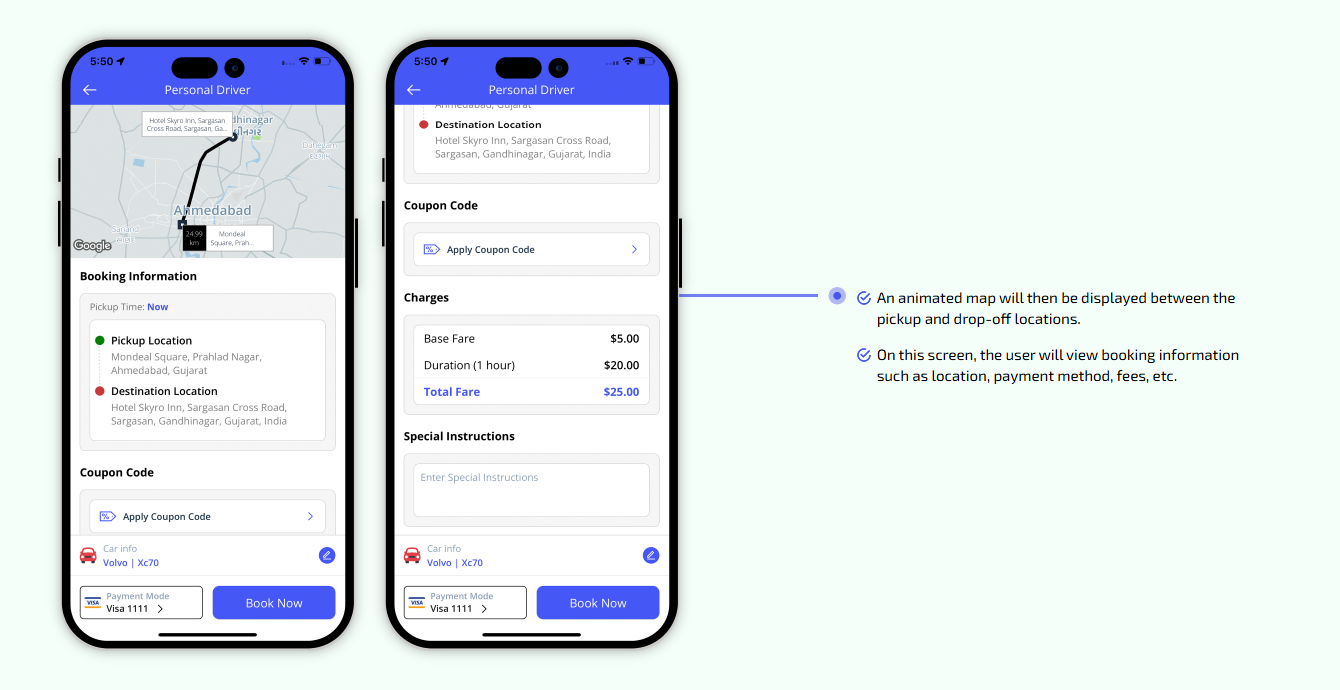
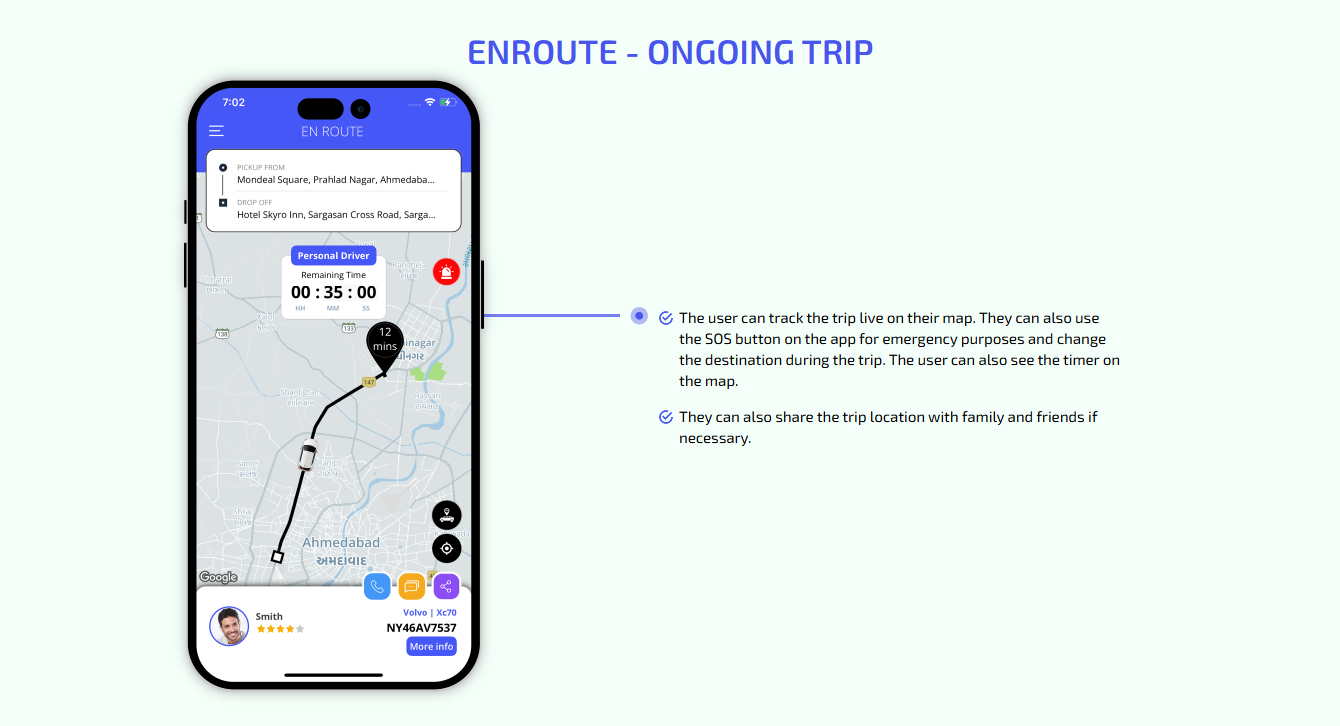
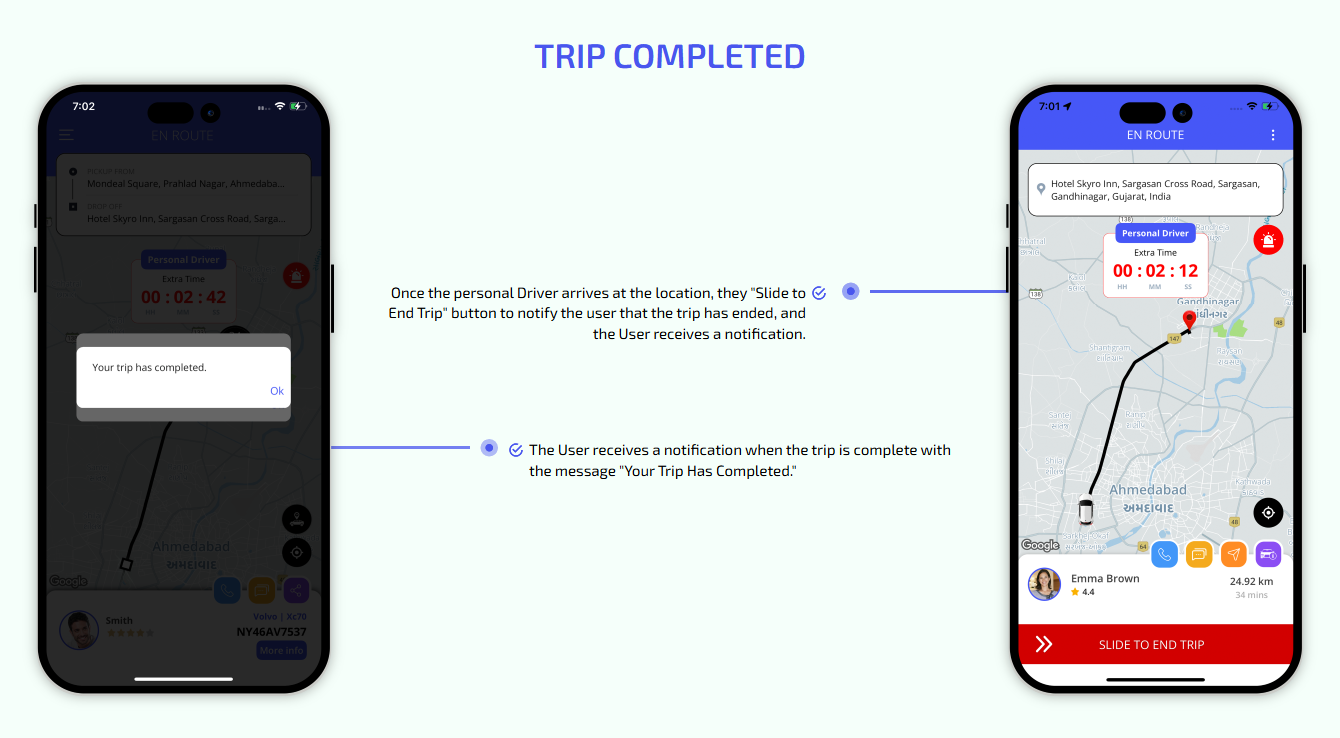
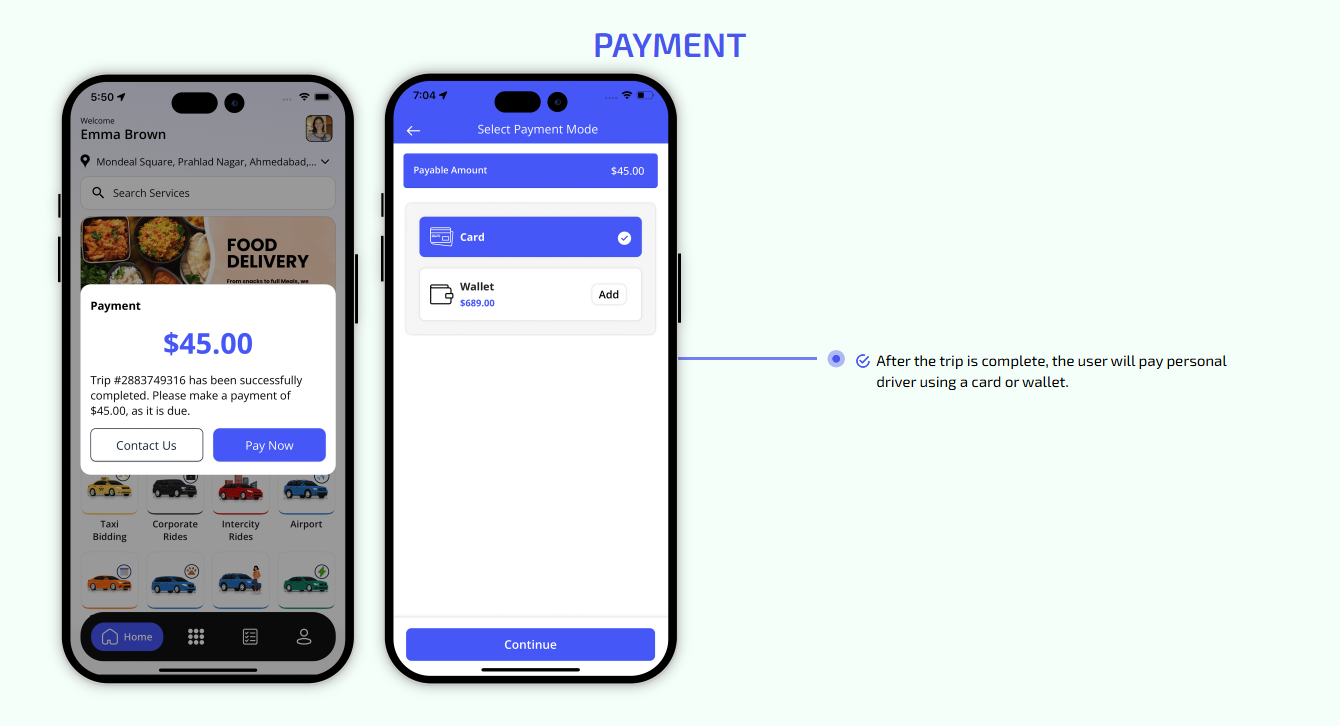
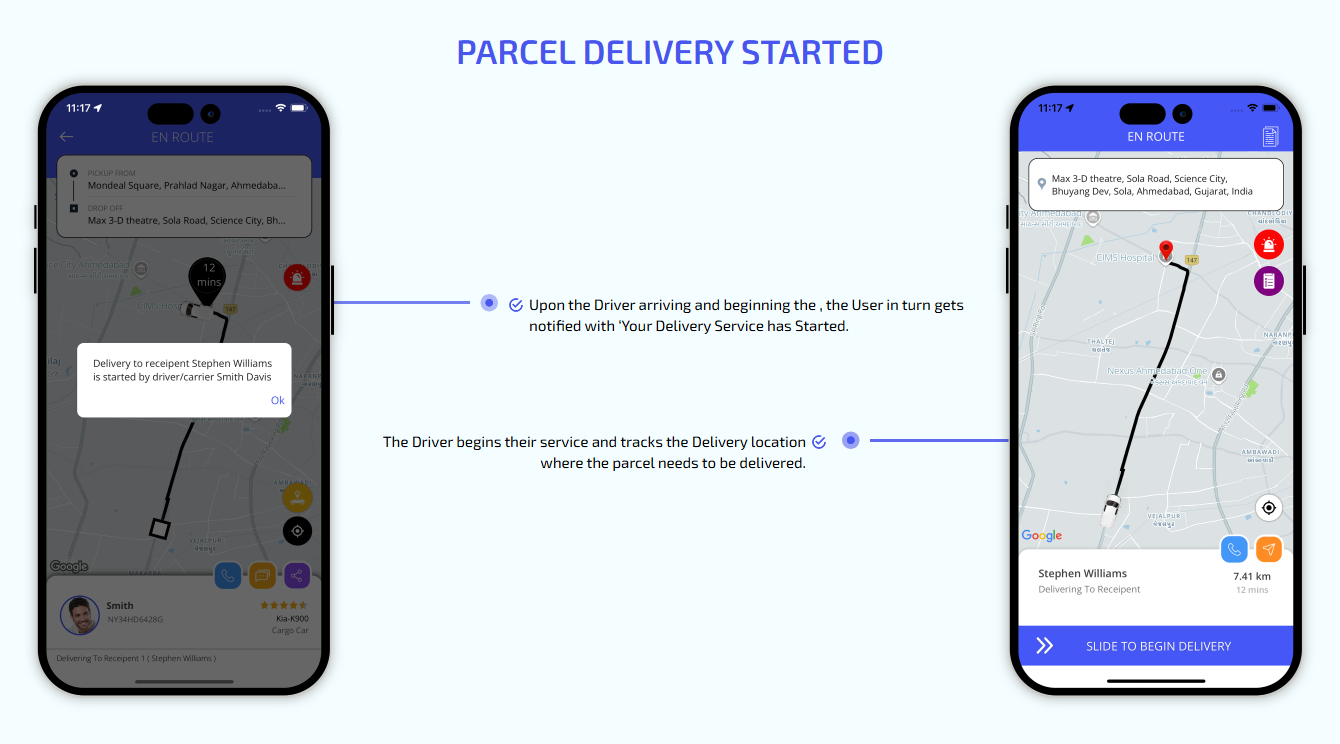
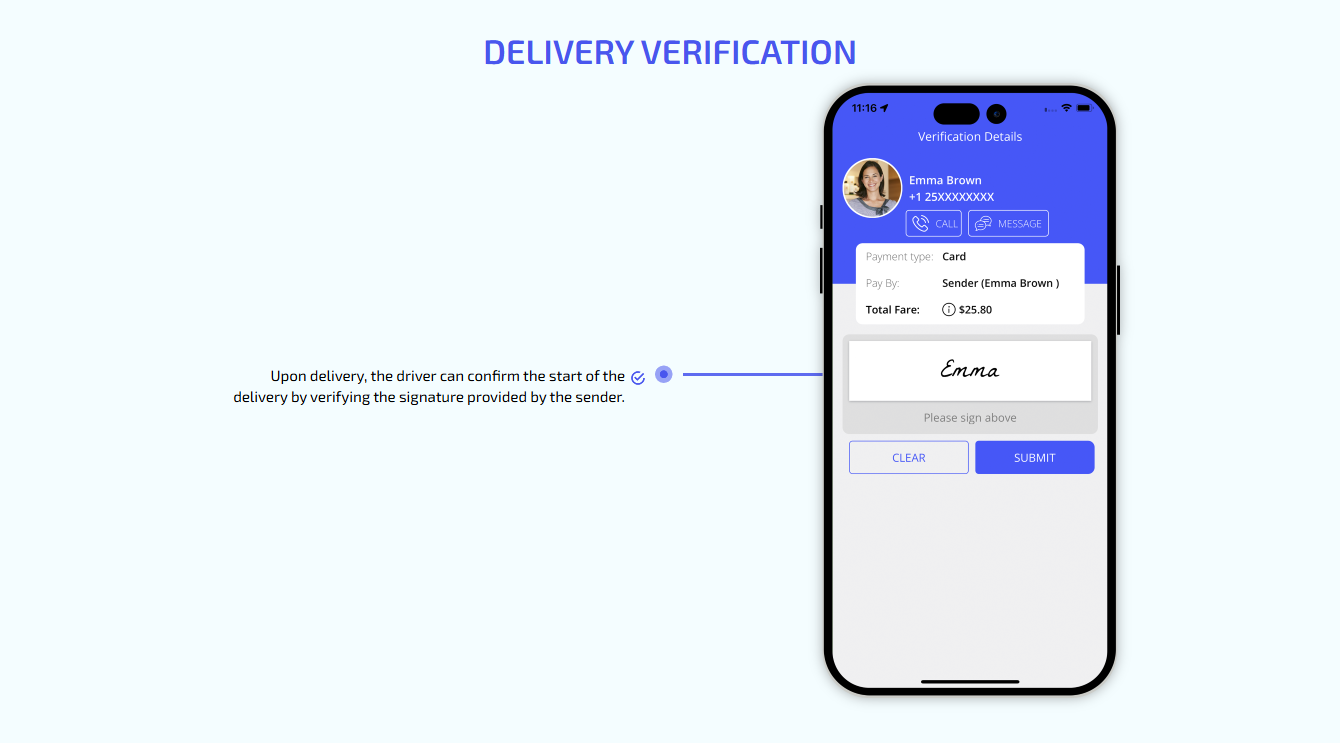
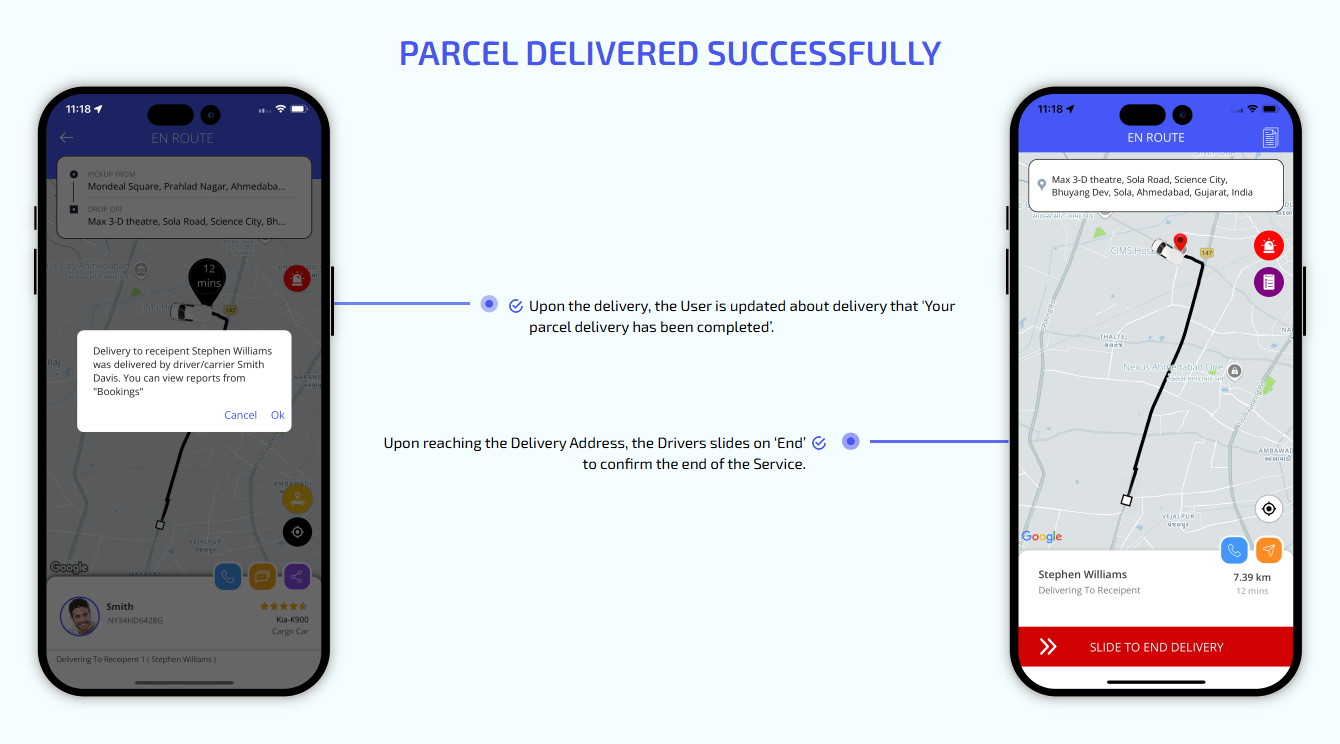
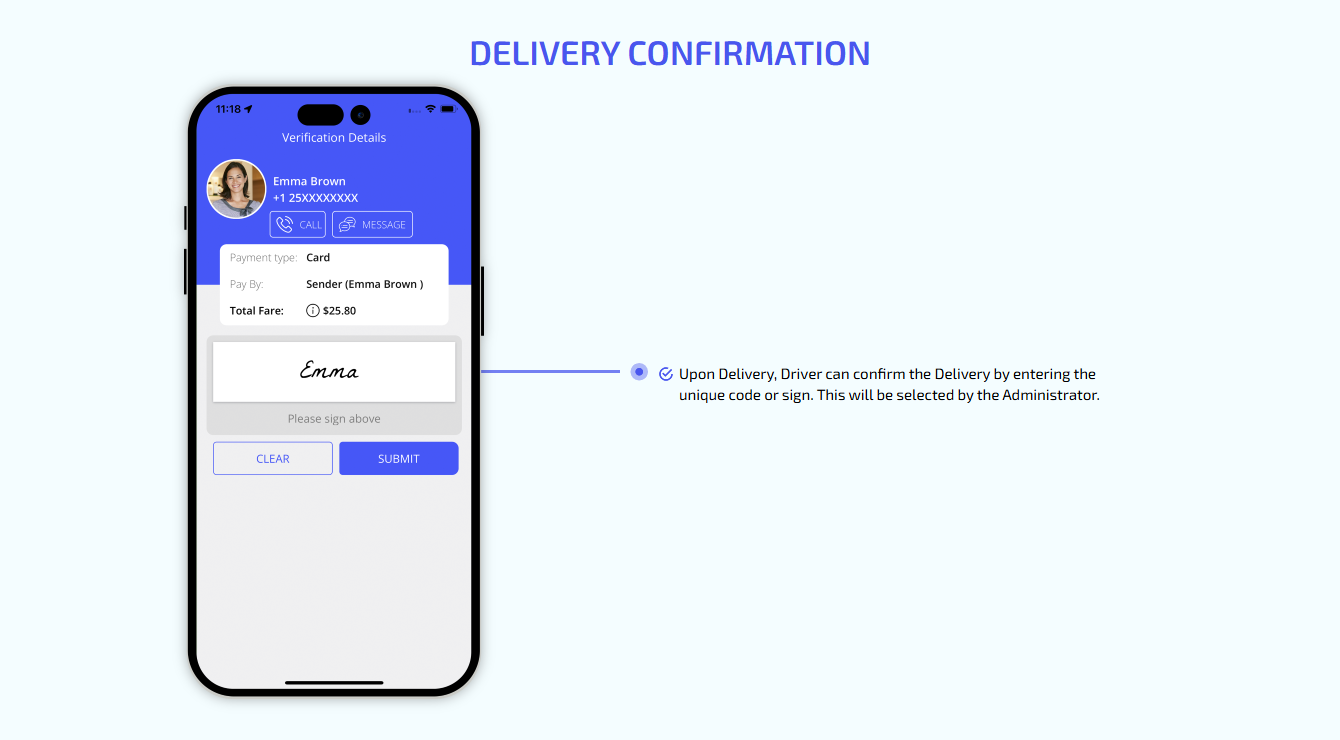
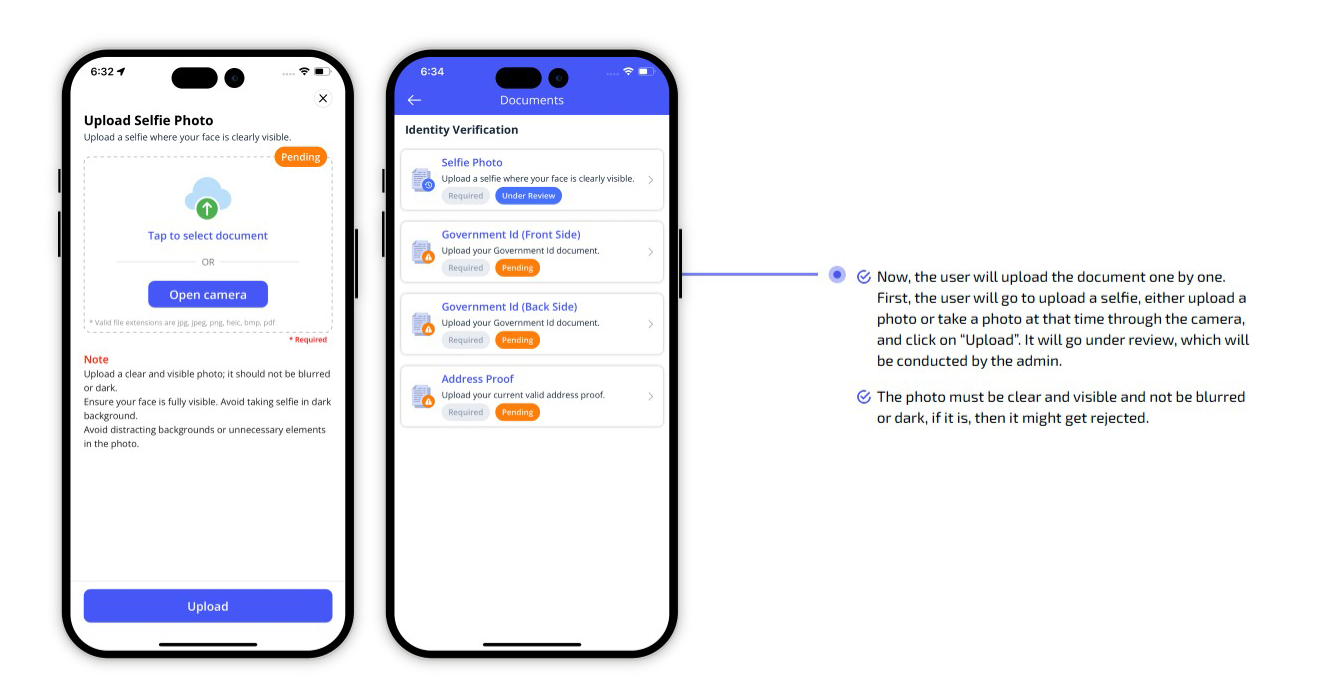
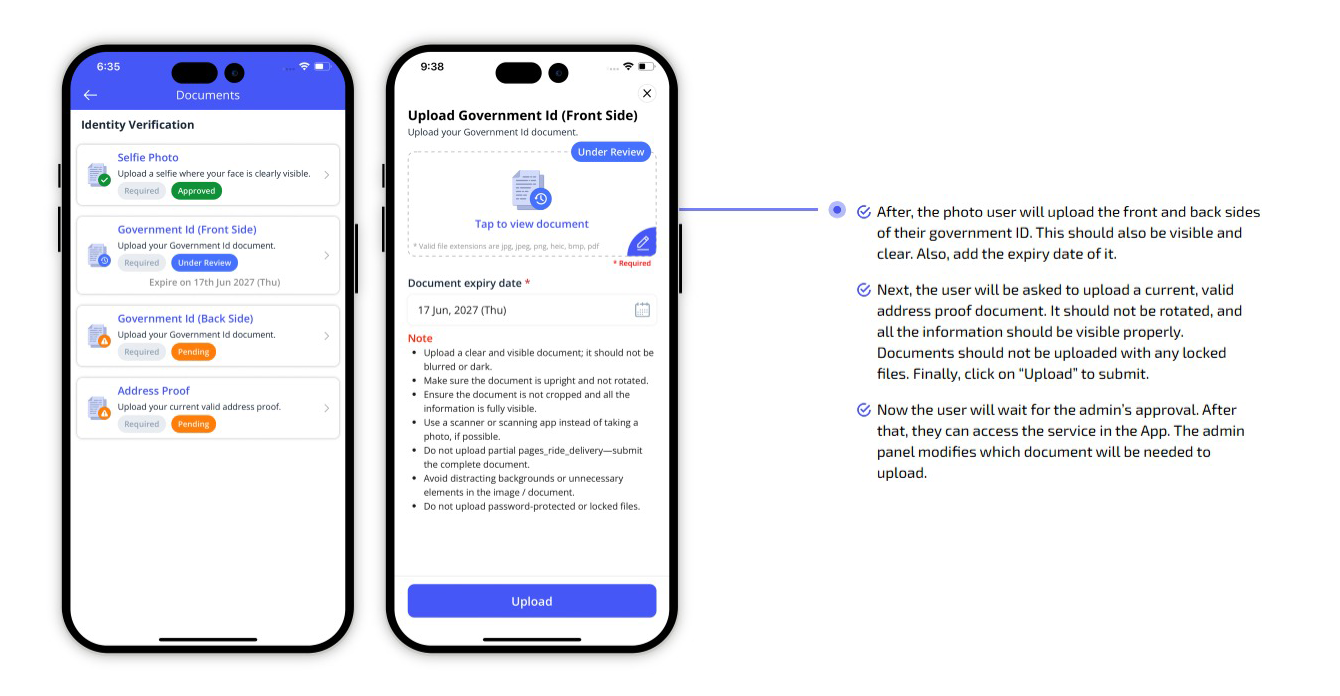
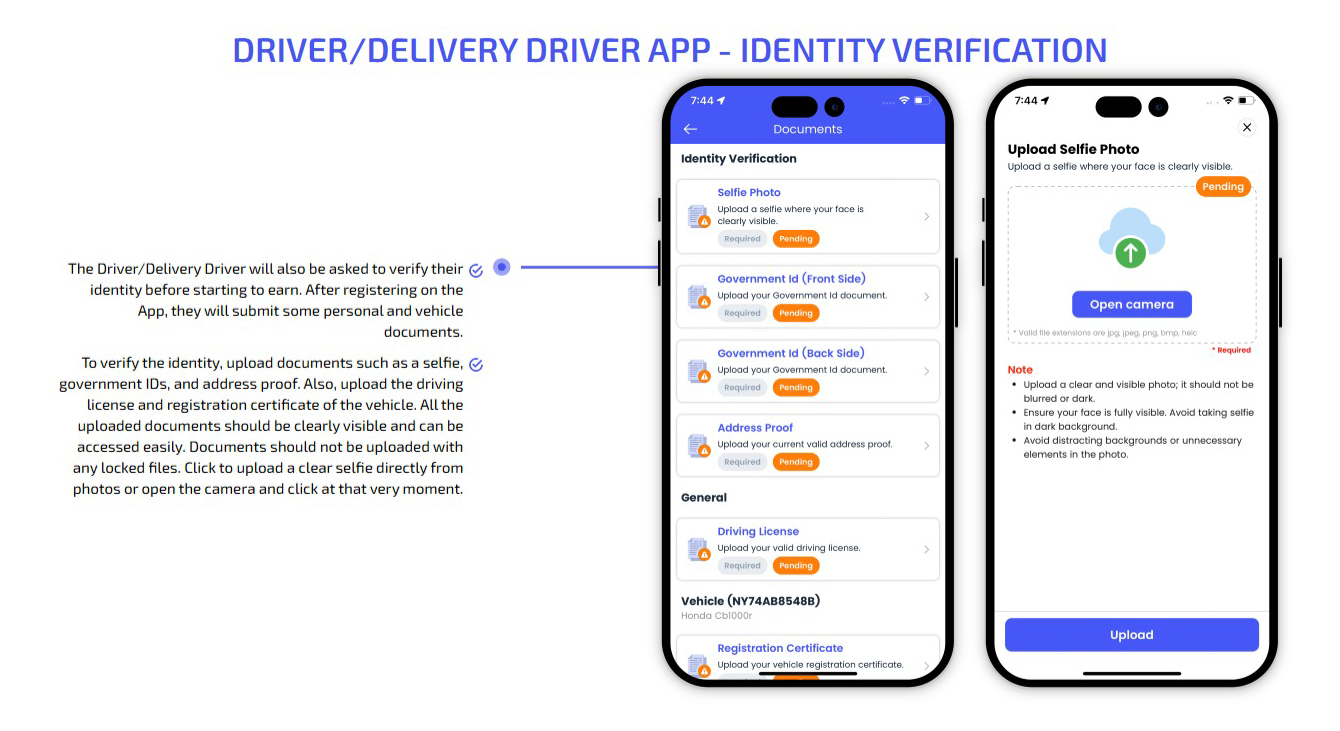
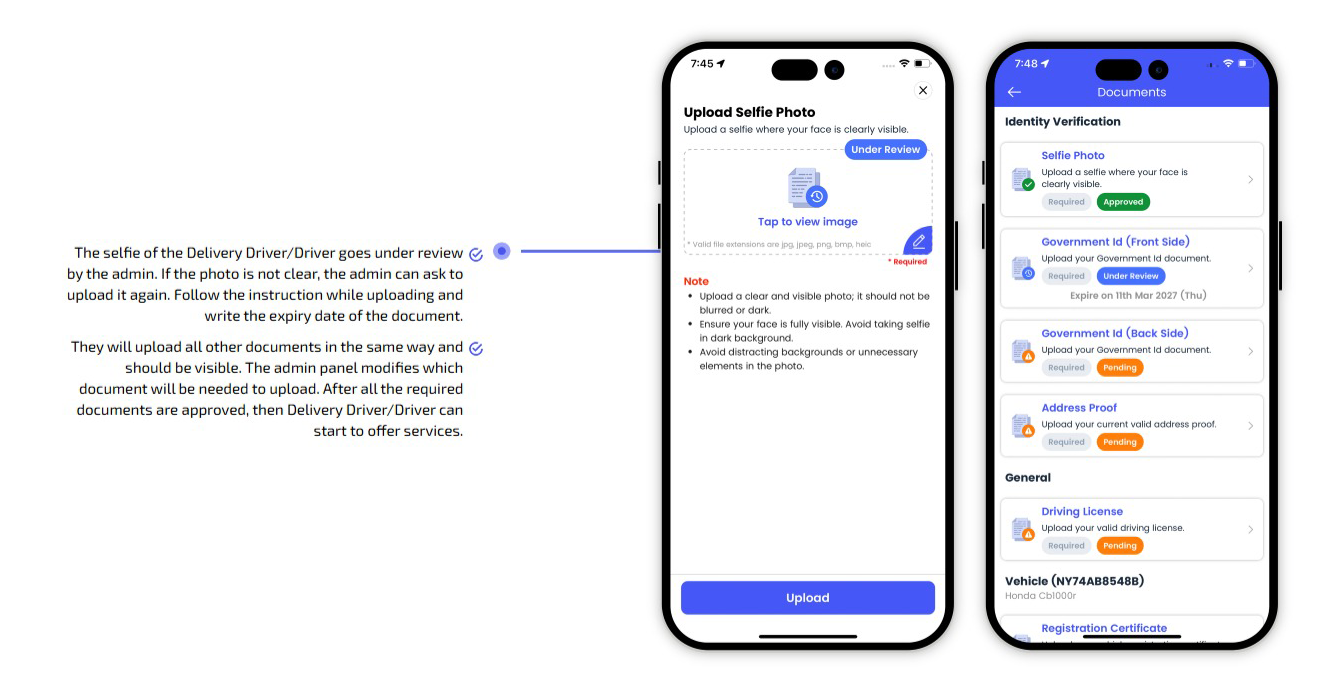
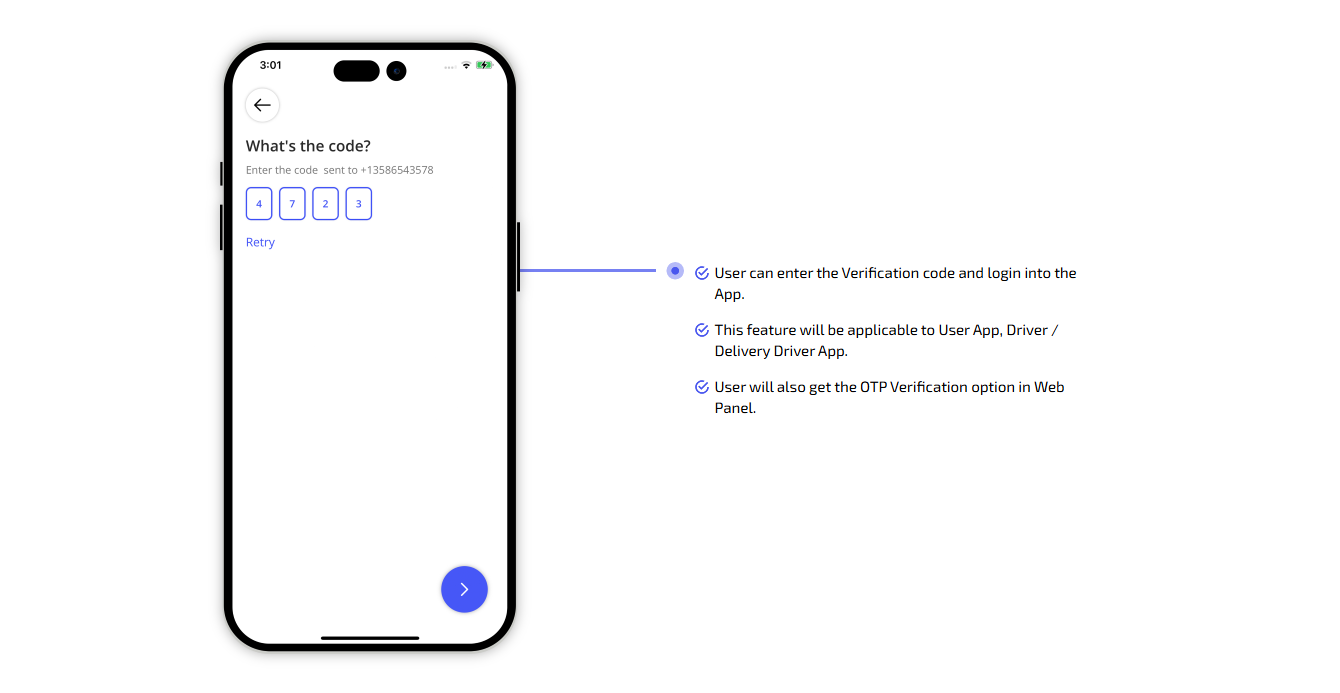
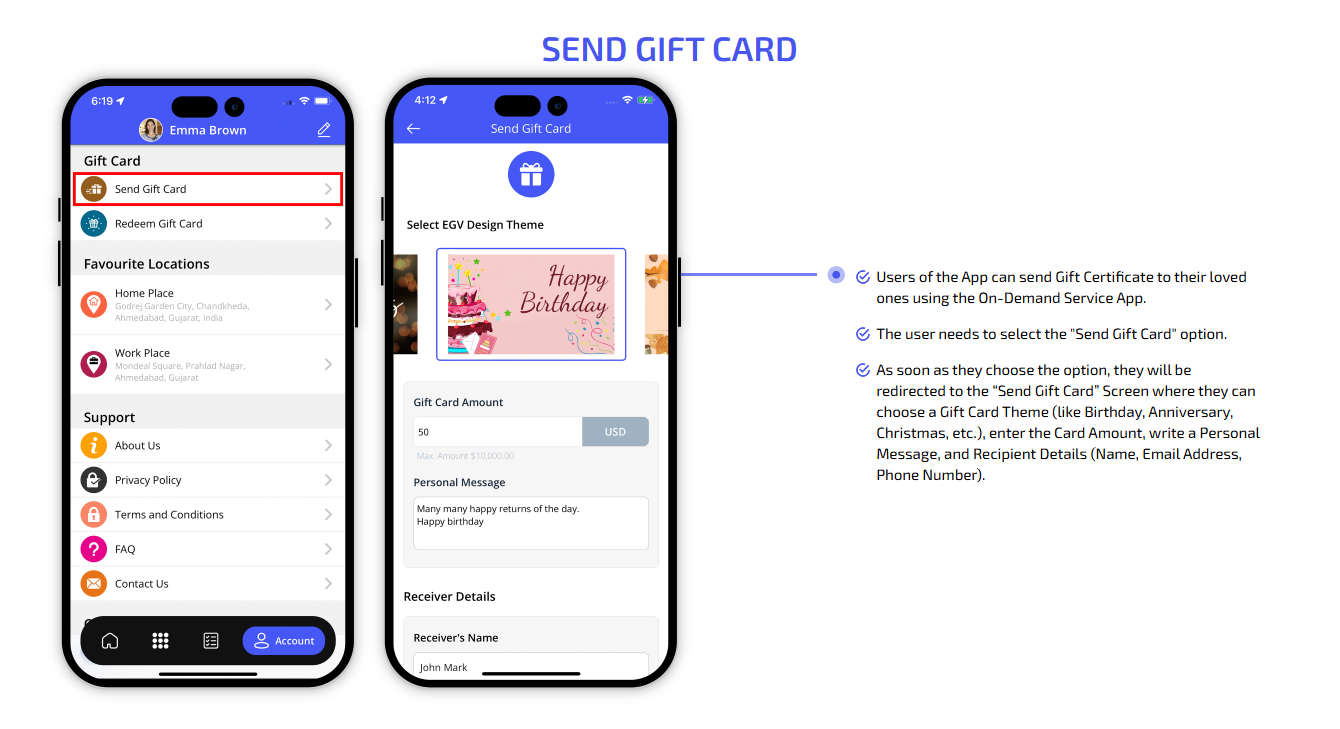
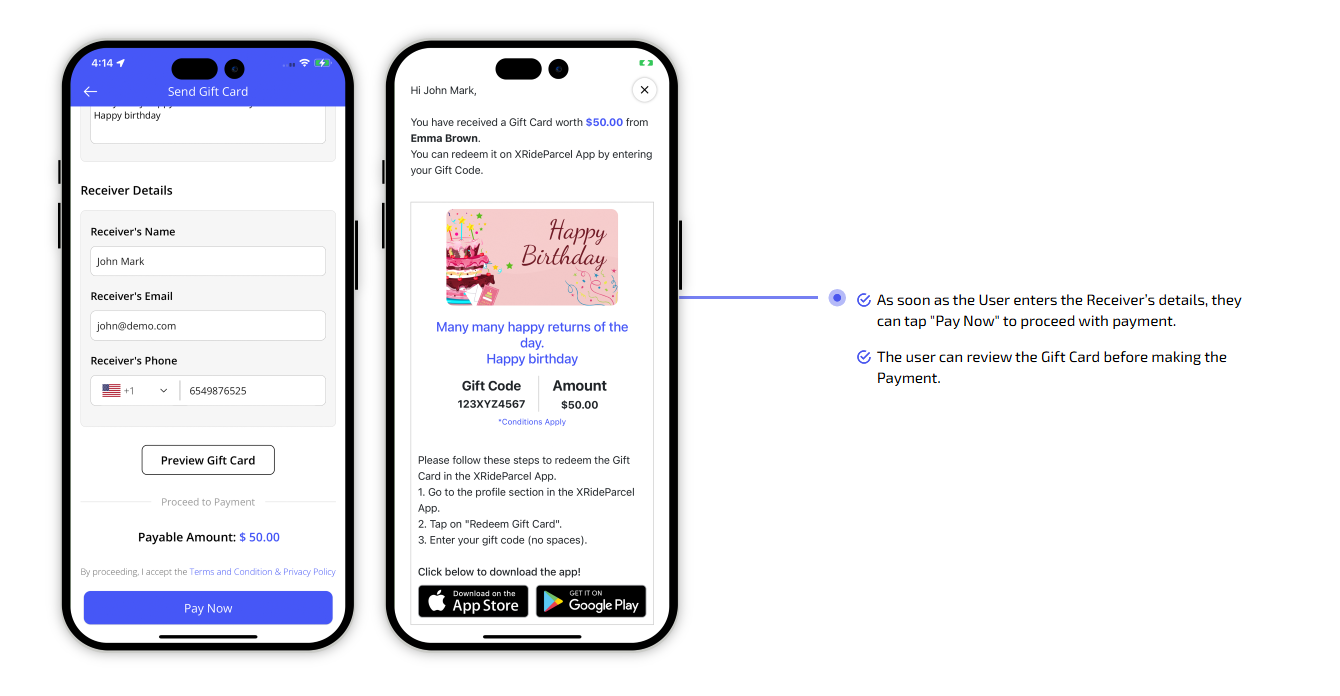
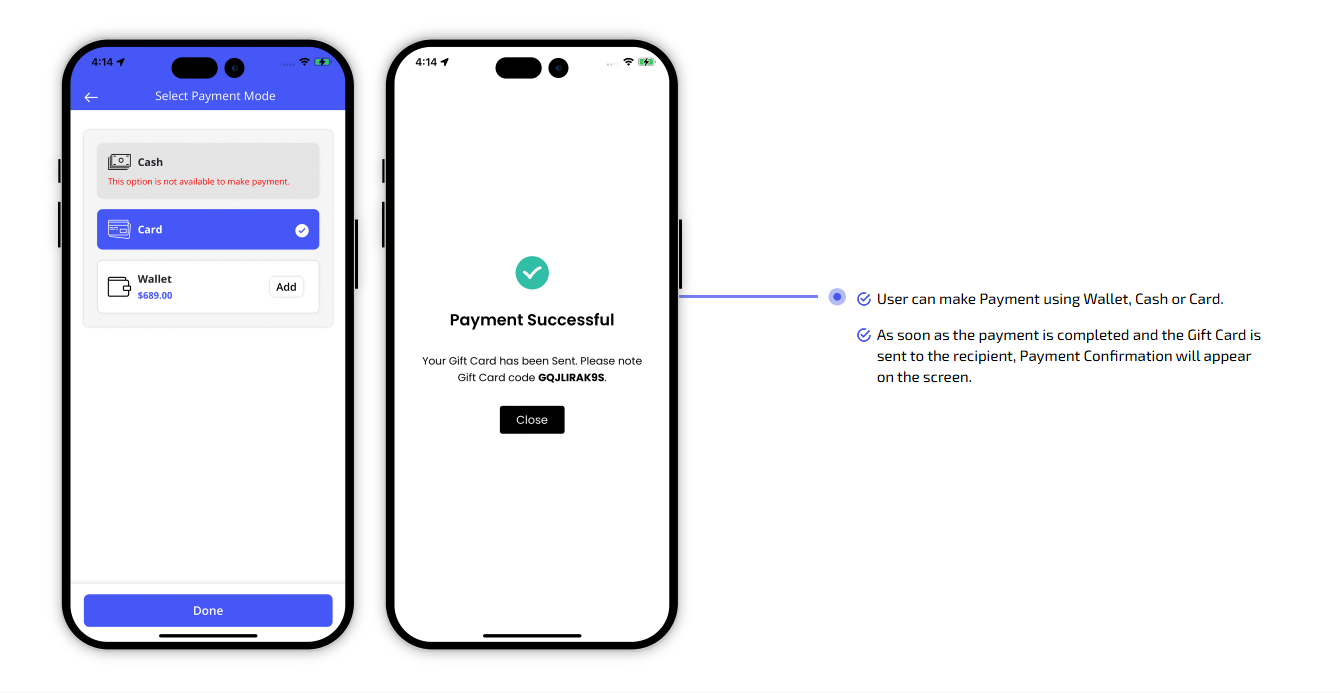
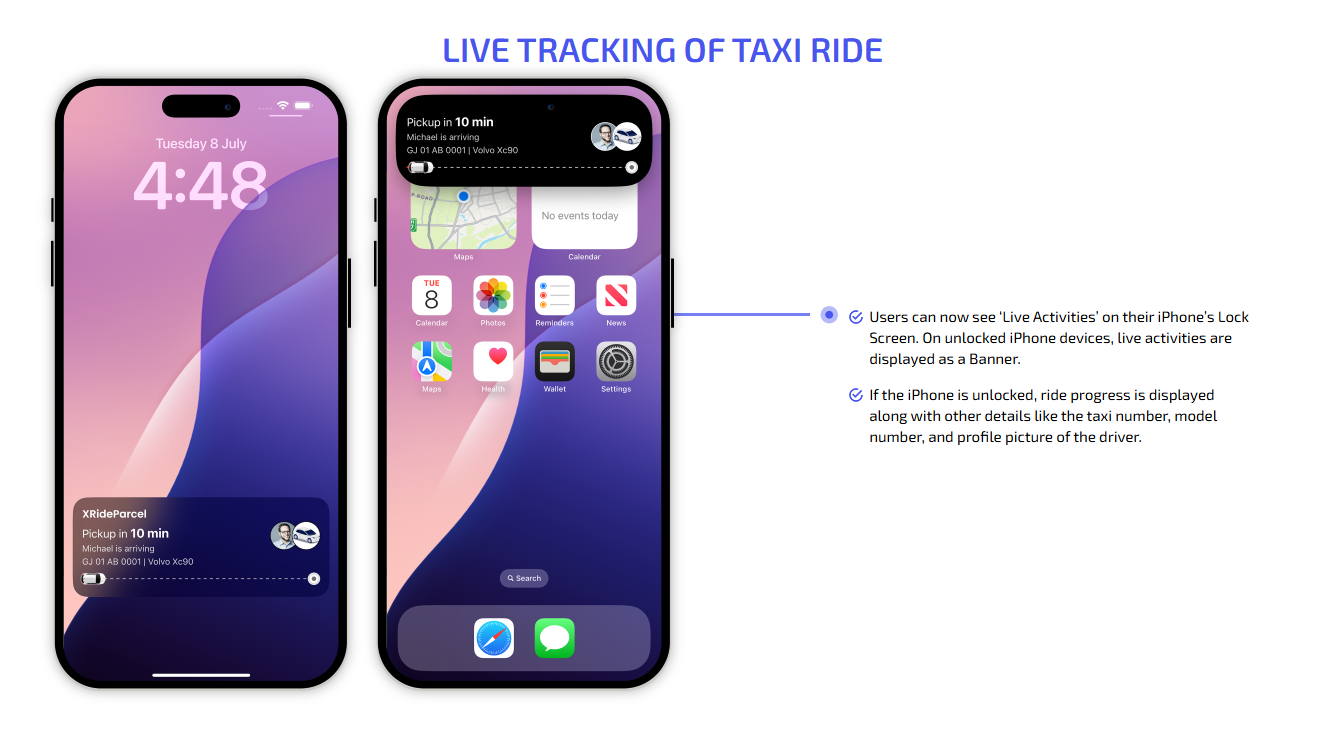
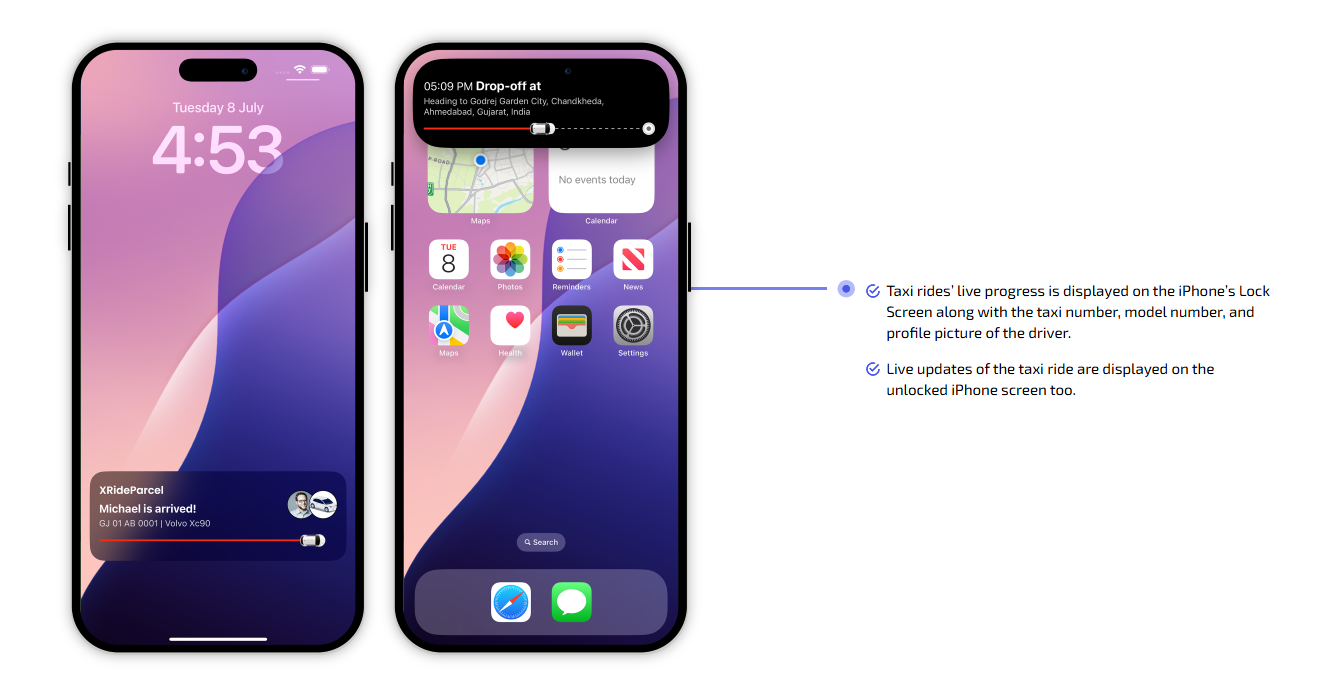
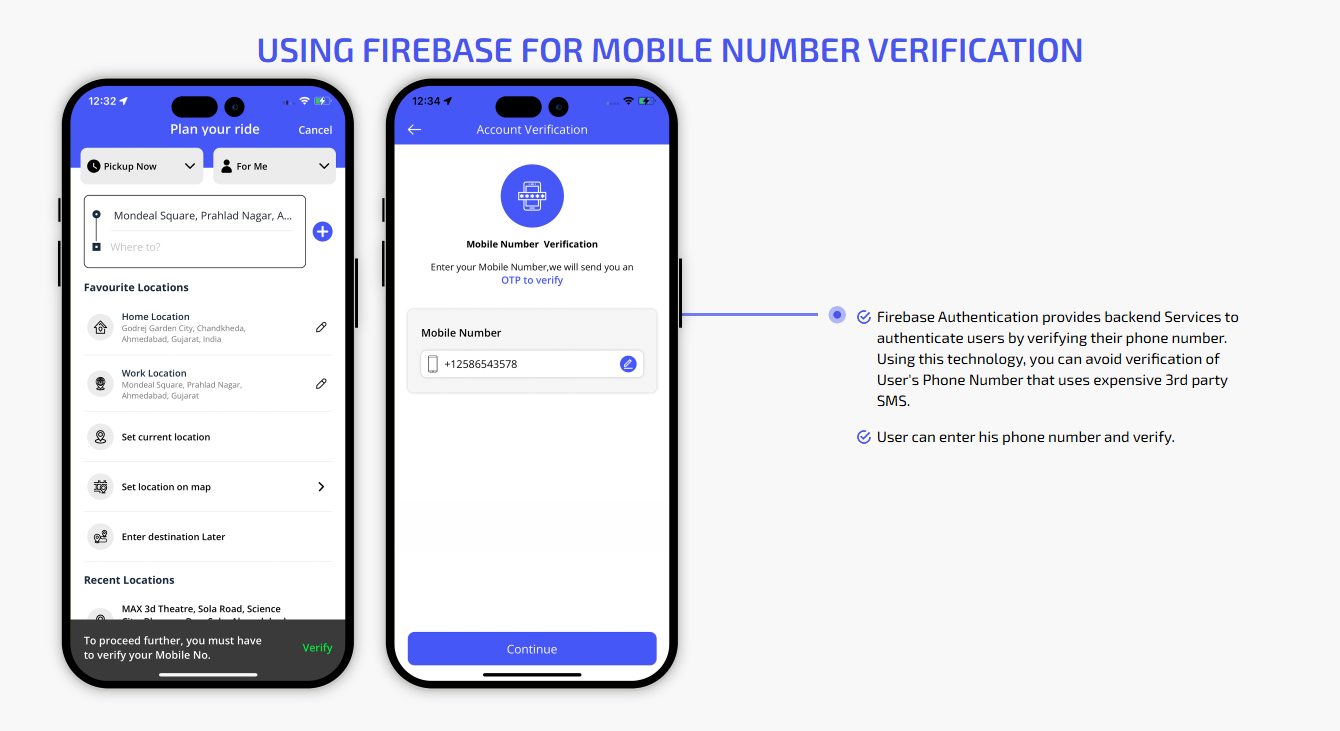
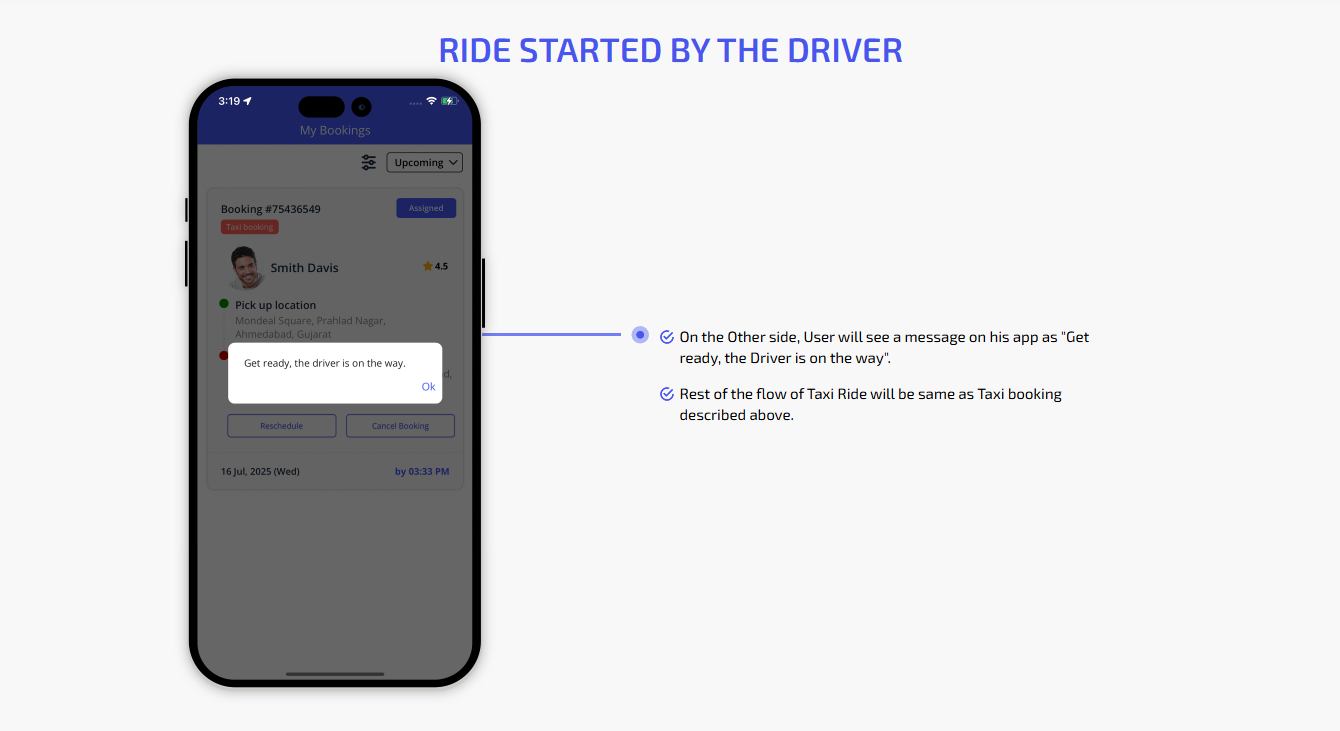
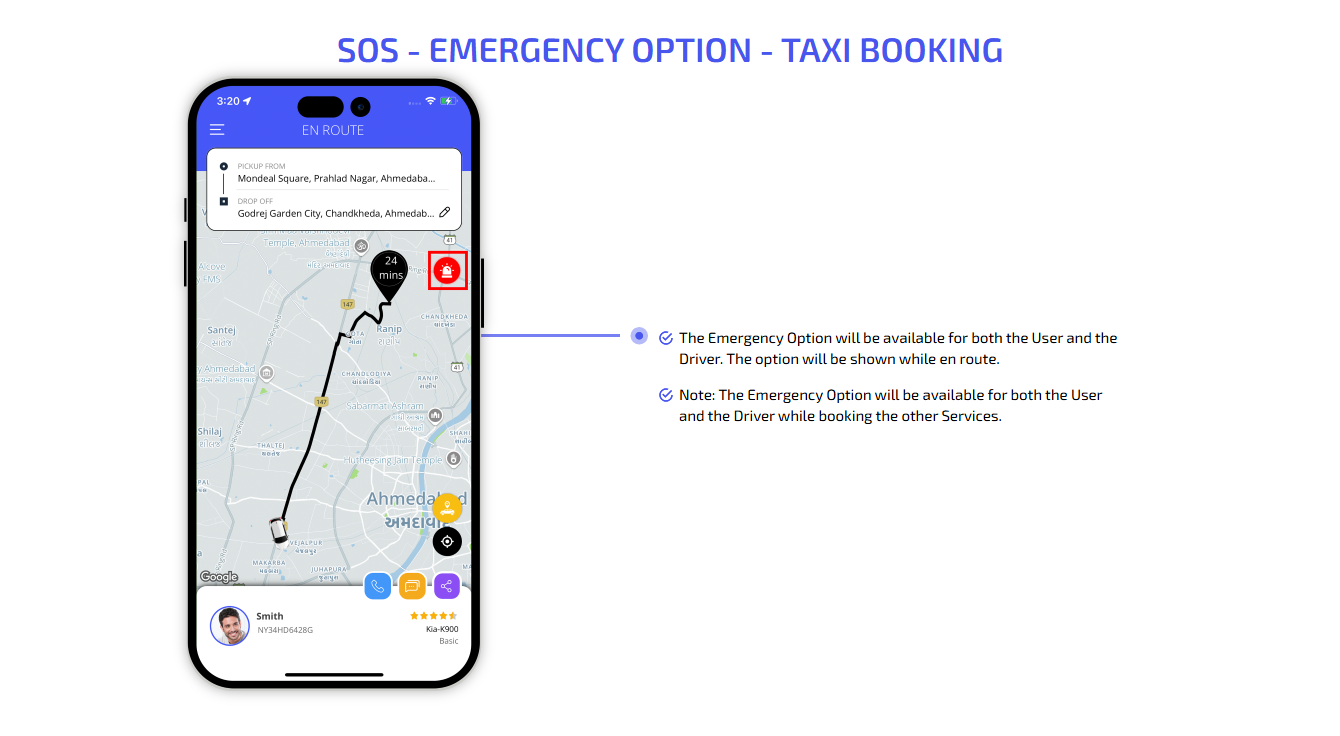
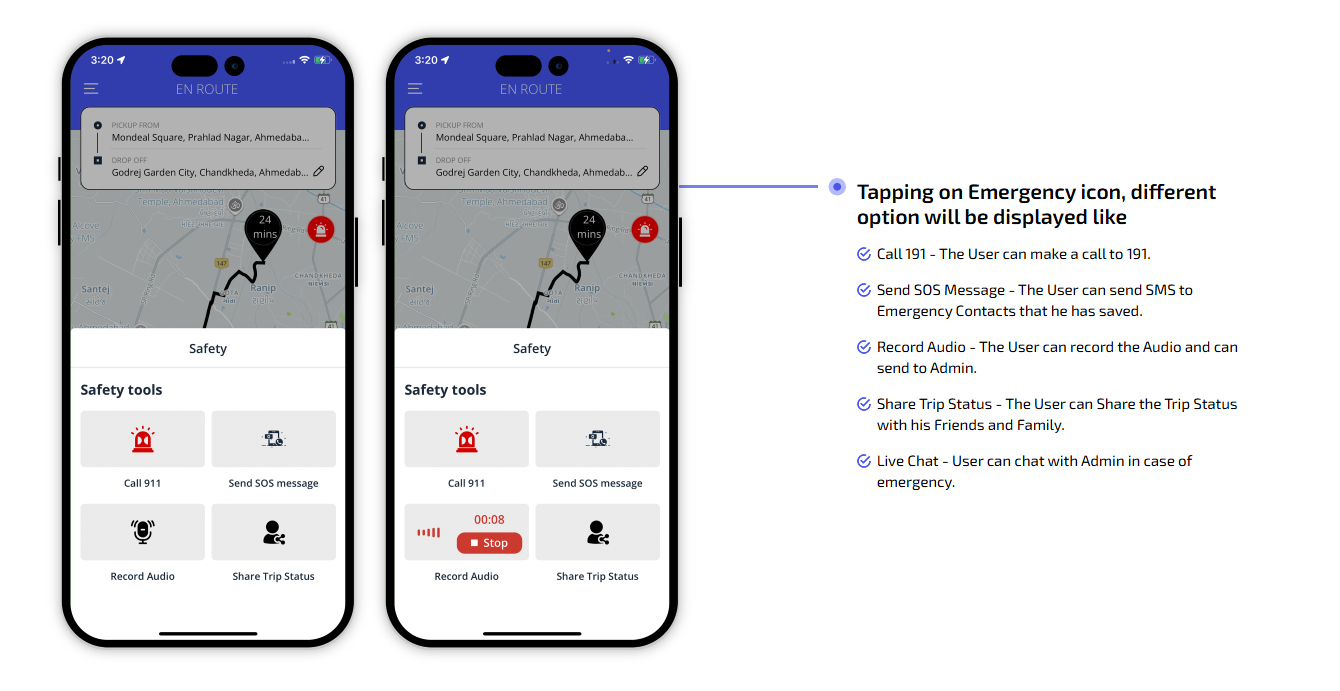
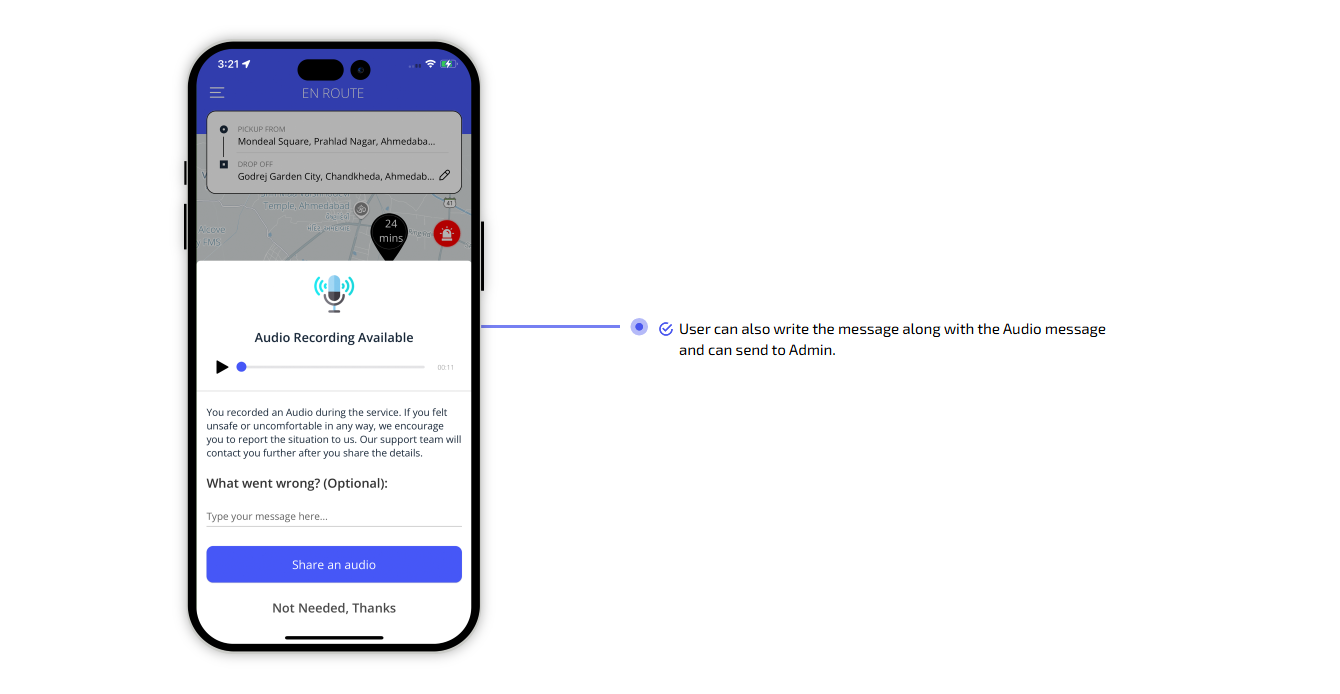
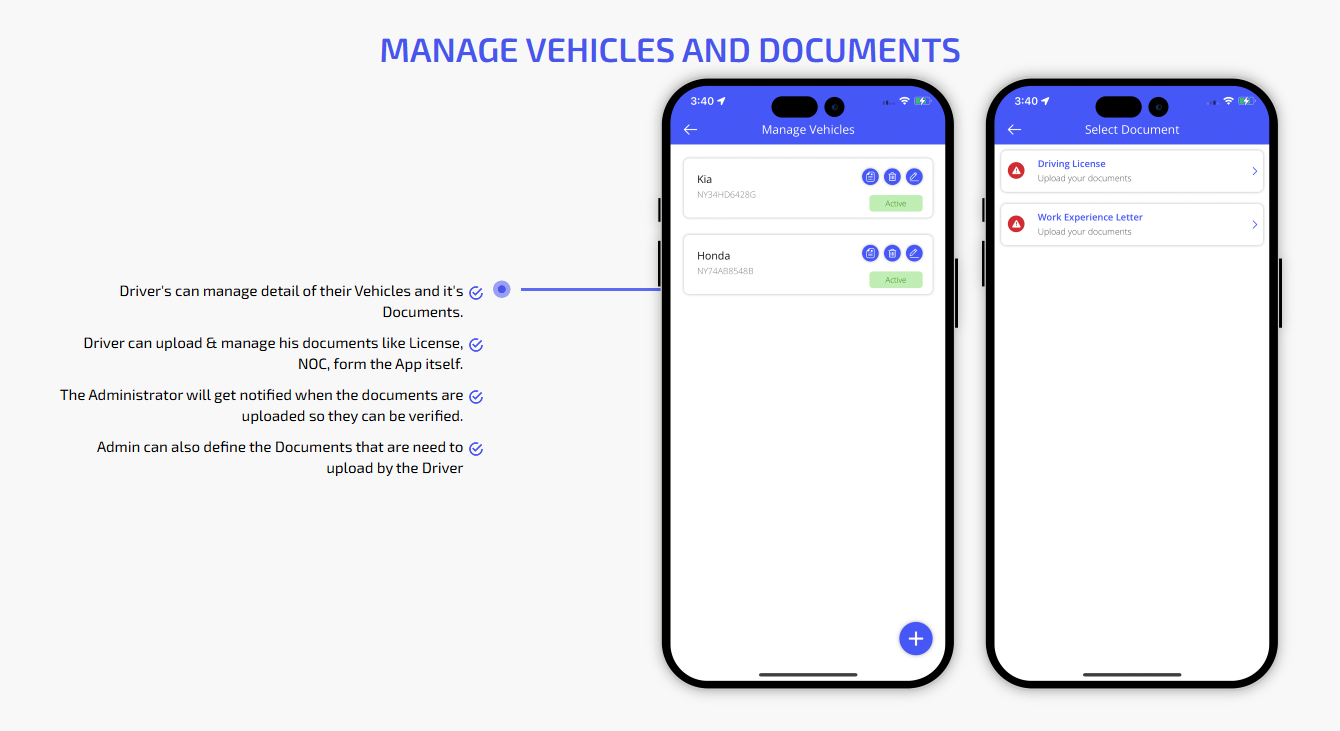
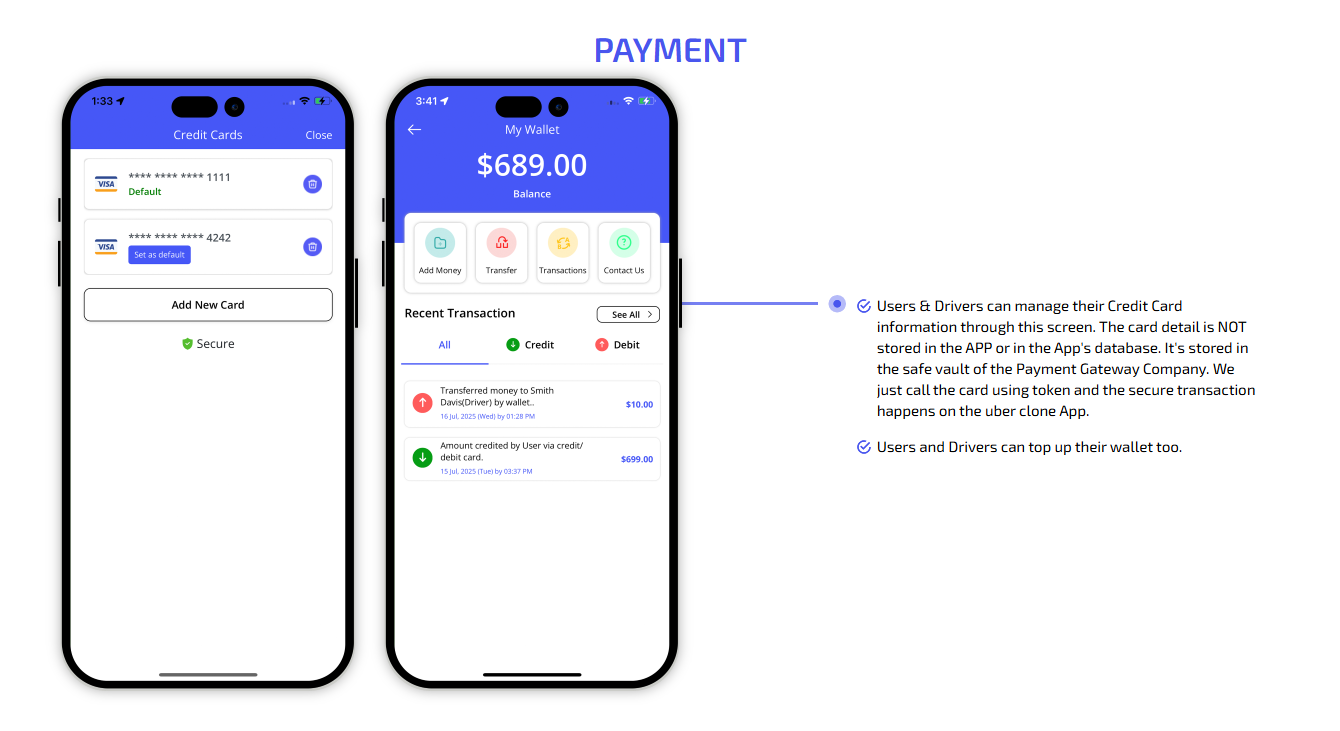
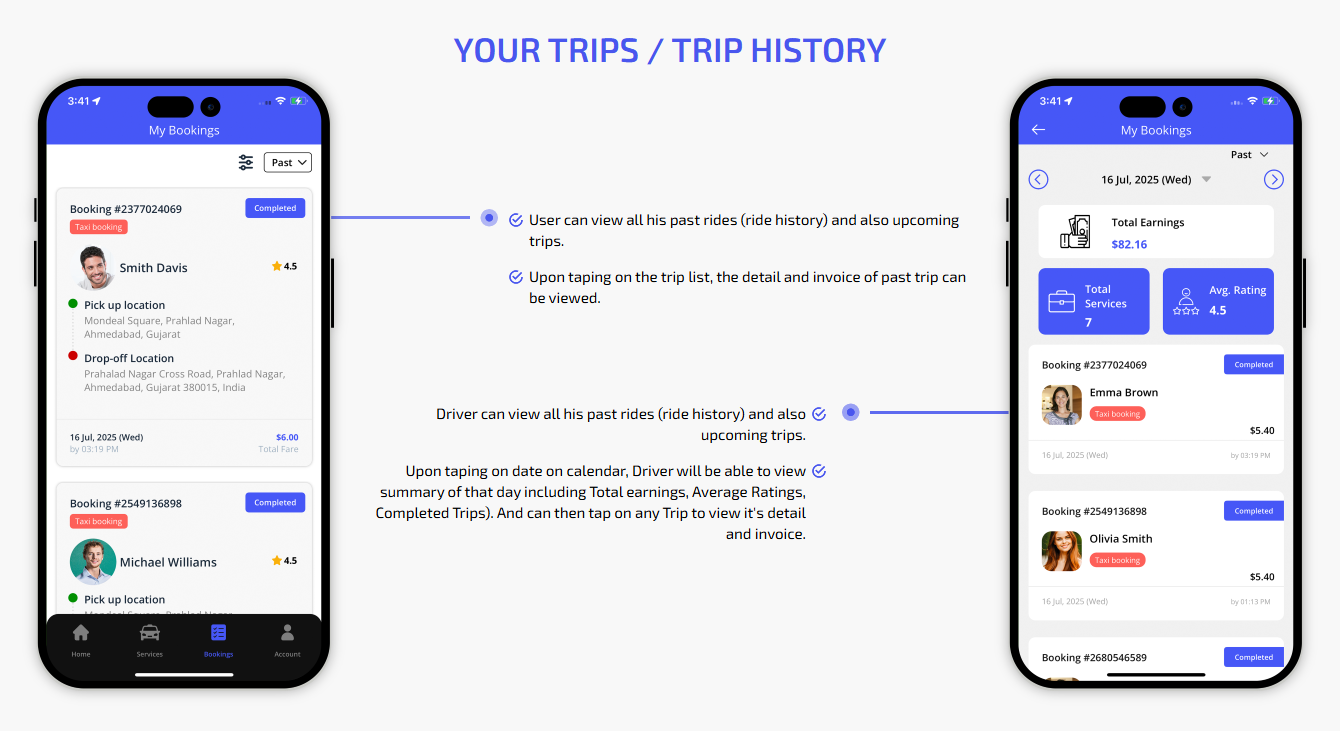
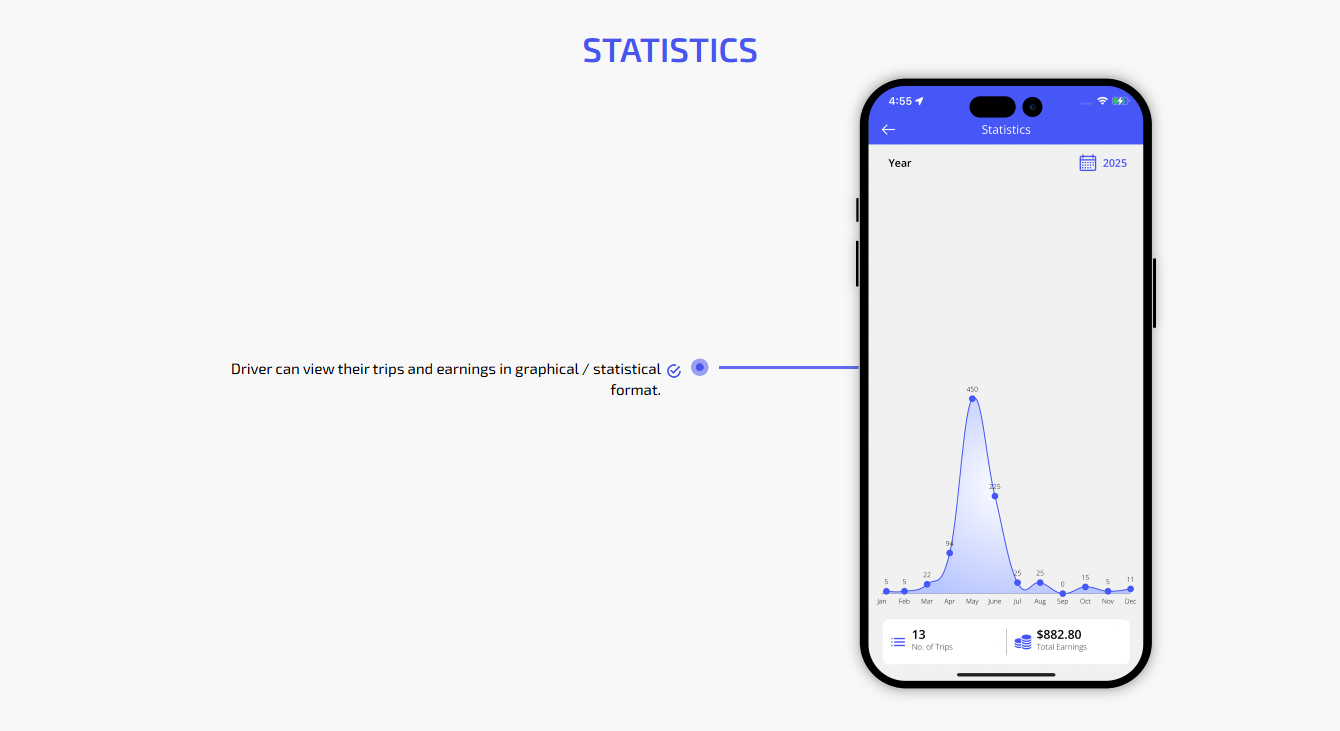
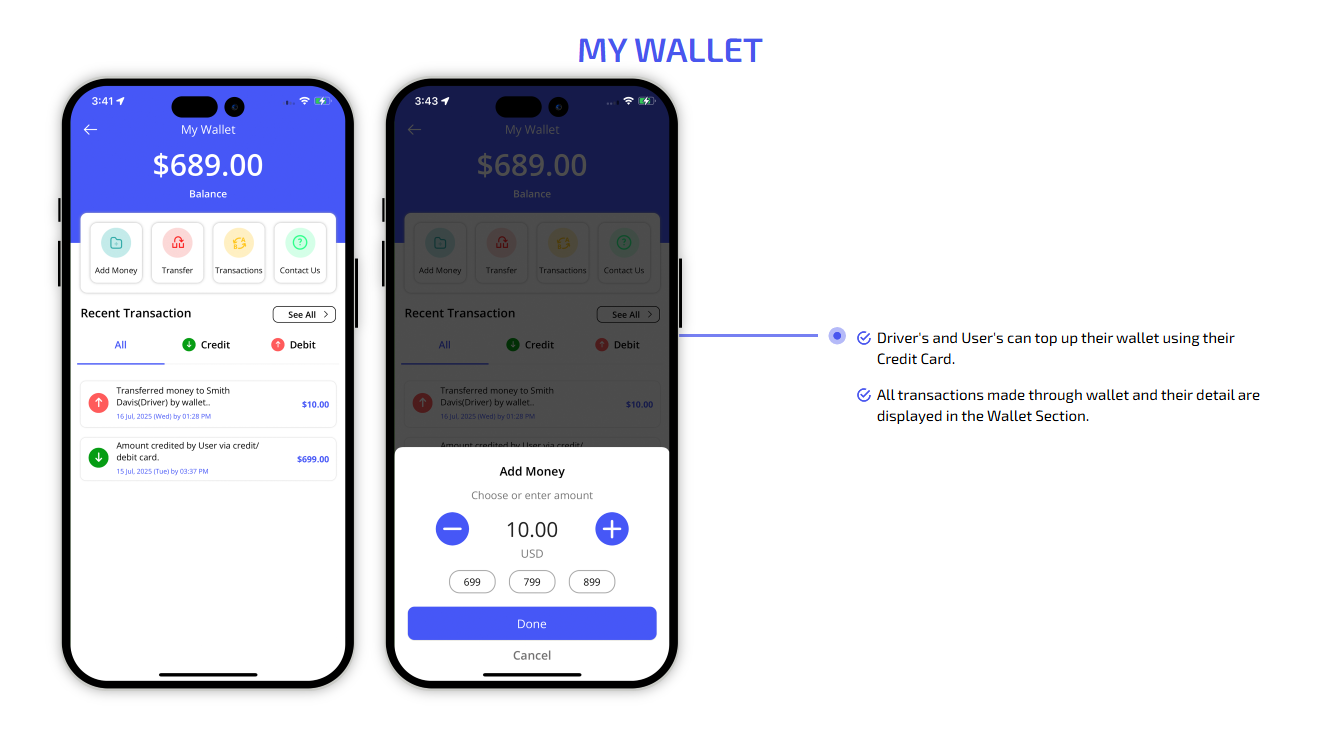
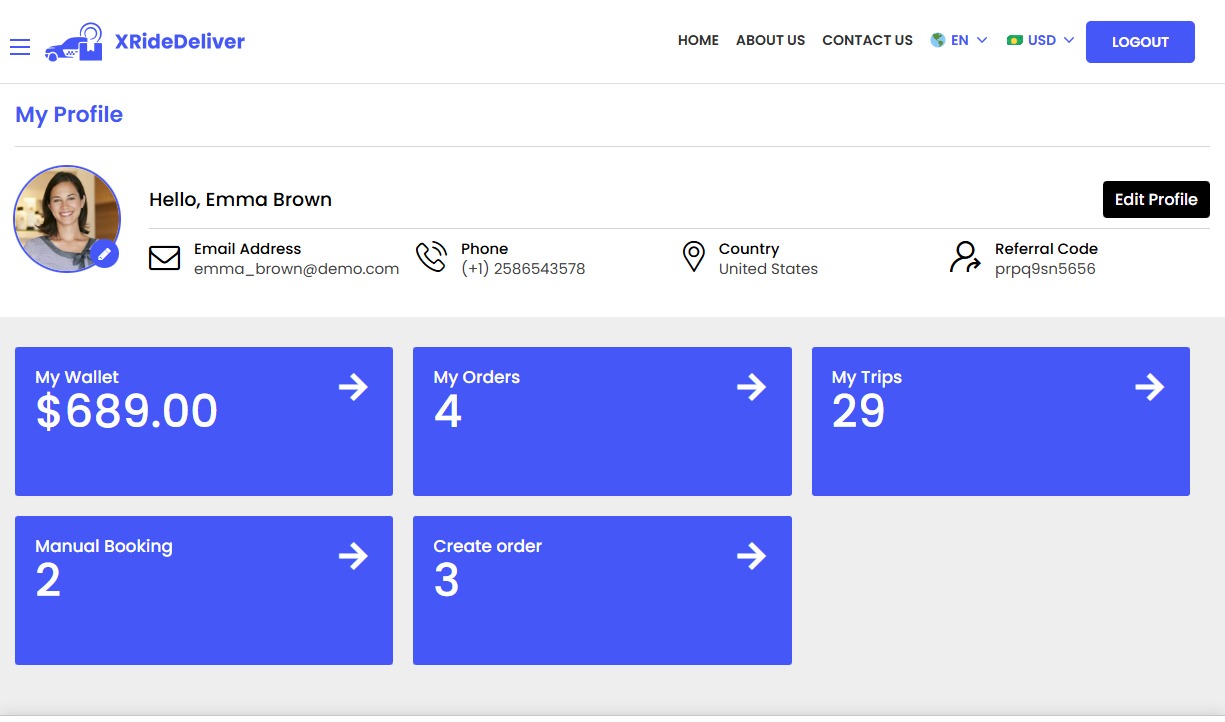
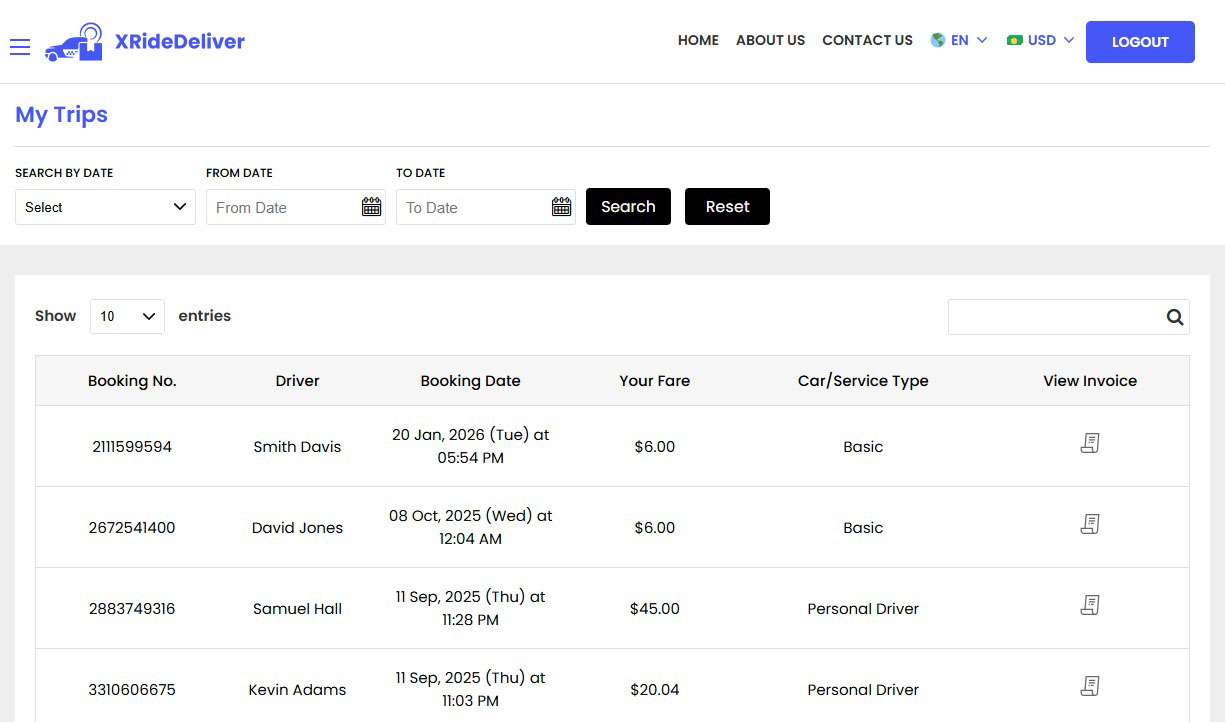
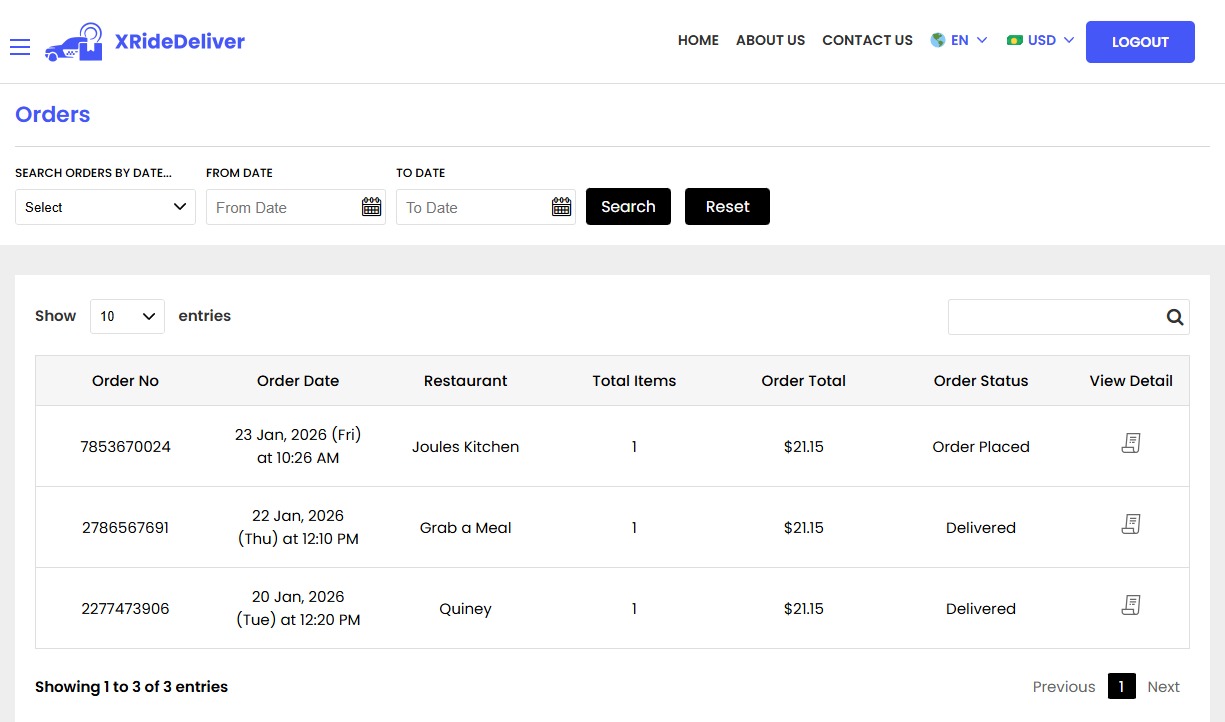
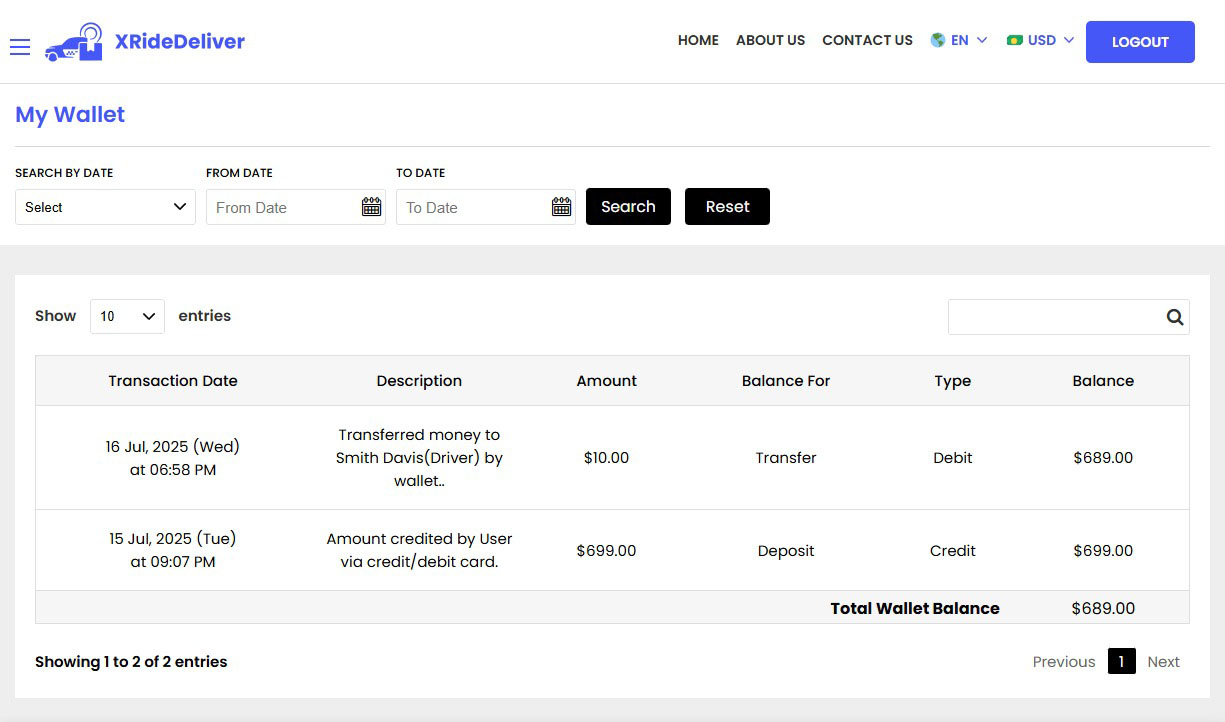
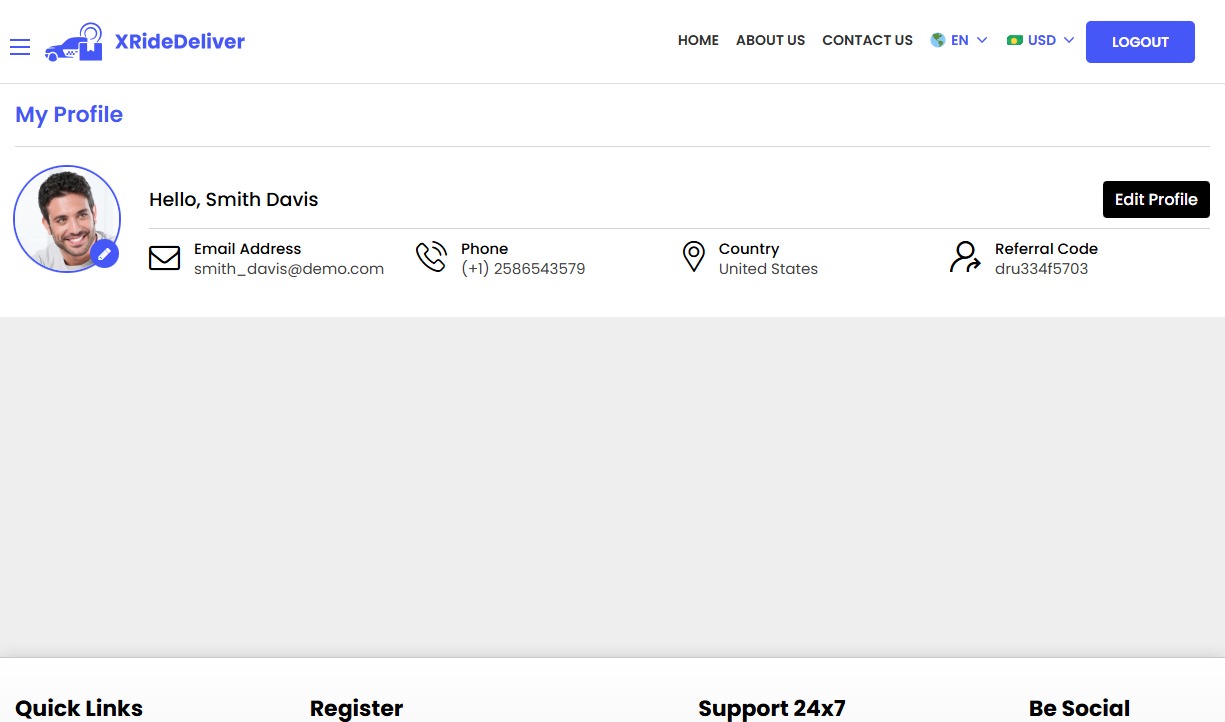
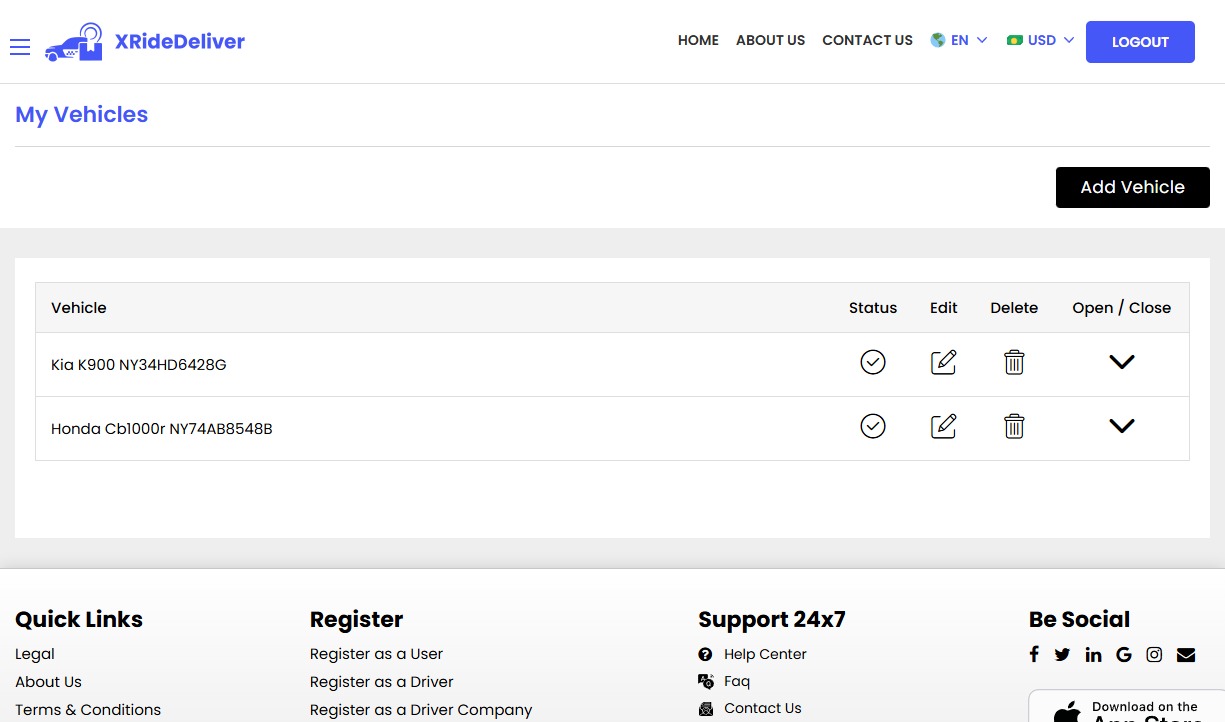
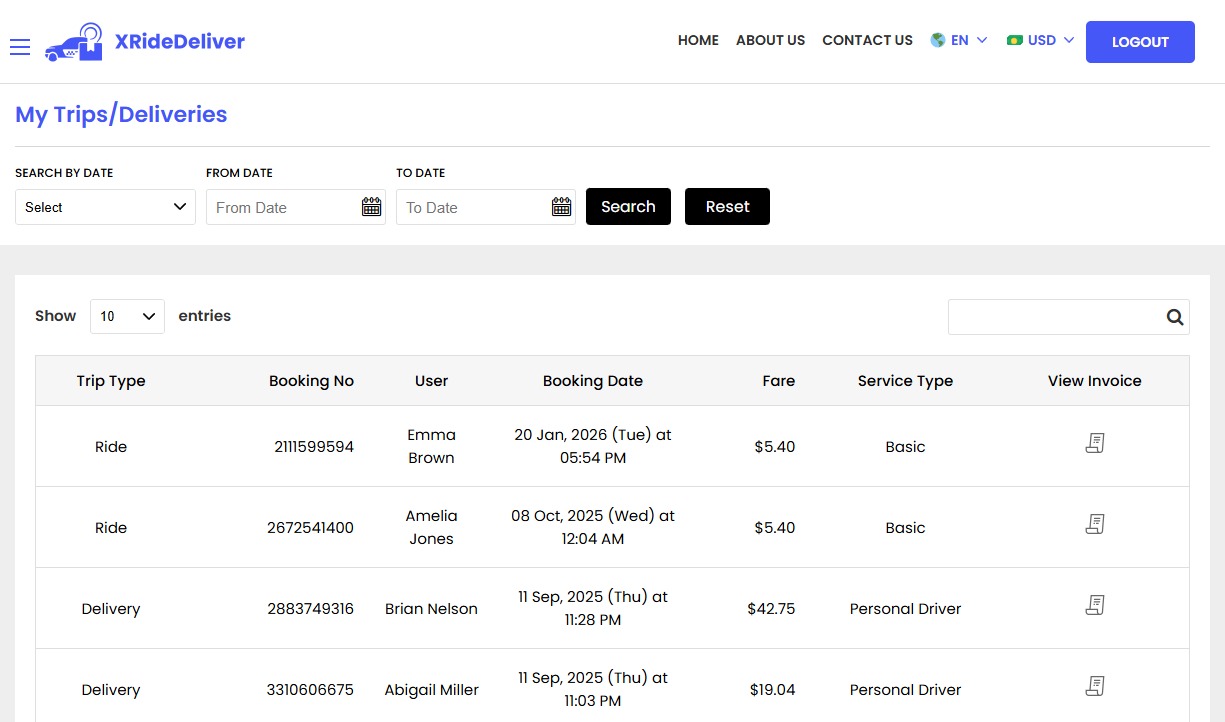
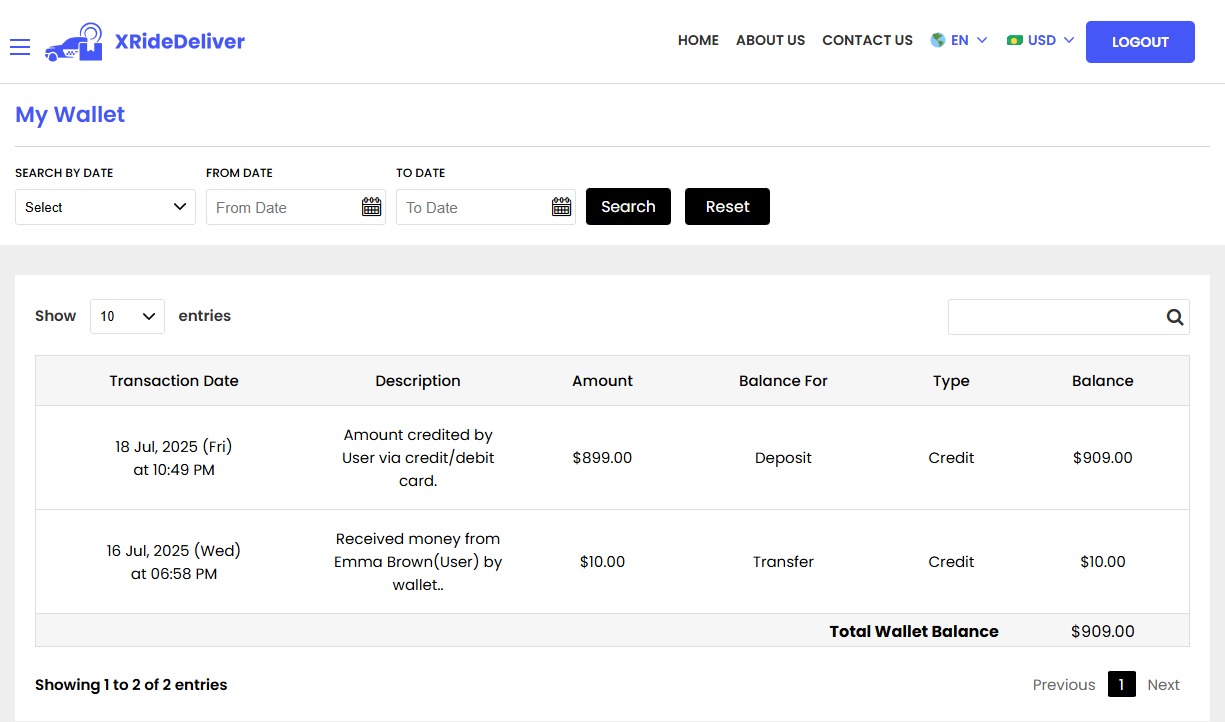
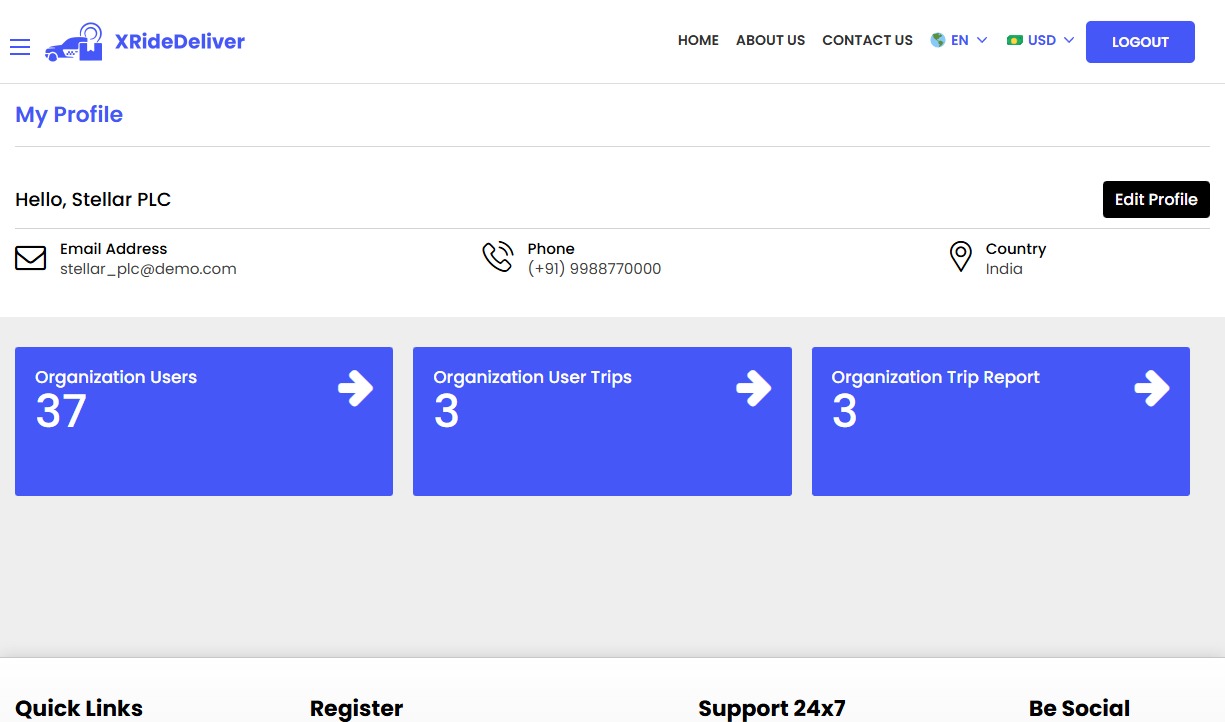
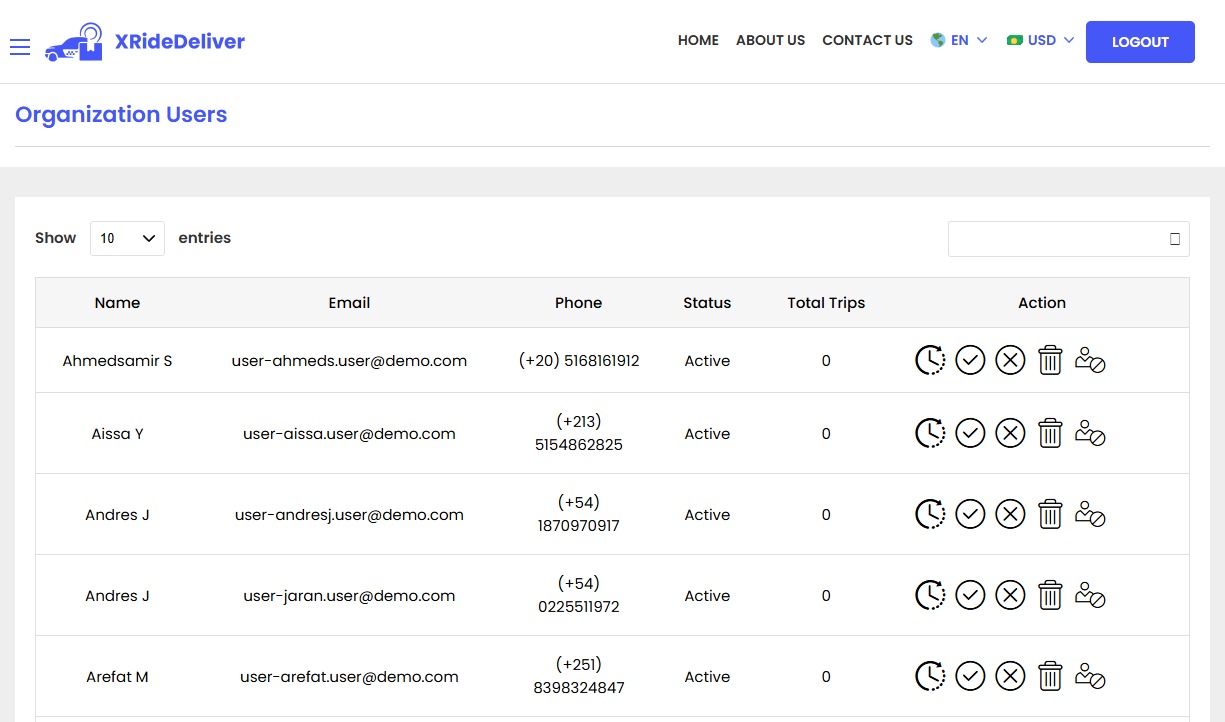
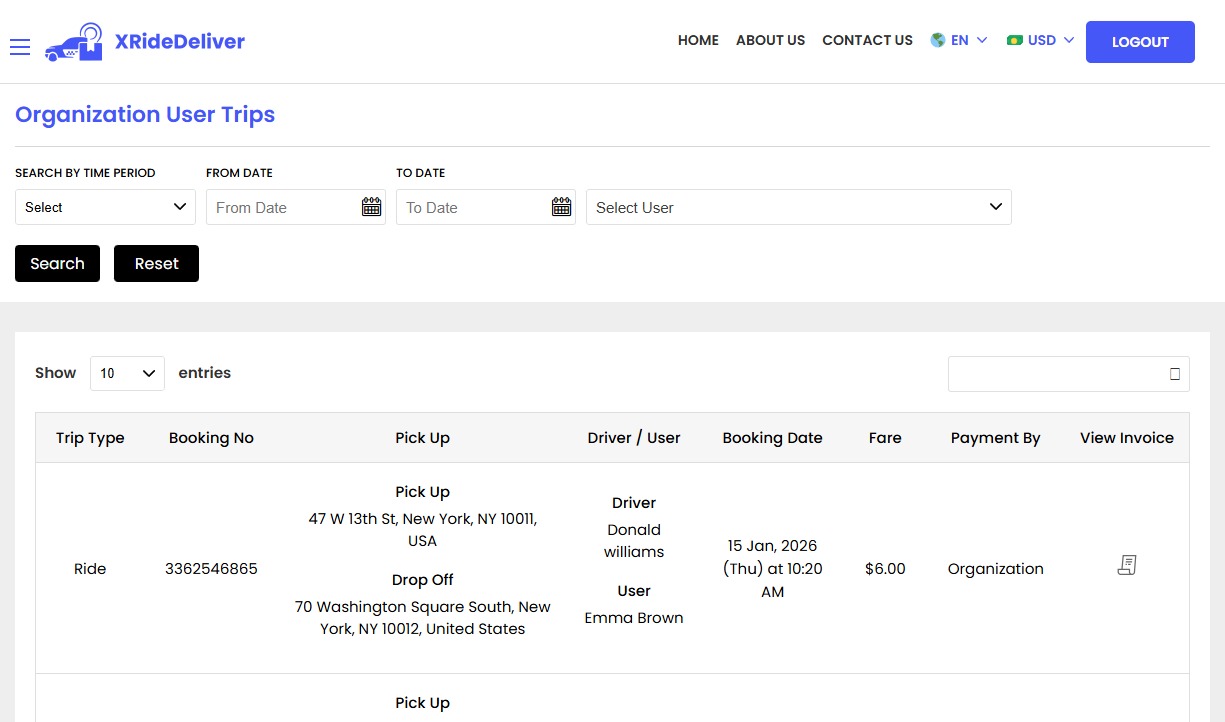
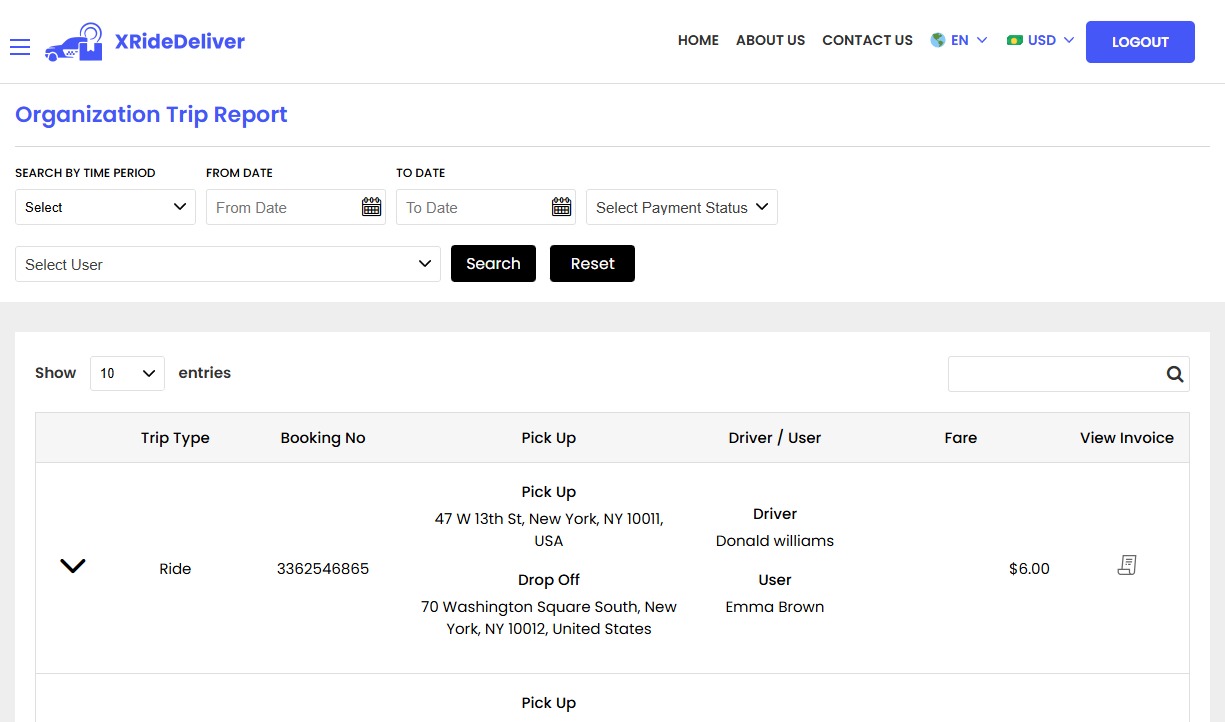
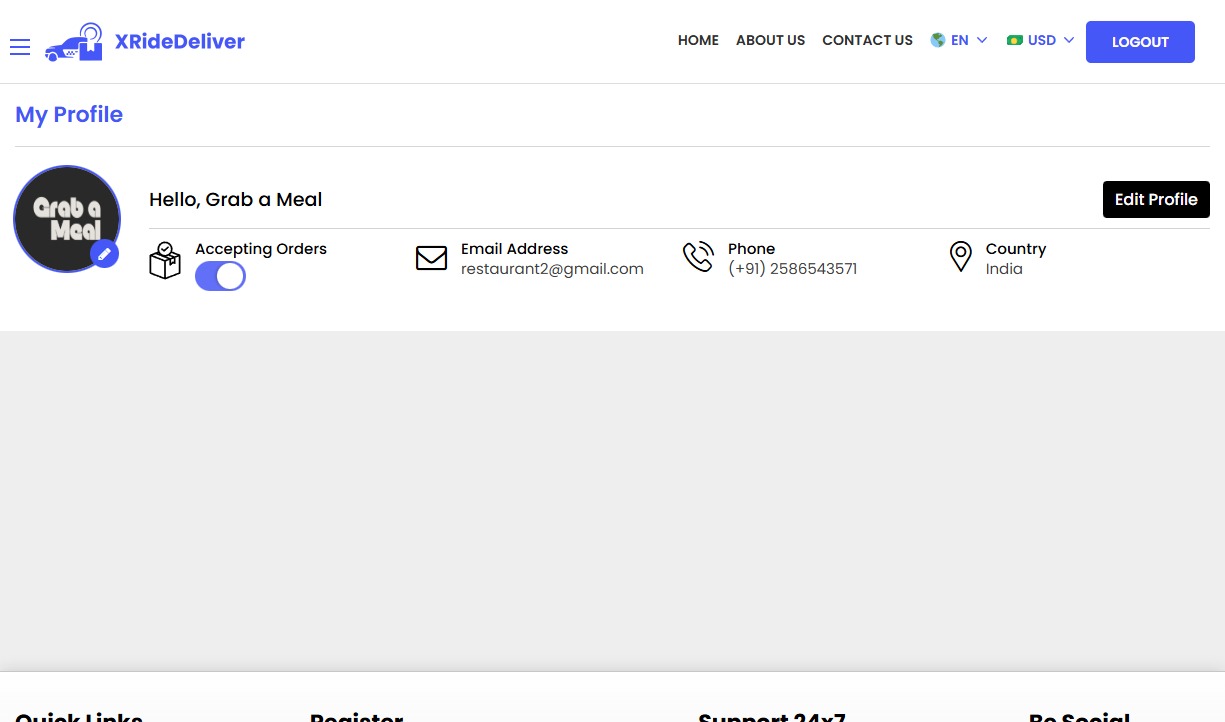
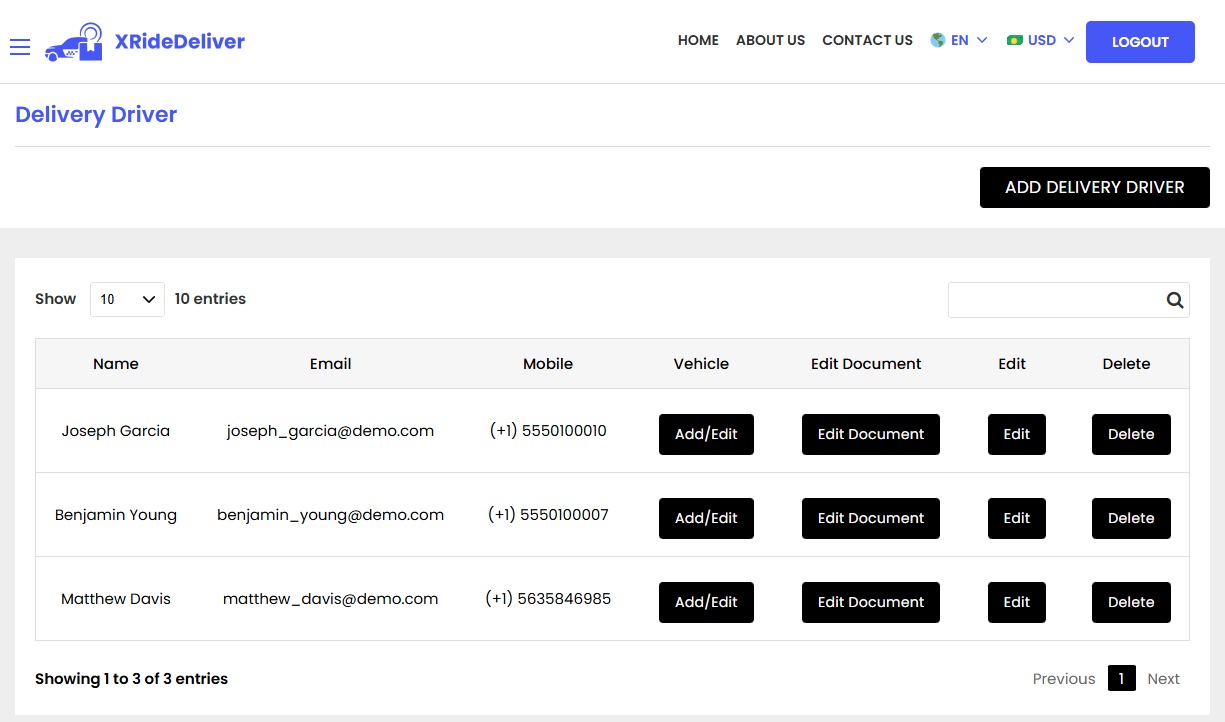
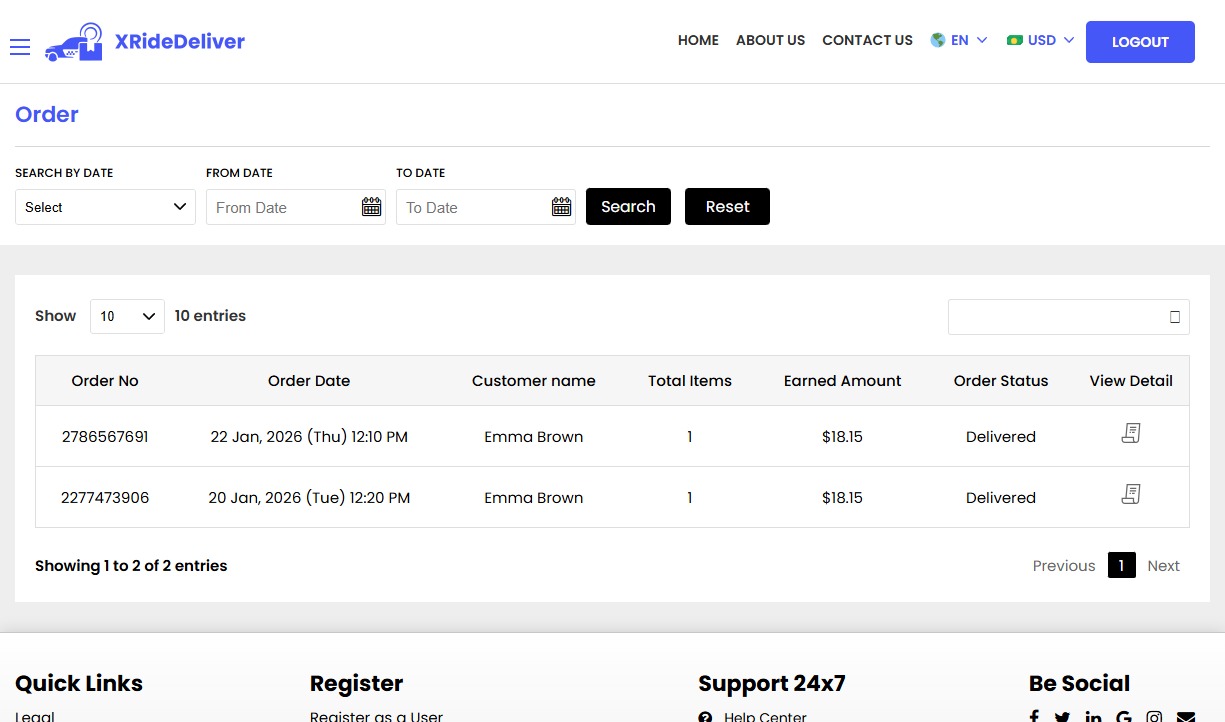
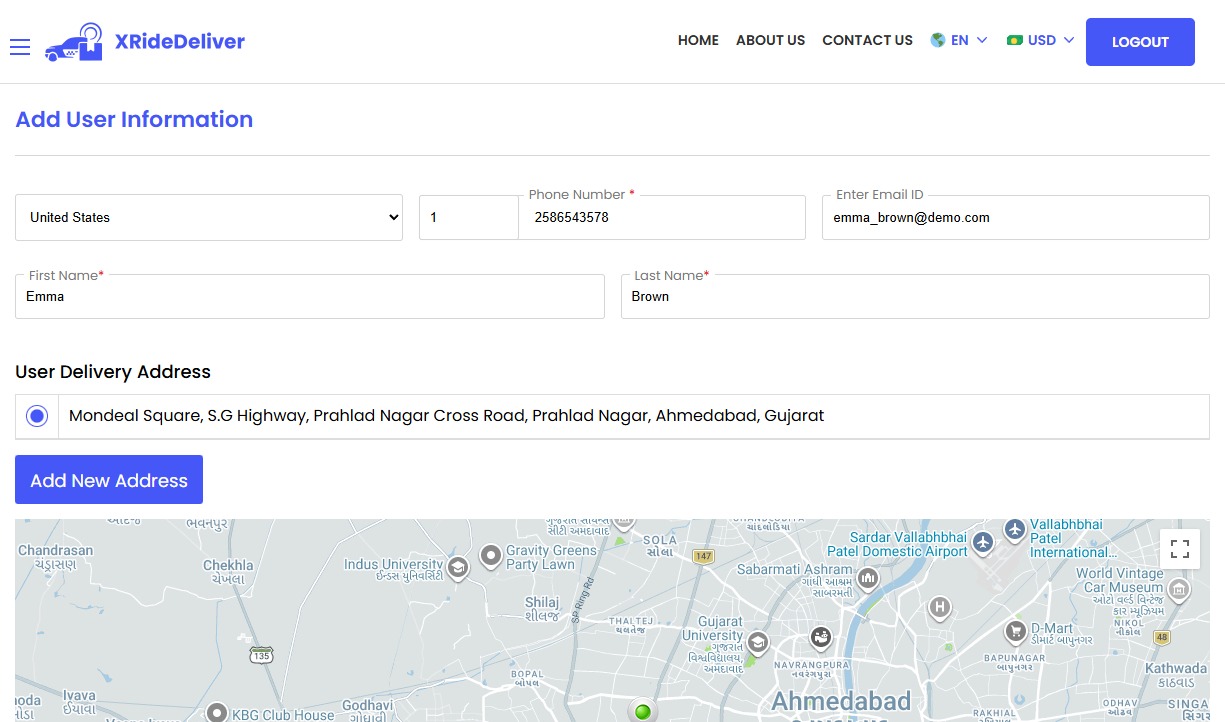
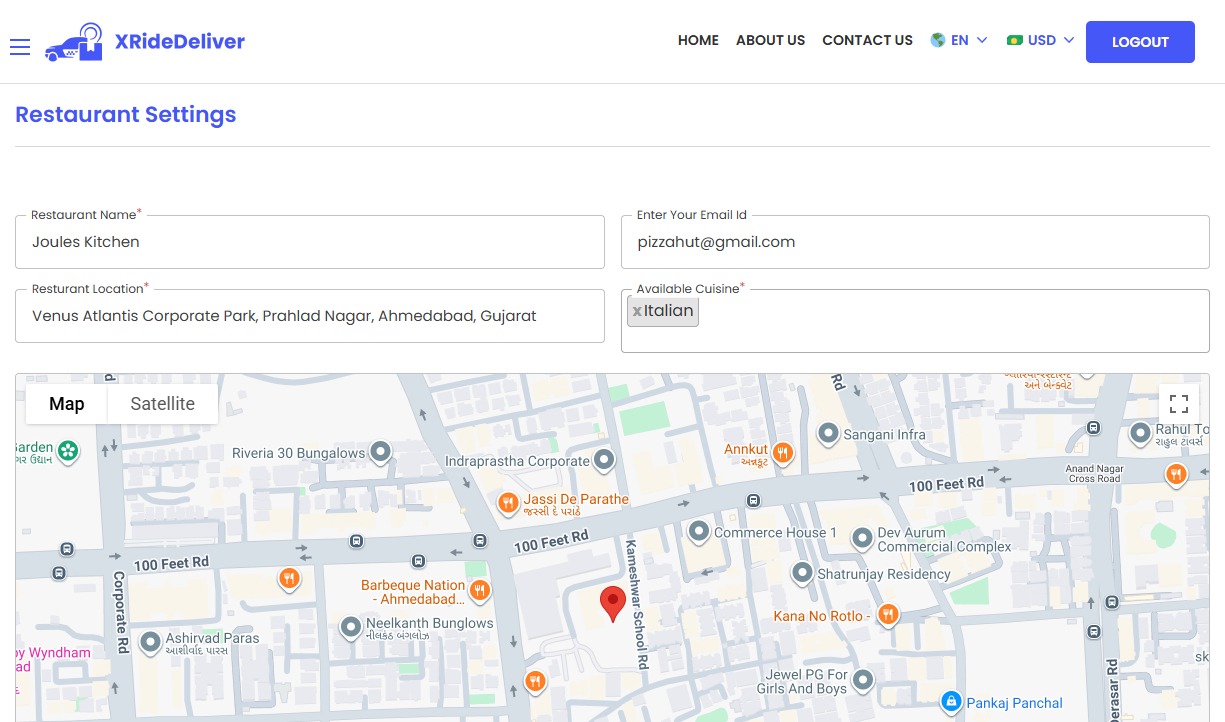
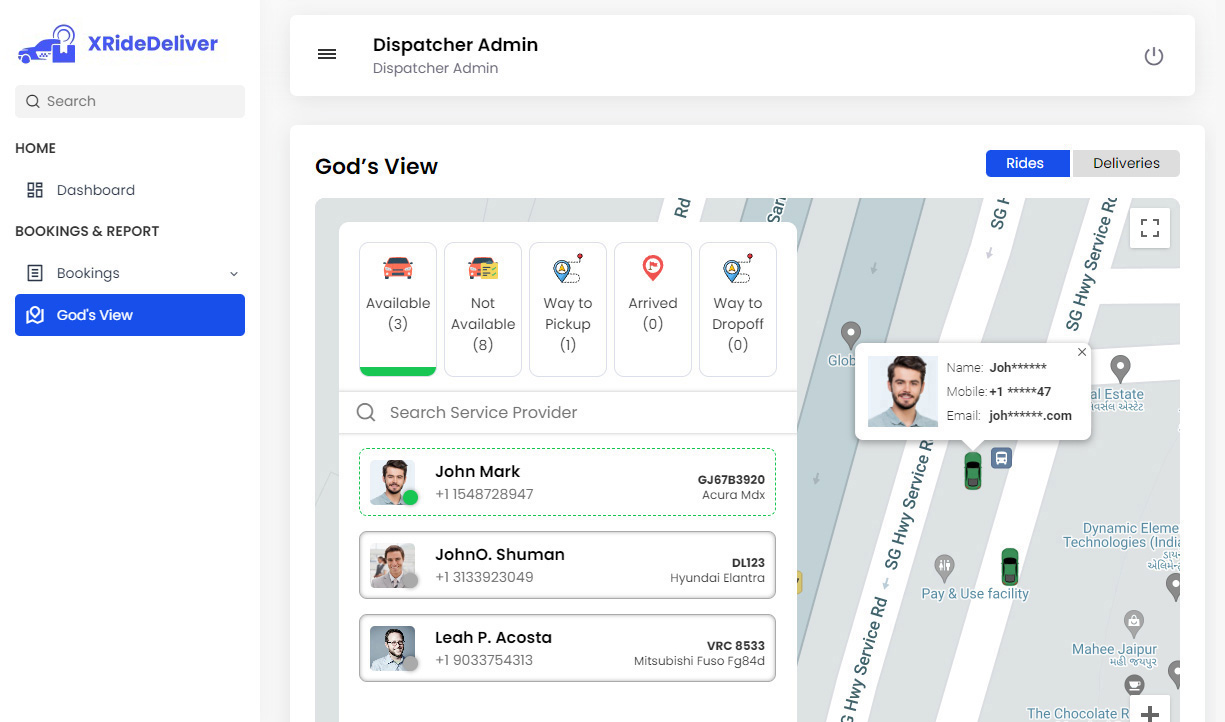
We provide different panels for users, drivers, and fleet organization. This user-friendly dashboard help manage their bookings, wallet, personal info, trip history and earnings and so forth. Look at the screenshots for more understanding.

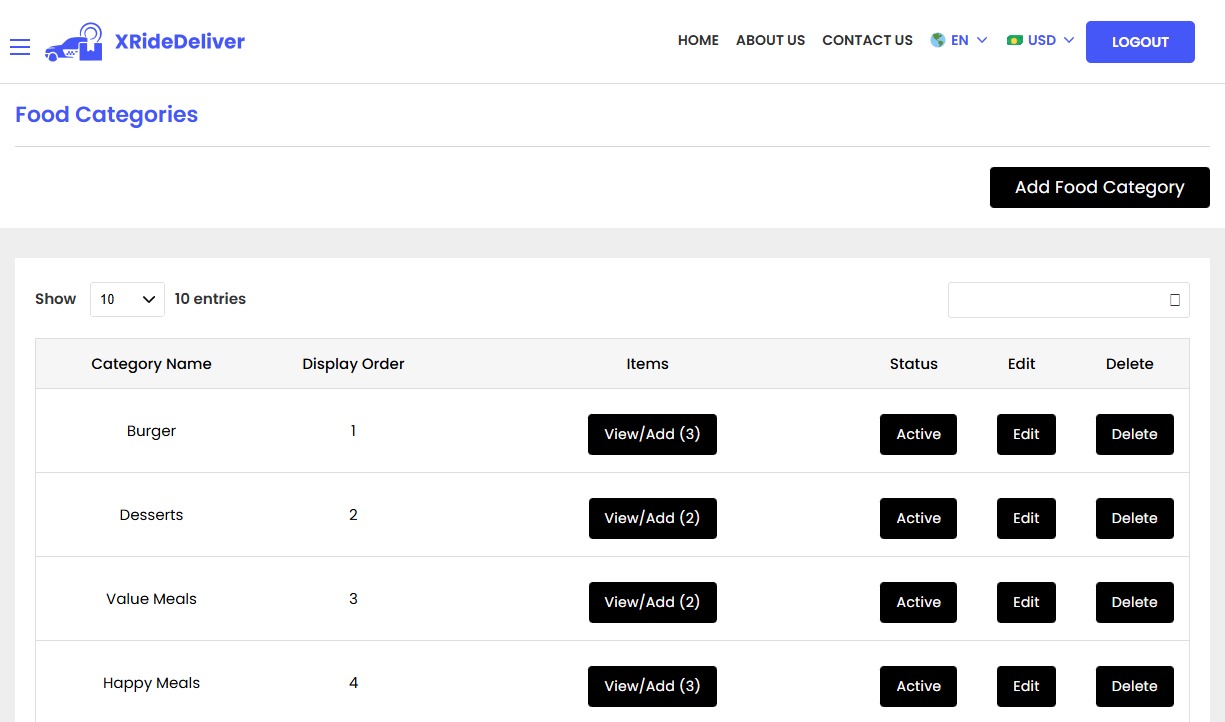
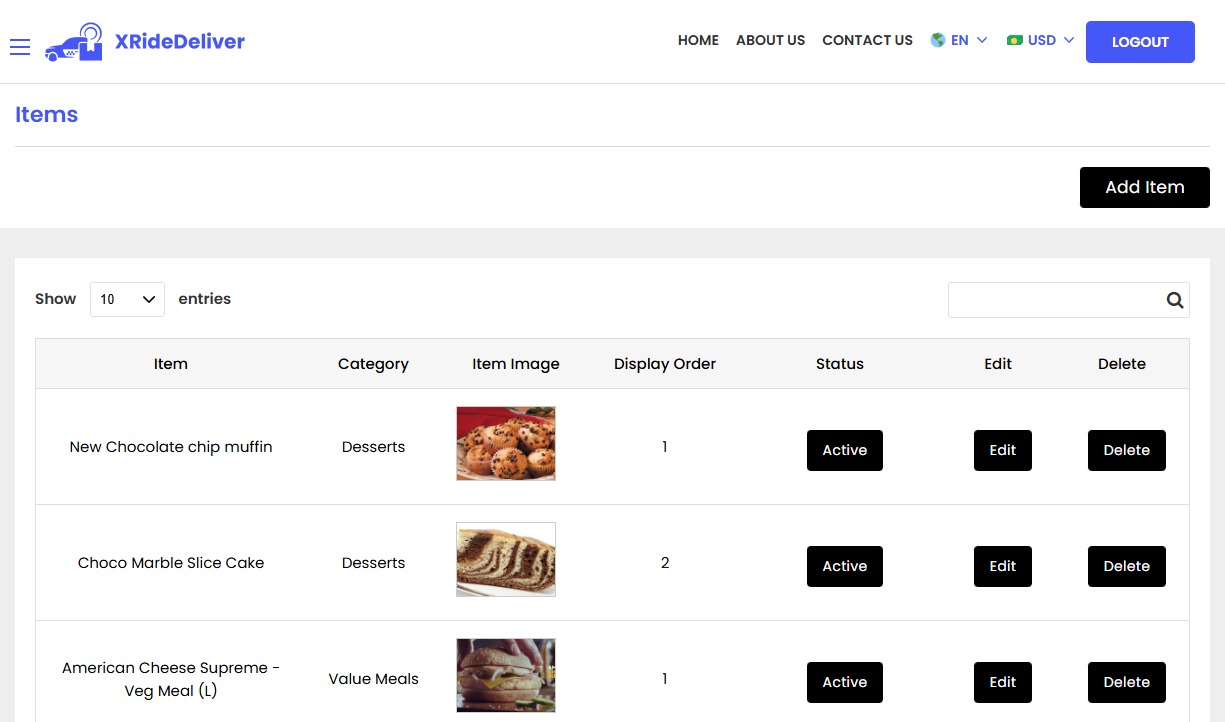
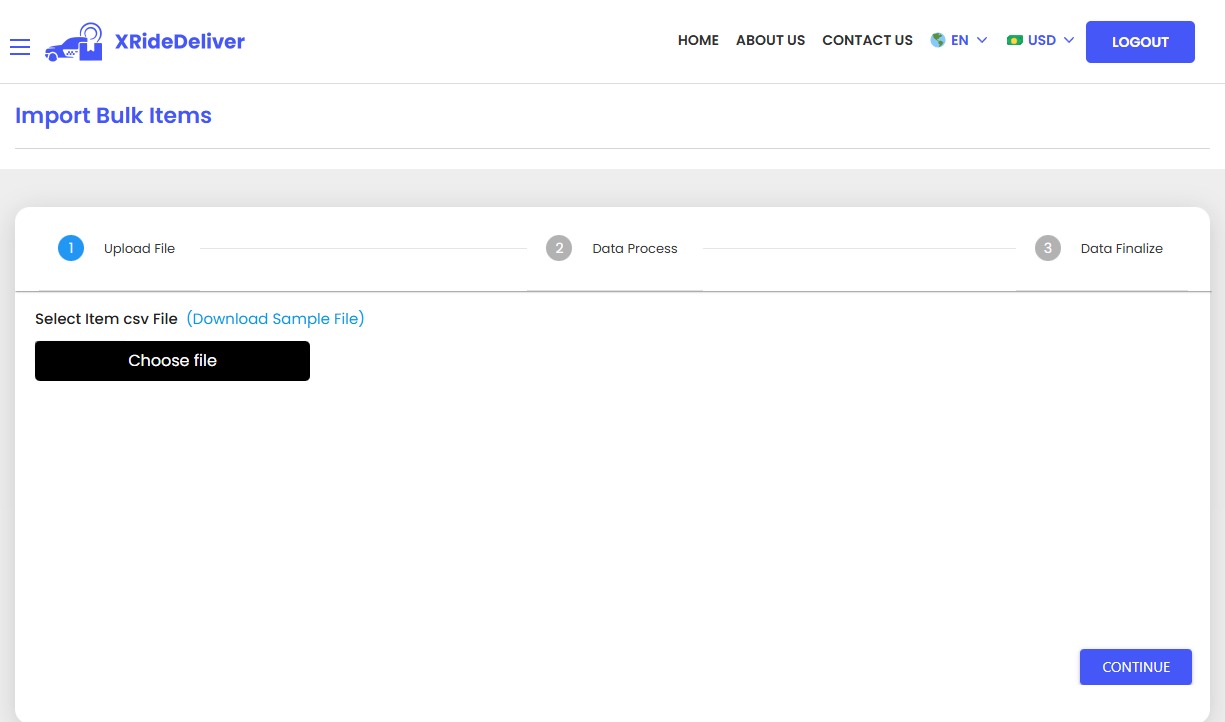
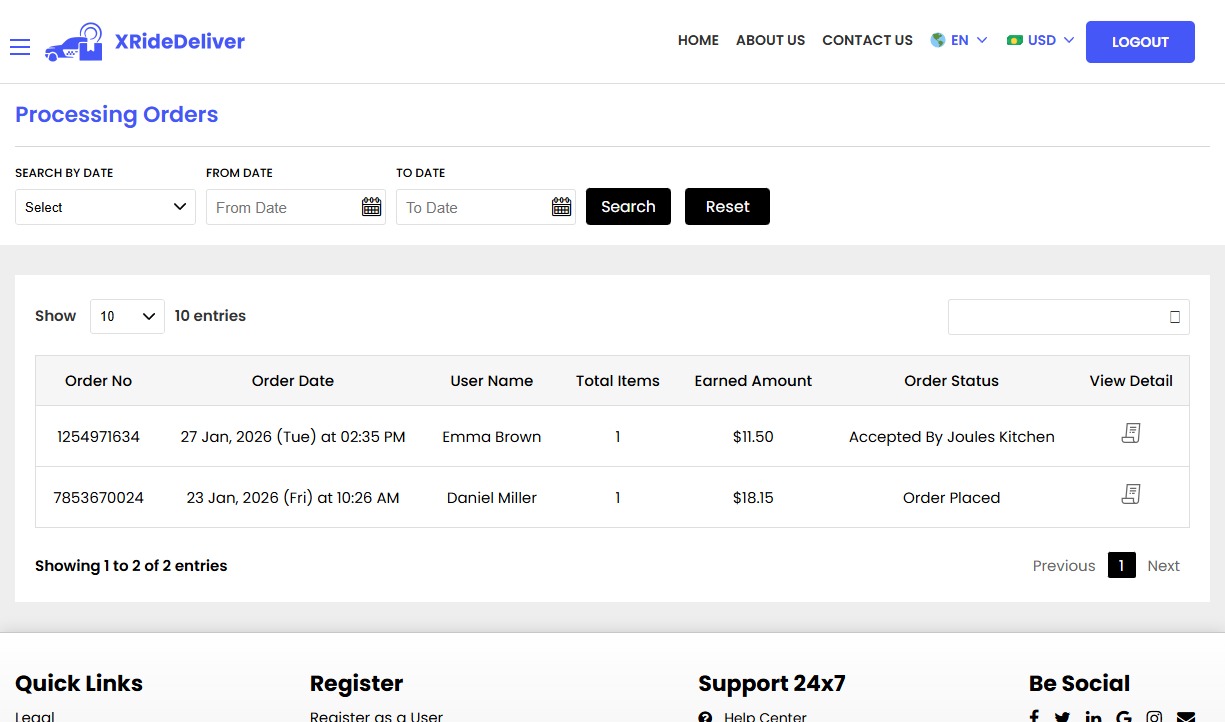
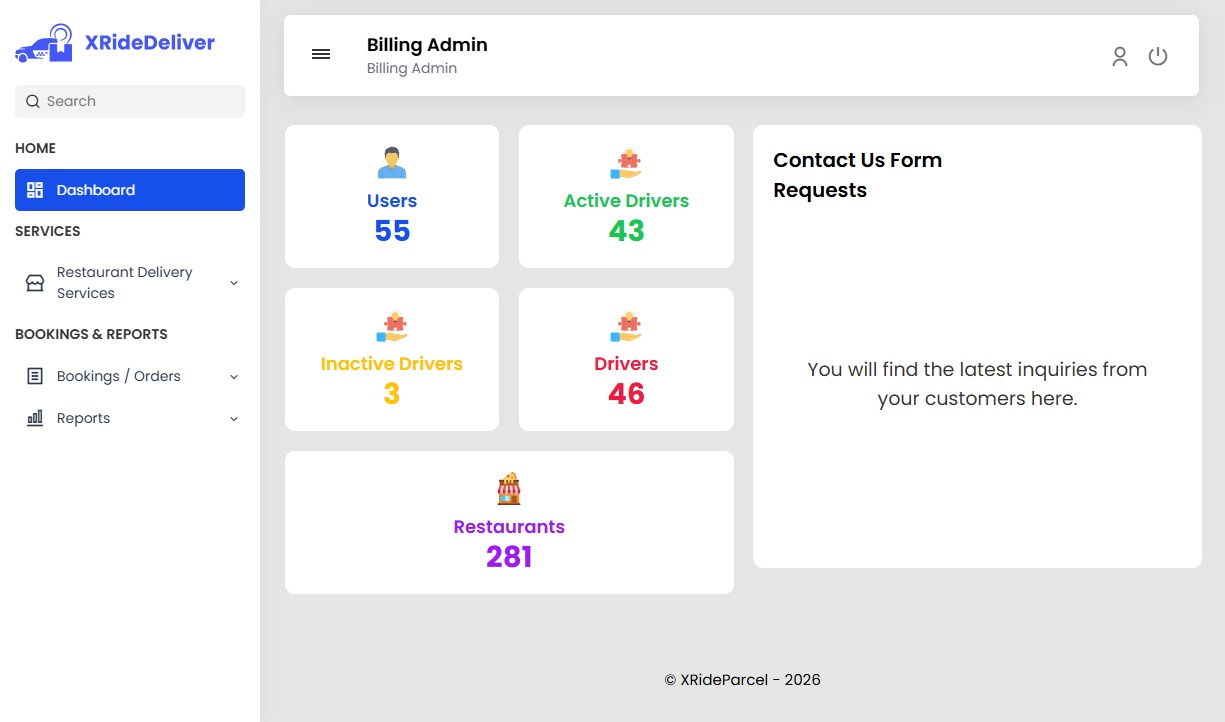
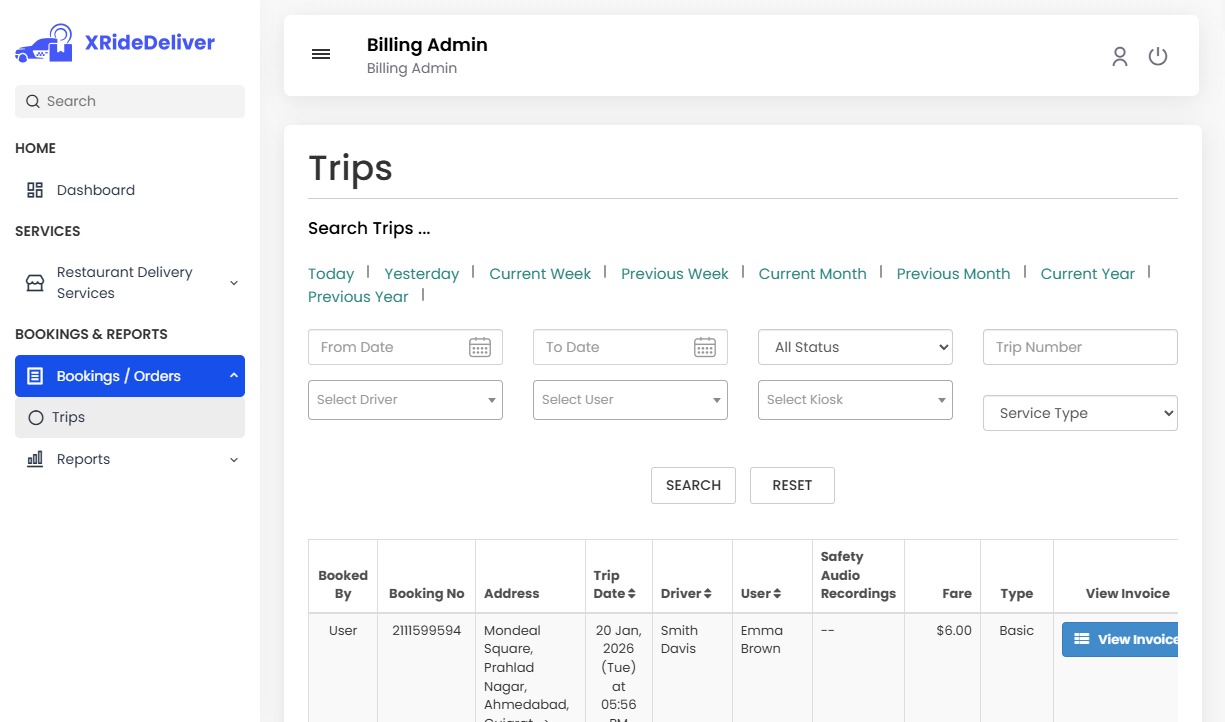
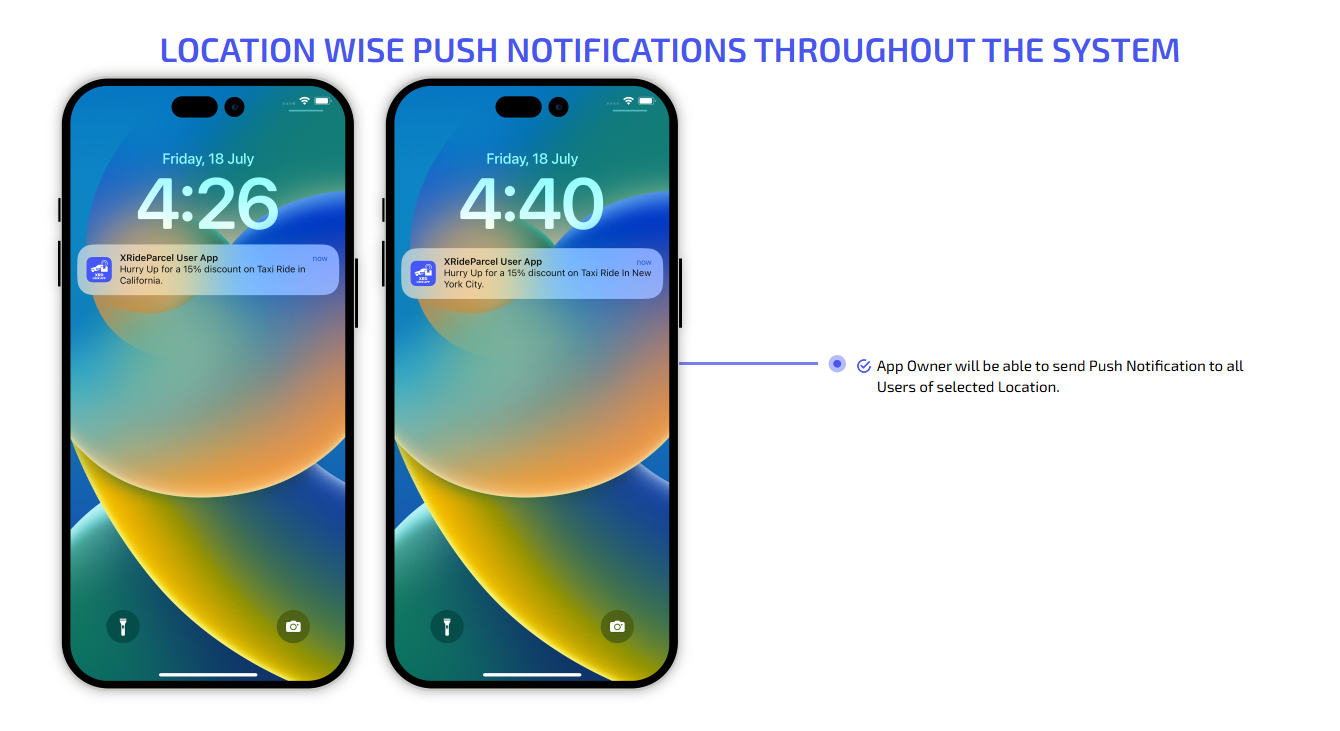
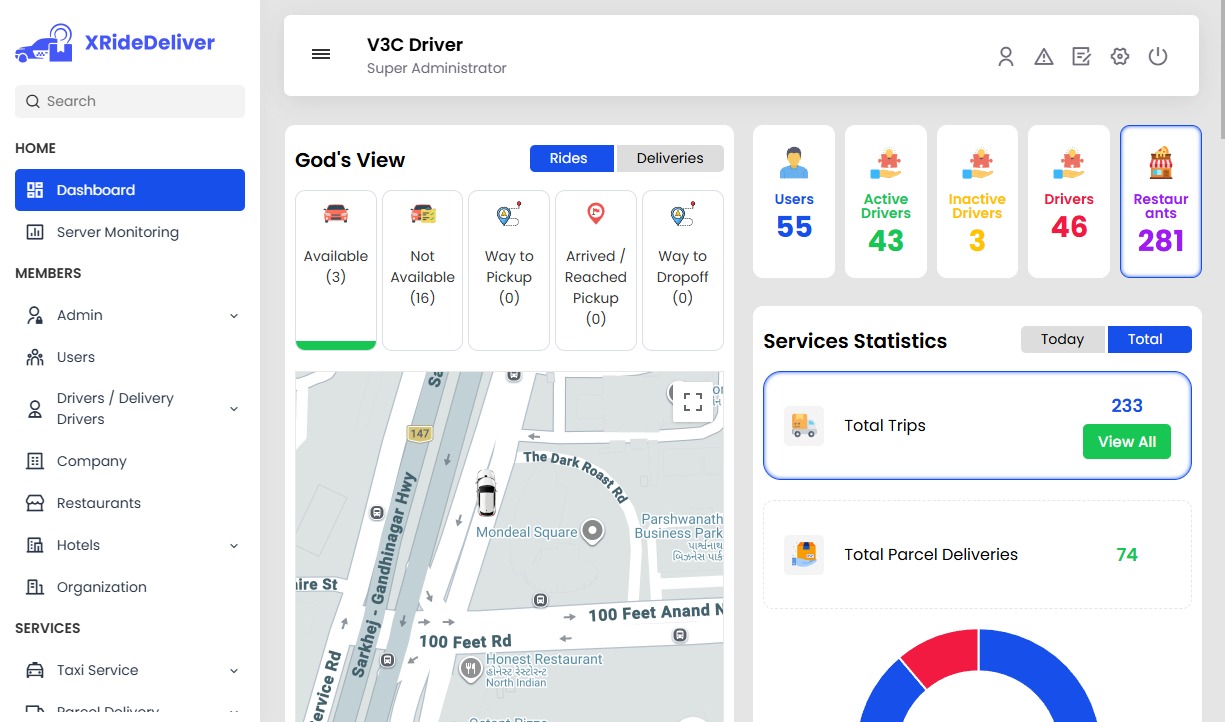
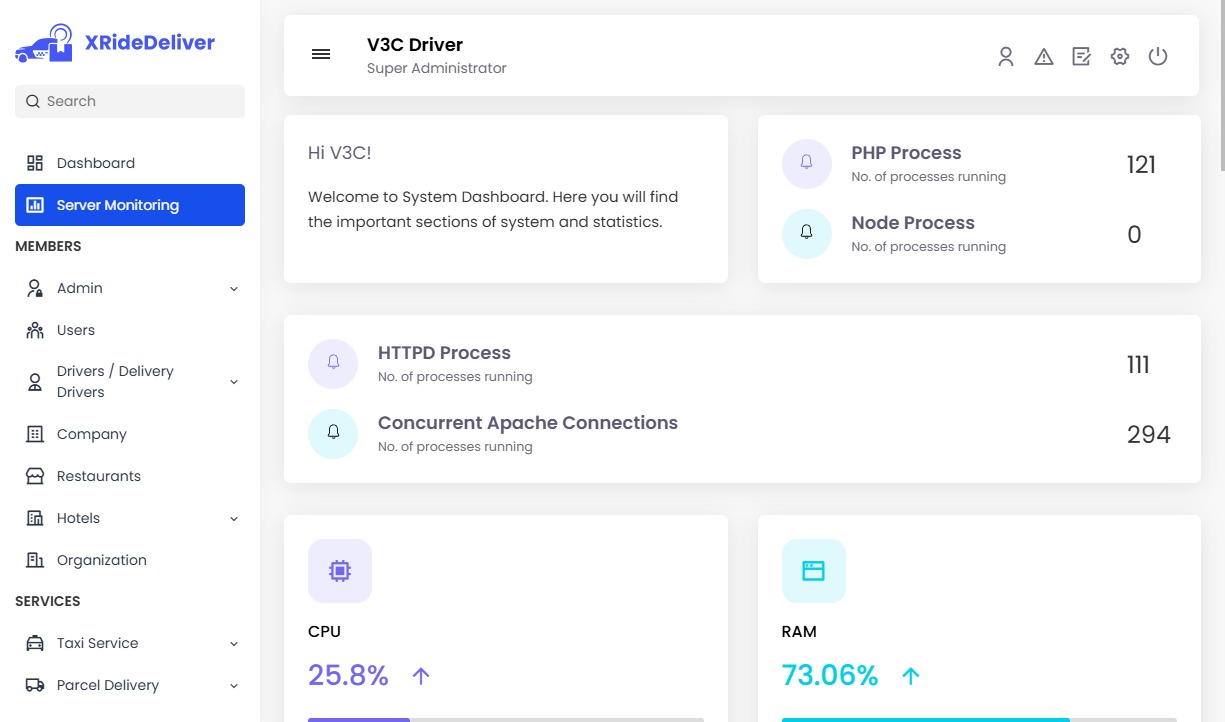
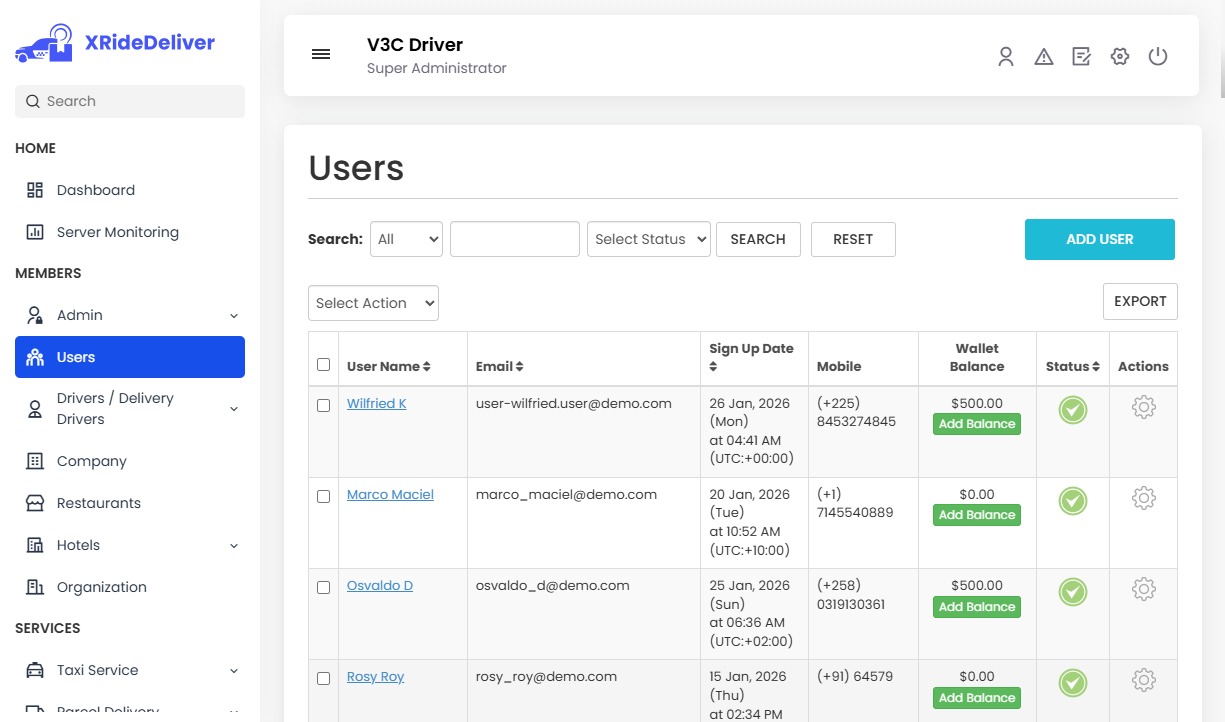
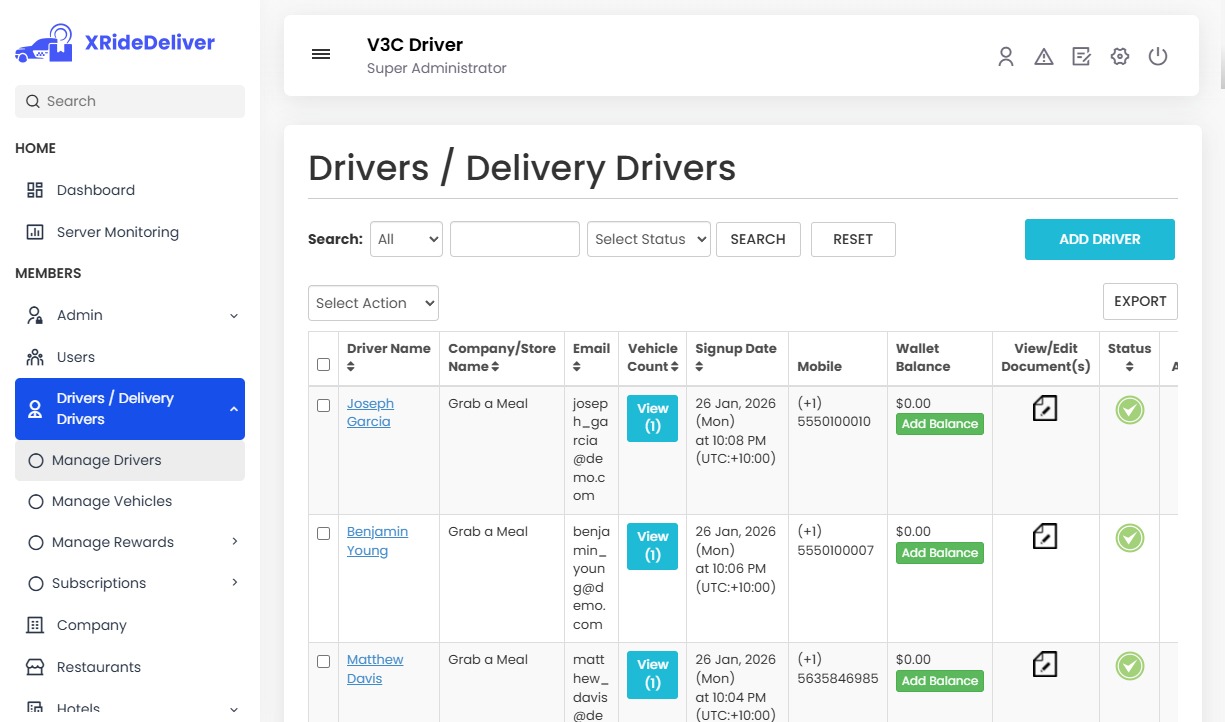
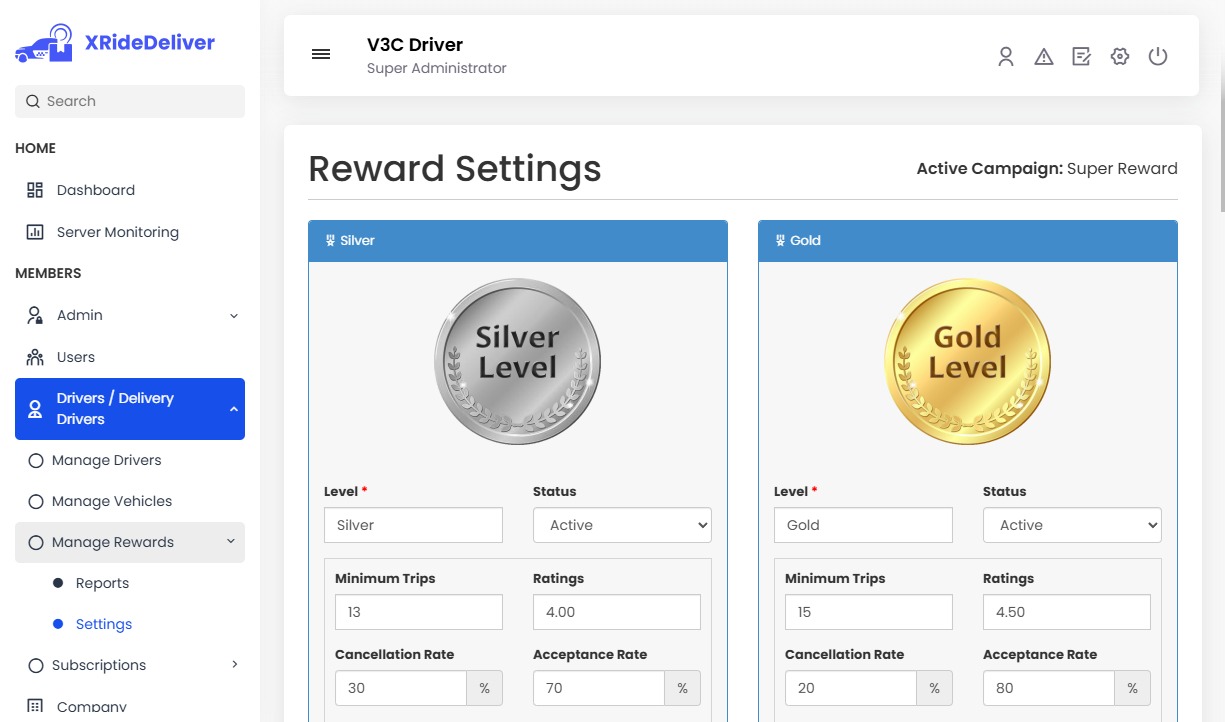
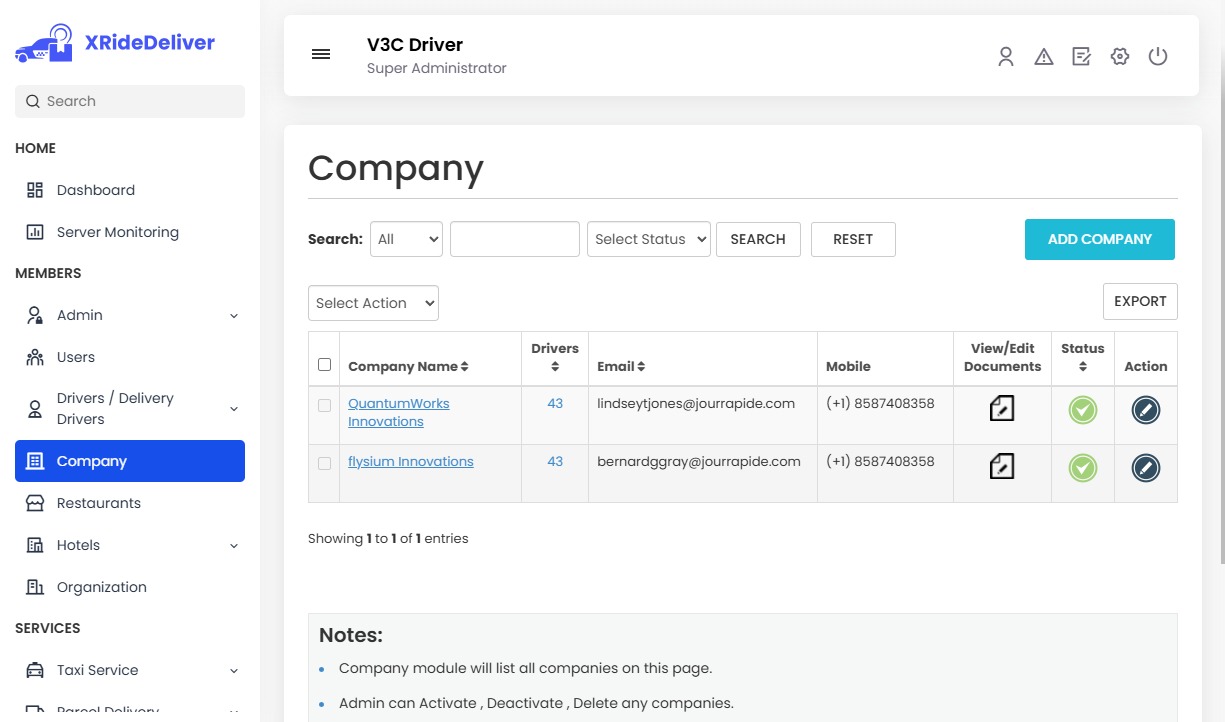
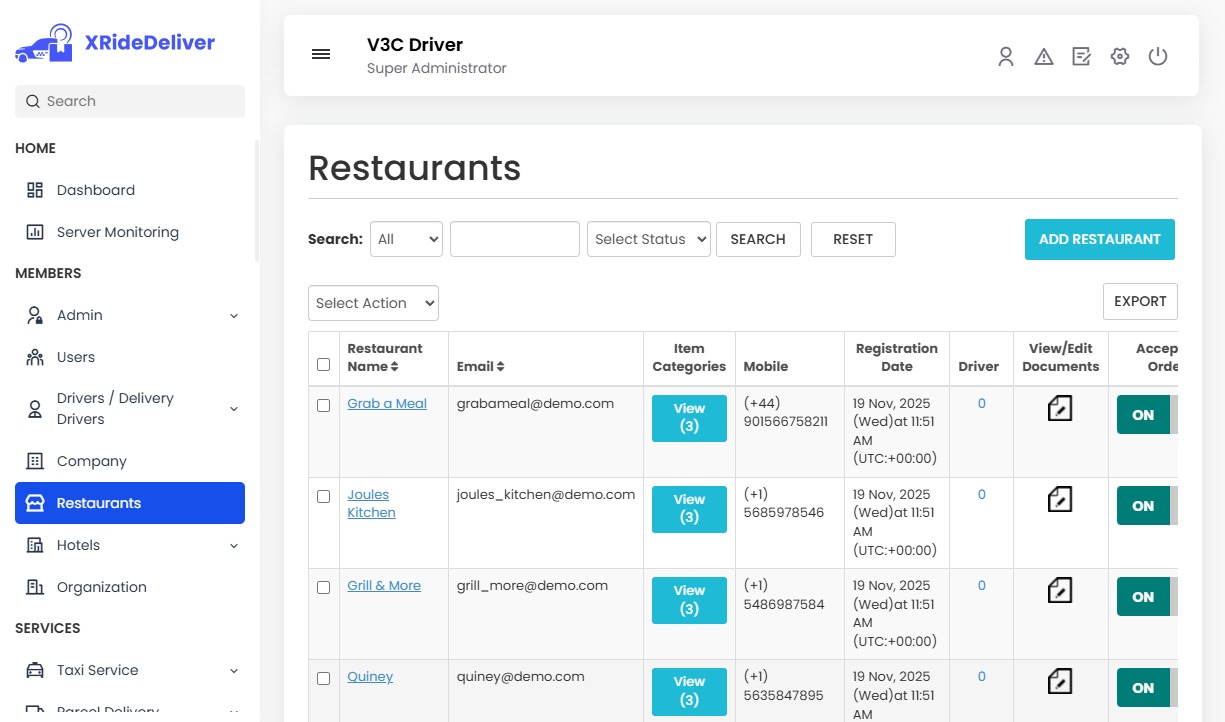
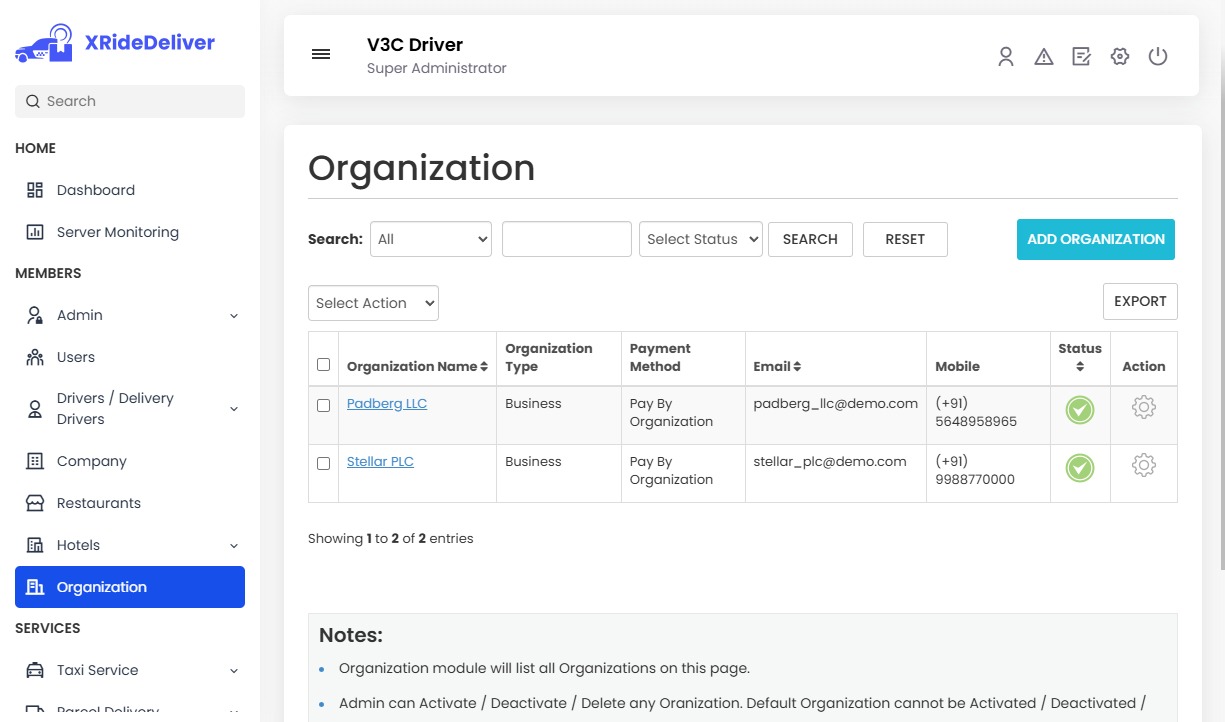
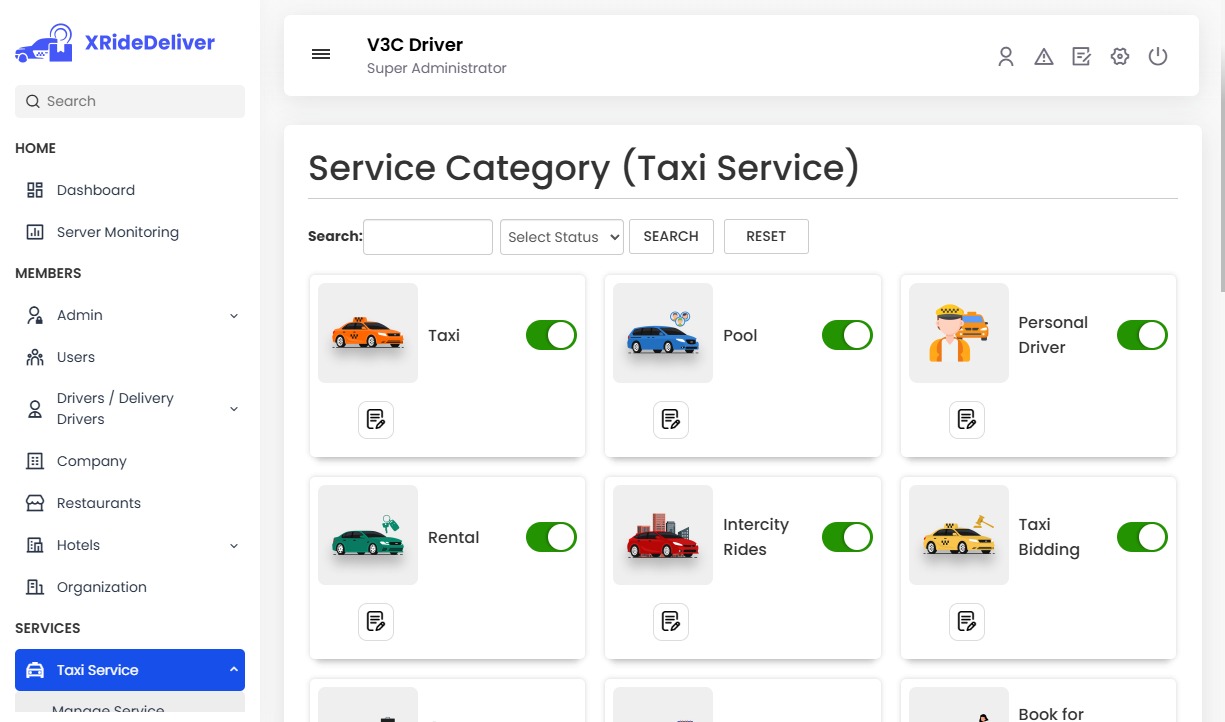
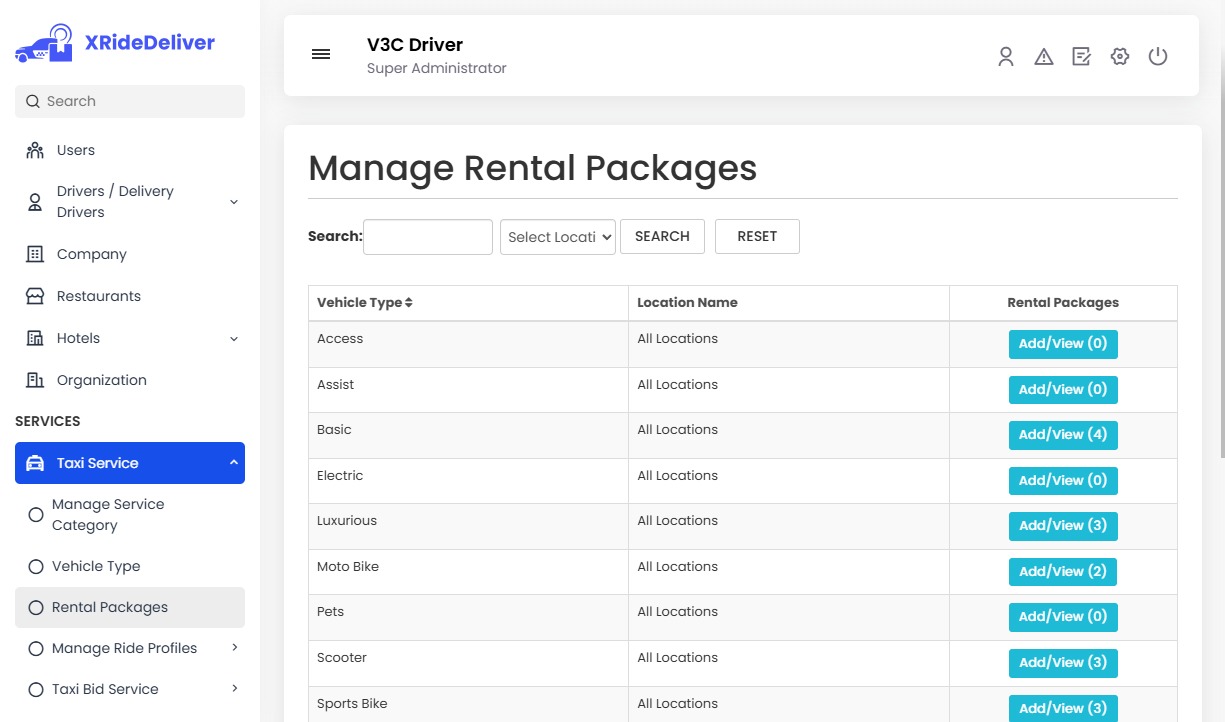
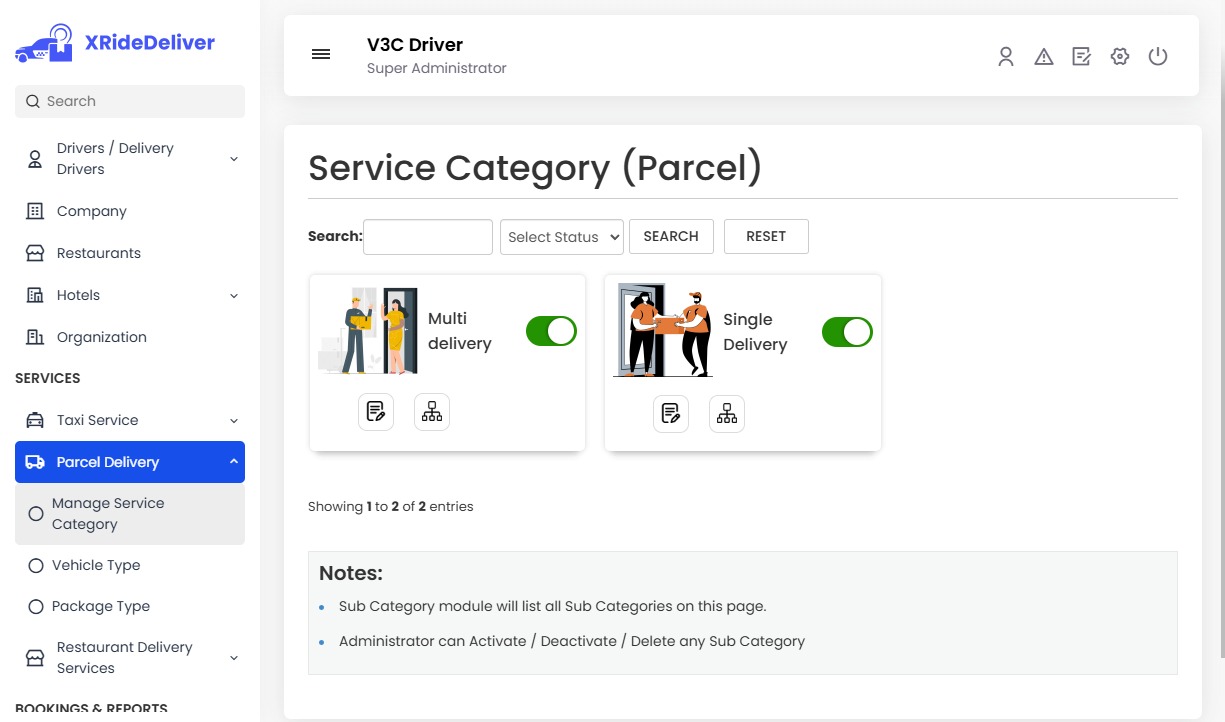
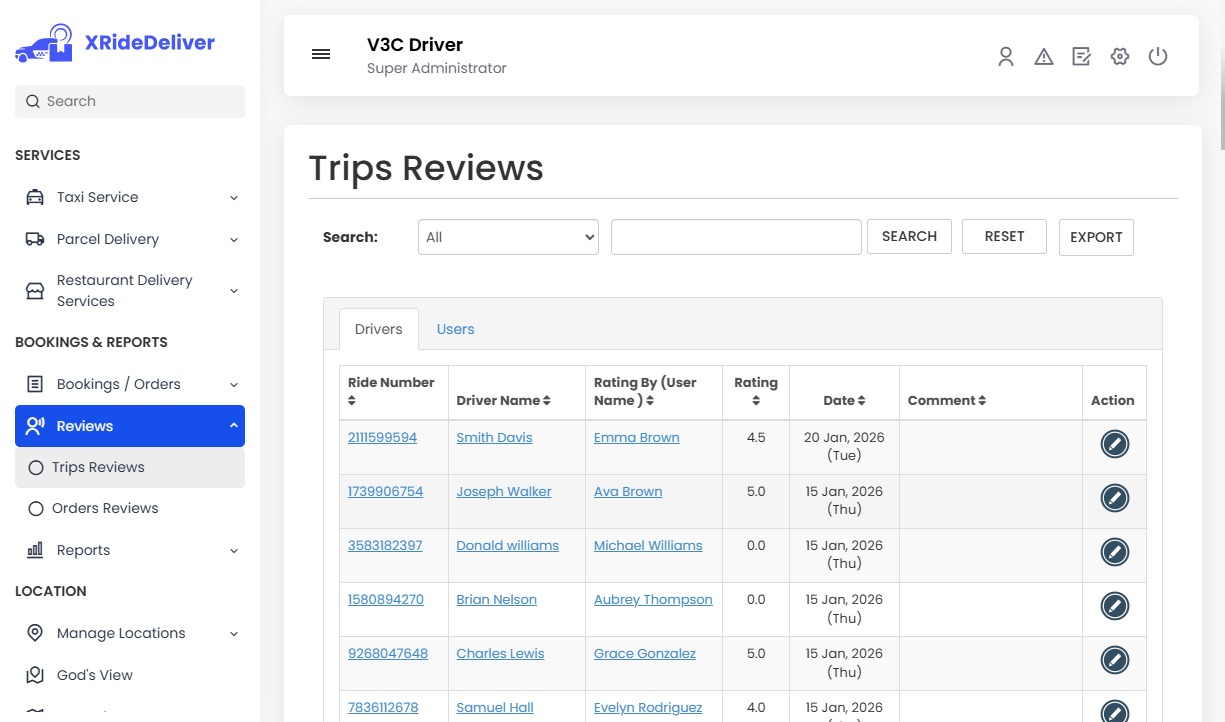
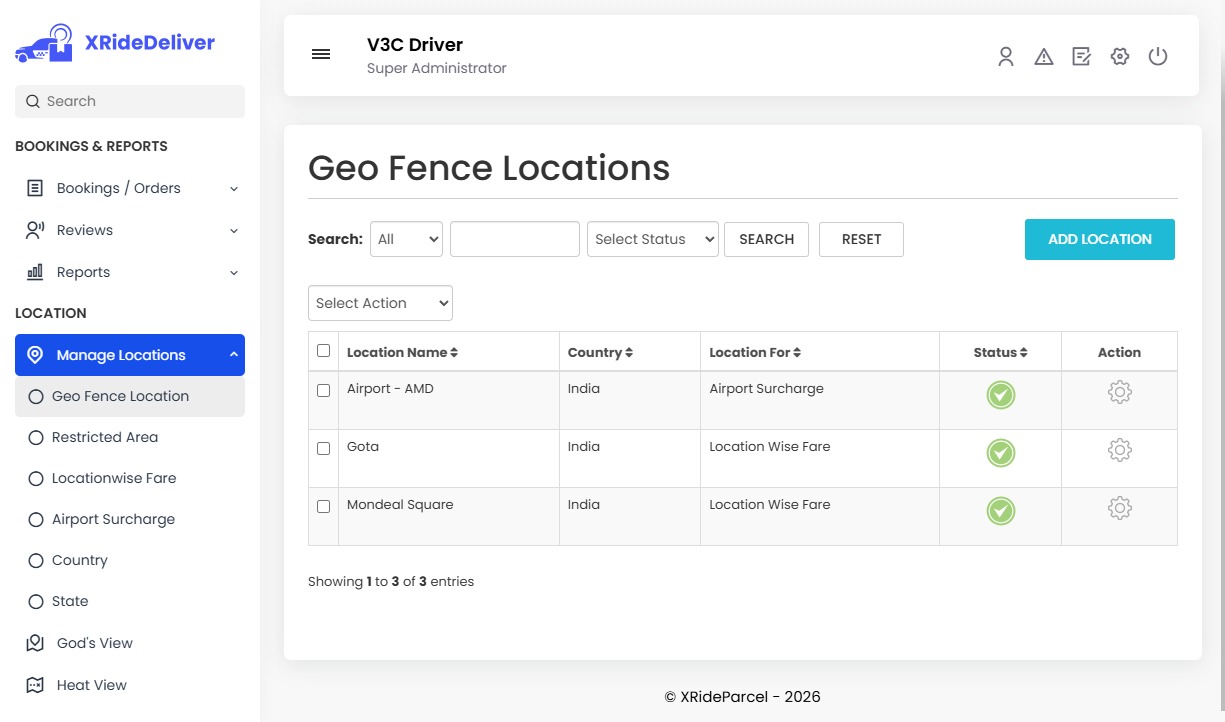
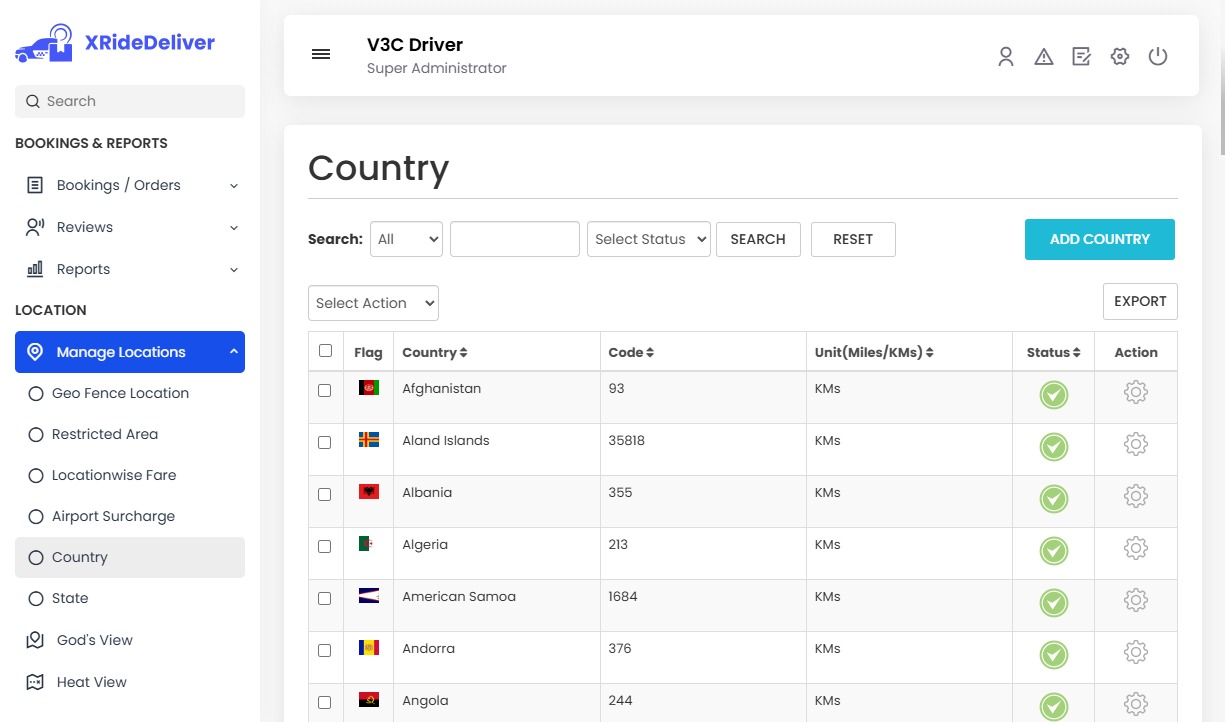
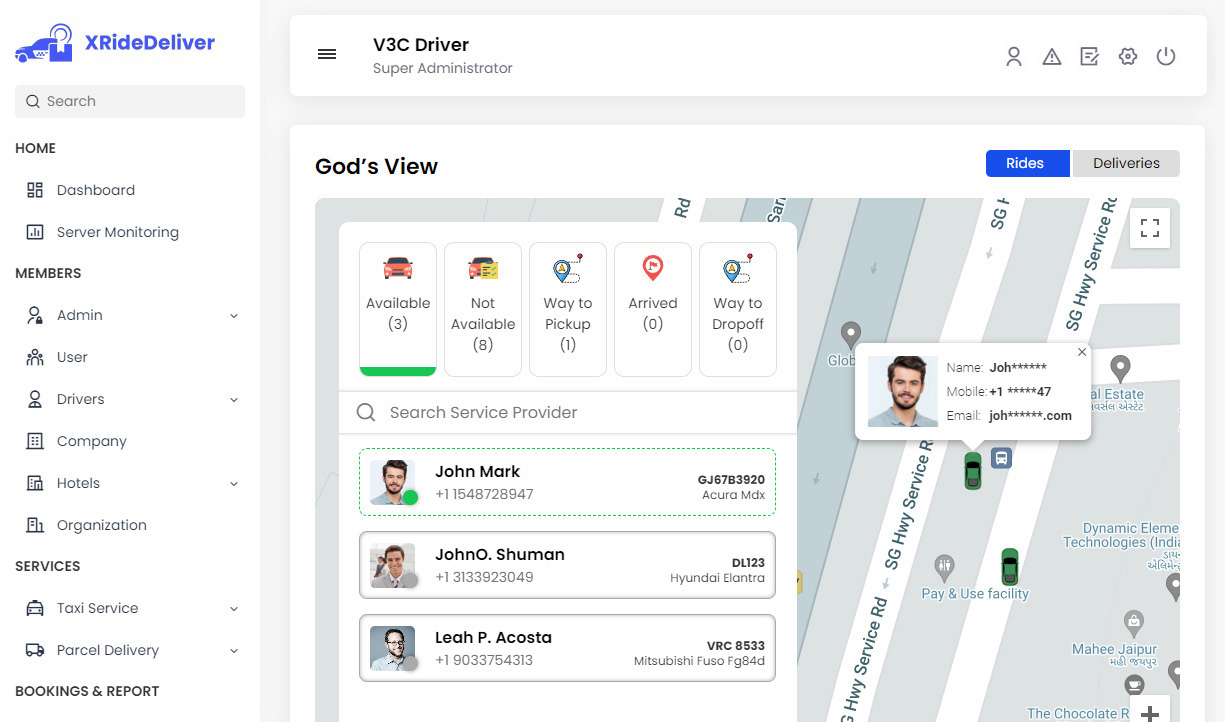
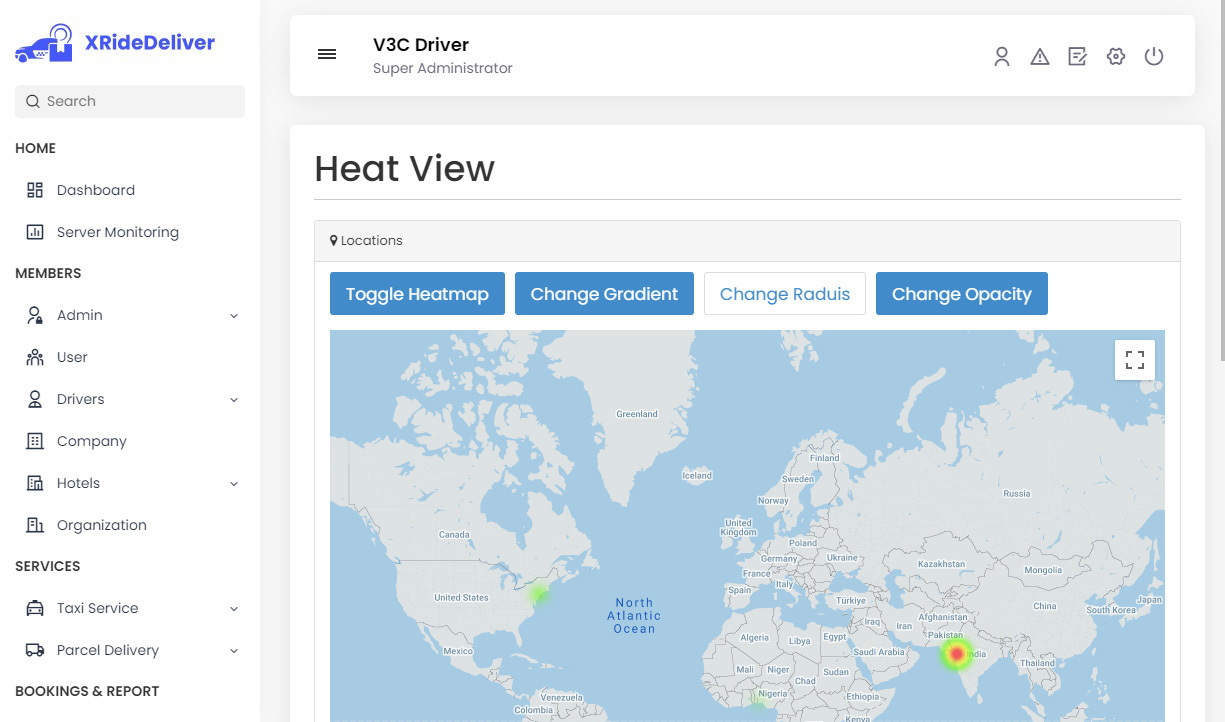
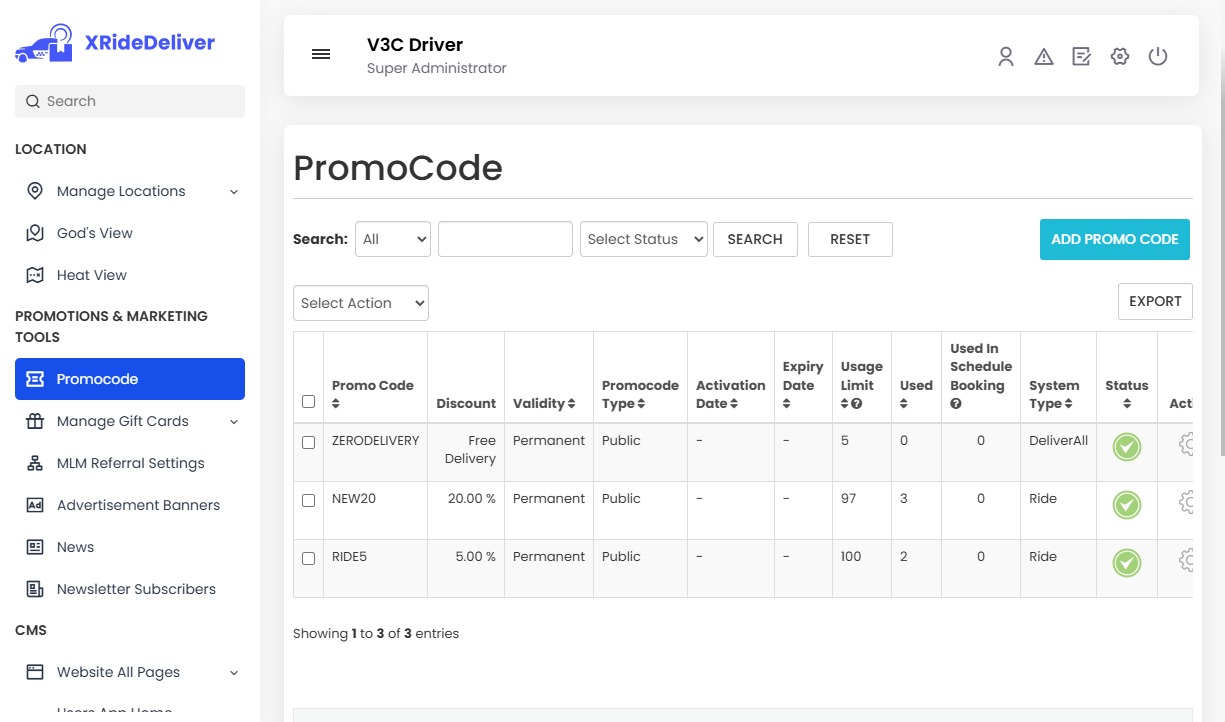
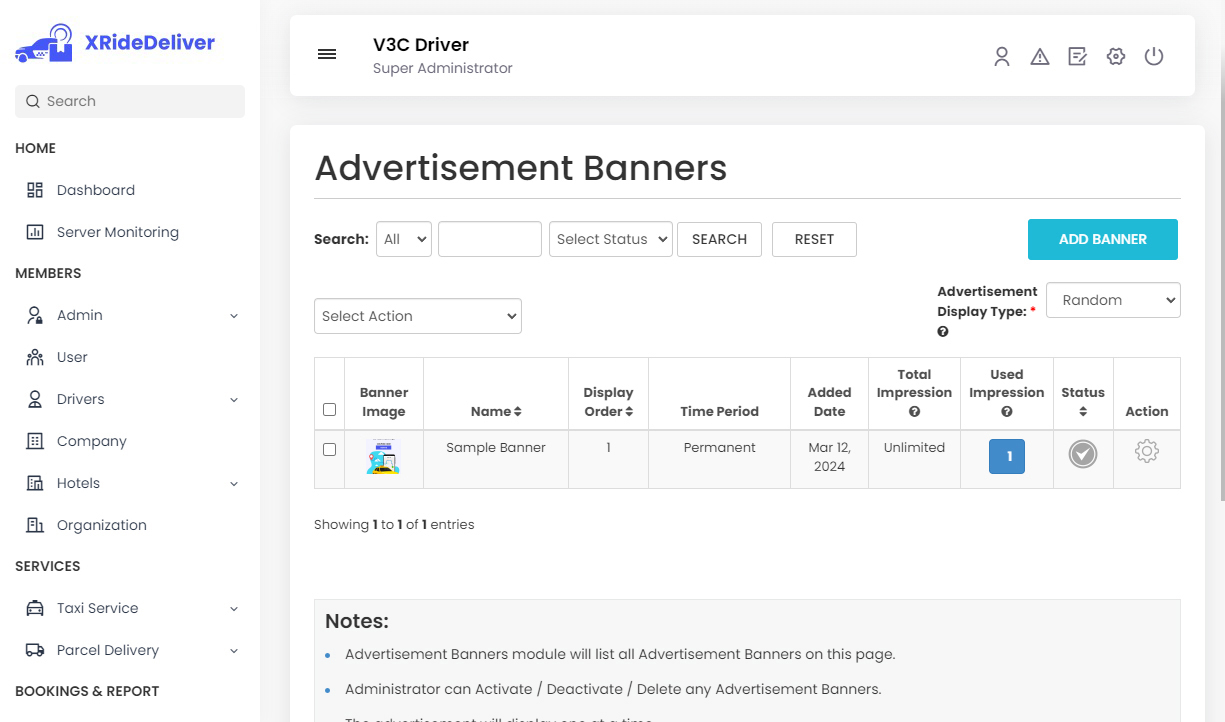
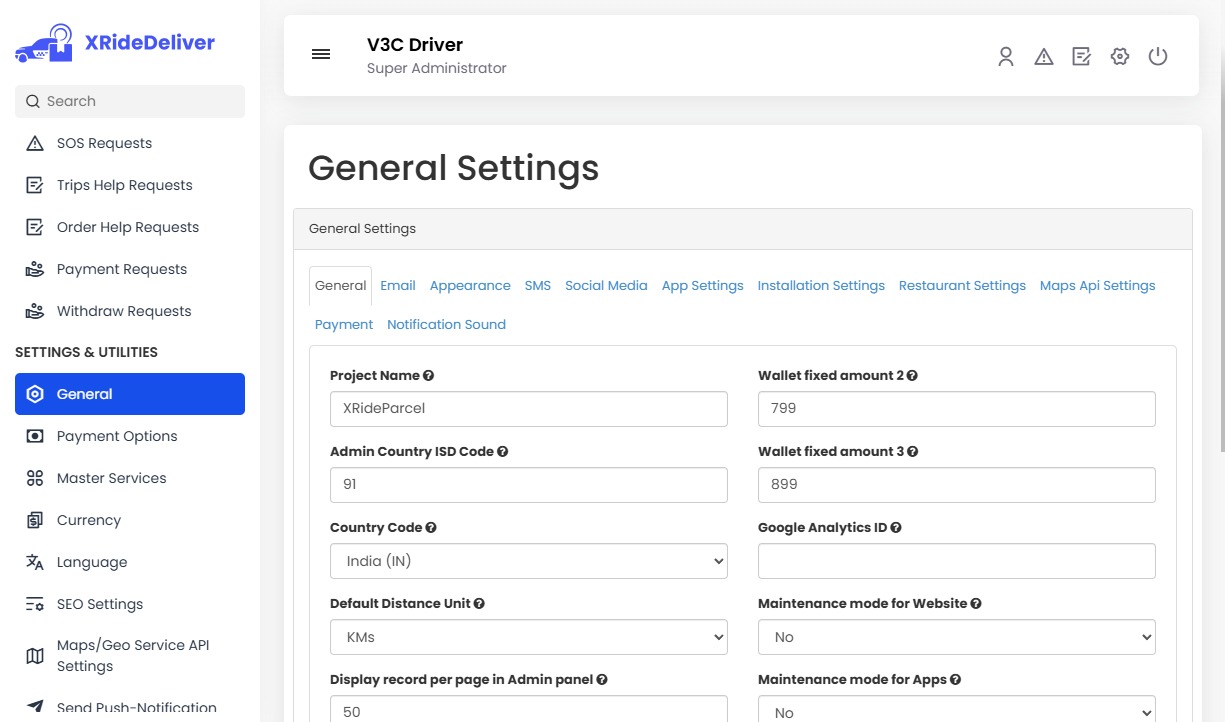
Our robust Admin Panel is designed to give you full control over your business from one centralized dashboard. Effortlessly manage users and drivers, set commission rates, create and monitor promo codes, handle customer reviews, and more. Every essential feature is integrated for you need to run and scale your App is seamlessly. It simplifies your daily management tasks.
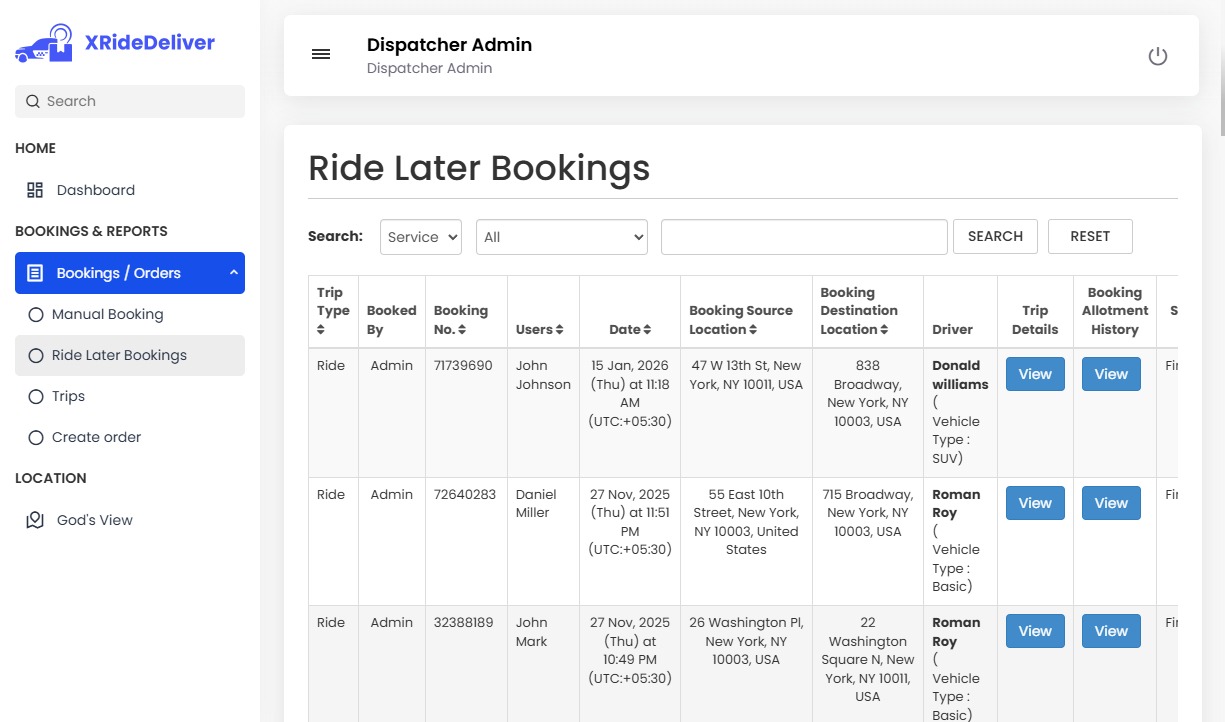
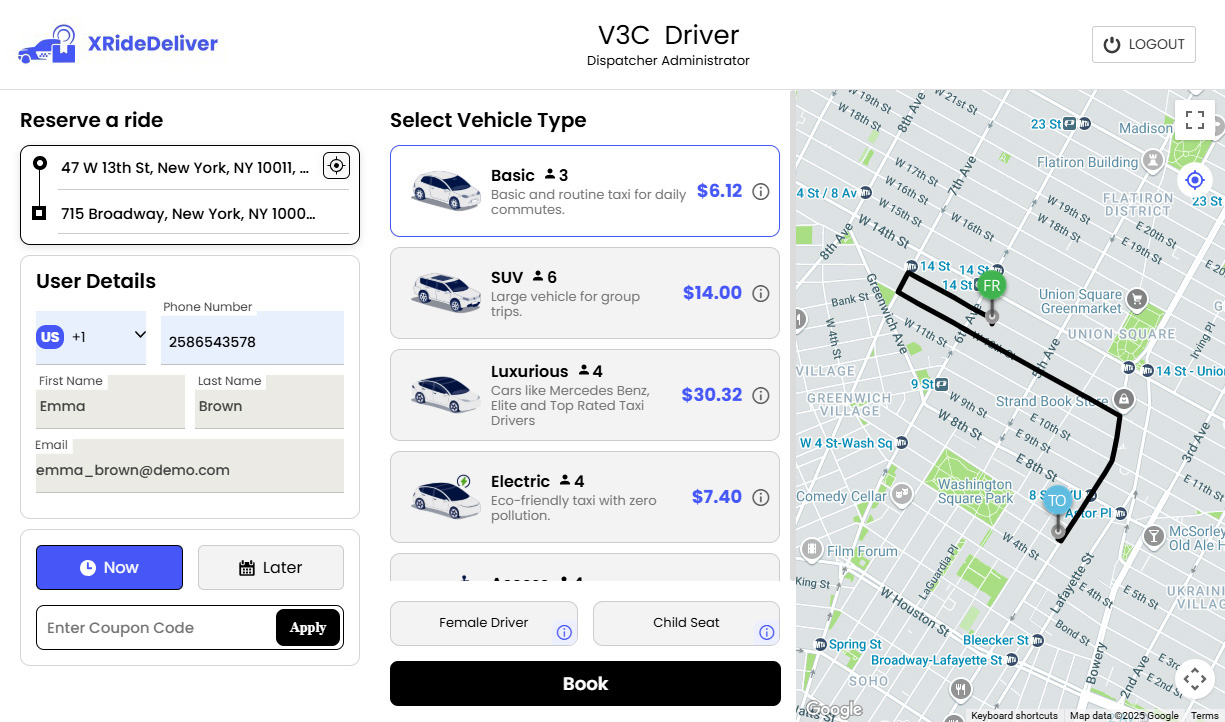
This Panel is perfect for managing phone taxi bookings or helping people who aren’t tech-savvy. It is ideal for call-based support users who prefer a human touch. Your team can manually input taxi ride details and assign a driver.

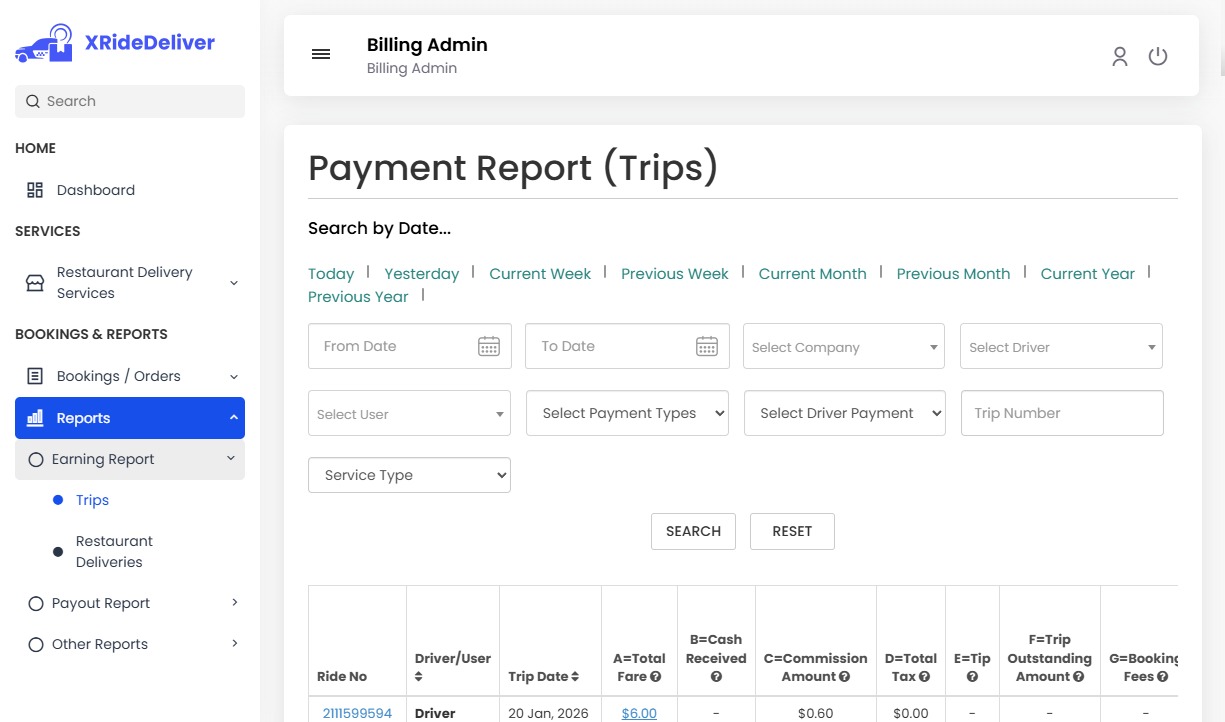
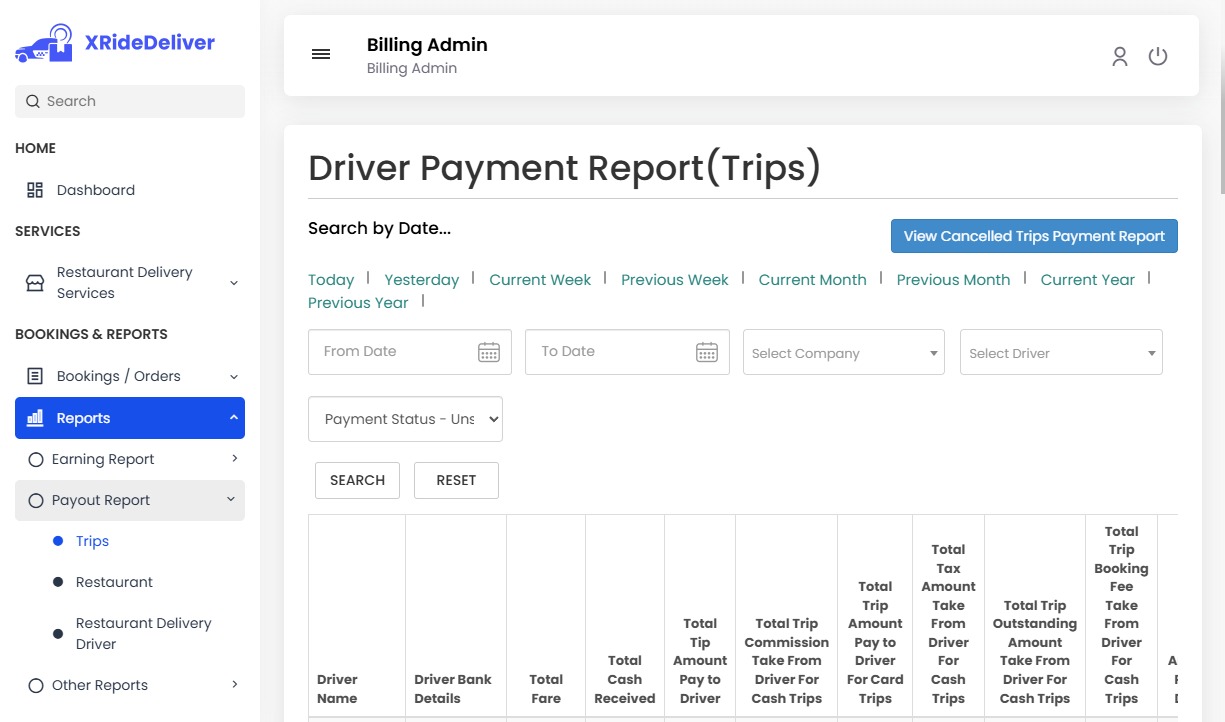
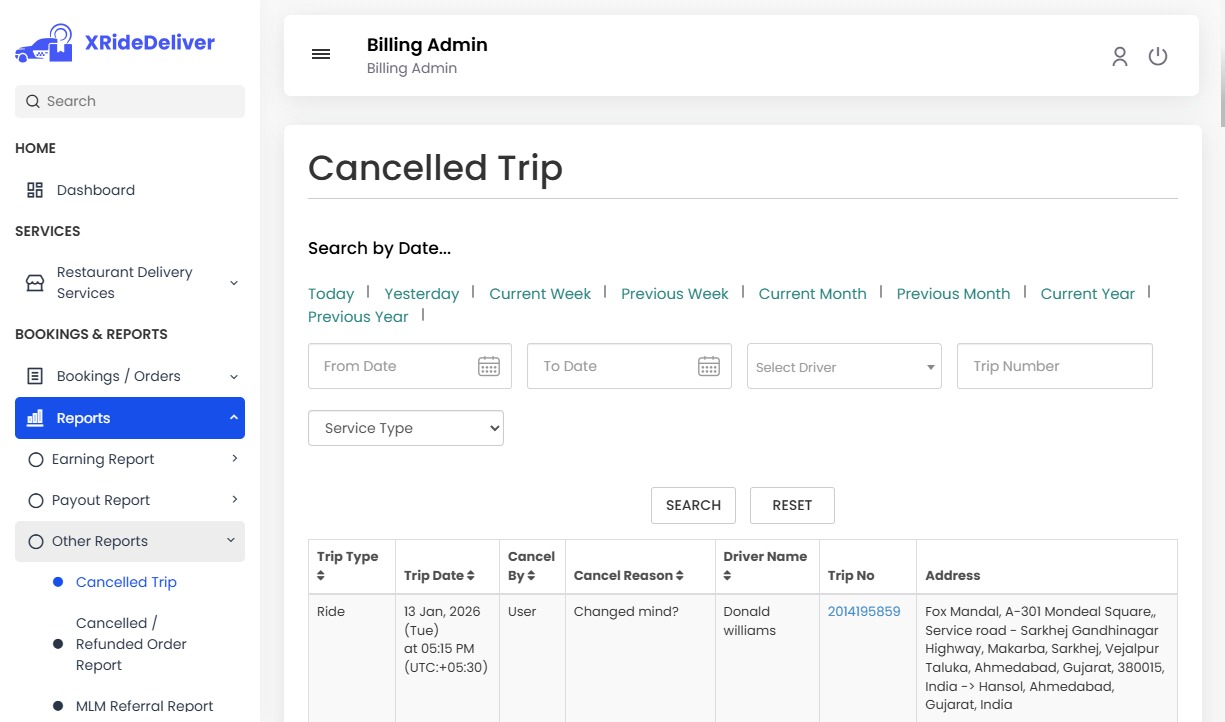
Forget manual calculations. Our advanced Billing Panel tracks all financial transactions automatically, user payments, driver earnings, and your commissions. You get real-time visibility and accurate reports, making your financial operations effortless and transparent.